
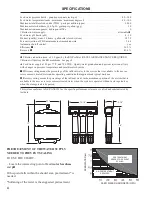
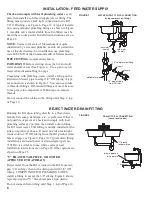


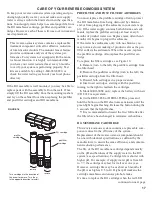


8
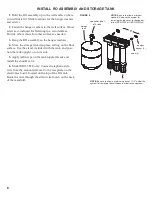
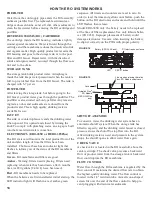
INSTALL RO ASSEMBLY AND STORAGE TANK
1.
Hold the RO assembly up to the wall surface where
you will install it. Mark locations for the hanger washers
and screws.
2.
Fasten the hanger washers to the wall surface. Wood
screws are included for fastening to a wood surface.
Provide other screws for other surfaces as needed.
3.
Hang the RO assembly on the hanger washers.
4.
Move the storage tank into place, setting on the floor
surface. Use the stand, included with the tank, and posi-
tion the tank upright, or on its side.
5.
Apply teflon tape on the tank nipple threads and
install the shutoff valve.
6.
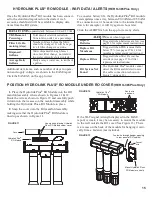
Model ERO-385E only: Connect telephone style
wire from the monitored faucet to the receptacle on the
electronics board, located on the top of the RO unit.
Route the wire through the strain relief notch on the back
of the manifold.
9”
NOTE:
Be sure to allow a minimum space of 1-1/2" under the
system for removing the cartridges in order to change them.
connector (shut
off) valve
storage
tank
hanger
washer (2)
screw (2)
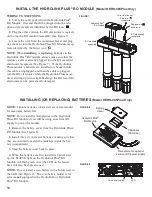
NOTE:
Be sure to allow a minimum
space of 4" above the system for
removing the top cover to change bat-
teries (ERO-385E or HERO-385Plus).
FIGURE 5


