Econ S2-GrandBox Скачать руководство пользователя страница 19


Parental Control 

You can set a password for anyone who wishes to 

operate in the “Installation” menu. And you can also 

set the password for the lock channels. (How to set 

the lock channel please refer to LOCK) Here will 

show you how to setting and how to revising the 

password. 

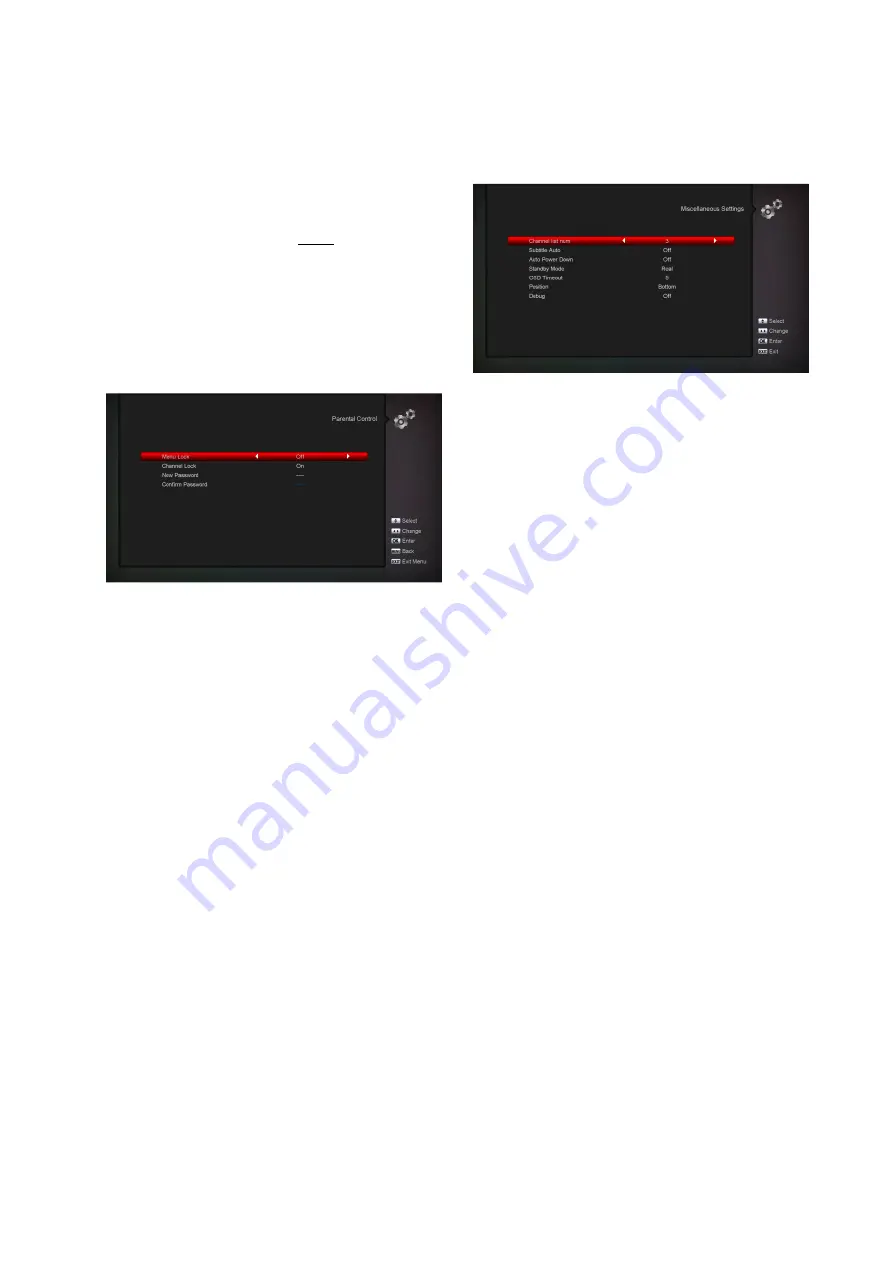
In “Parental Lock” function, press [OK] key, there 

will pop an dialogue for you to input the password. 

When you input the correct password, you will see a 

screen like below: 


Menu Lock determining that when user wish to enter 

“Installation” menu, whether have to input Password 

or not. If the setting of “Menu Lock” is “On” which 

means user have to key in password, set “Off” 

means unlock. 

Channel Lock determining that when user wish to 

play the lock channels, whether have to input the 

password or not. If the setting is “On”, play the 

channels with lock mark will show up a dialogue on 

the screen and ask for the password. If the setting 

of “Channel Lock ”is “Off”, the Lock function will 

invalid. 

New Password is used for revising password; you 

can input the new password in this item by using 

number keys directly. After you filled in 4 digital 

numbers, the highlight will auto skip to Confirm 

Password and ask you to input the new password 

again. If the password is correct, the screen will 

show up a message of “Saving Data, Please 

Wait…”. After finish saving and draw back to 

“System Setup” menu, the revising is complete.


Press [exit] key to draw back from the “Parental 

Lock” menu. 

Miscellaneous Settings 

When you enter to “Miscellaneous Settings” menu, 
you will see a screen like below: 


      Subtitle Auto: You can press [Volume 

Up/Volume Down] key to select “On” or 

“Off”. If the current channel has subtitle 

information, it will be showed up 

automatically while this function is “ON”, if 

this function is “OFF”, you need turn on the 

subtitle manually by press [Yellow] key. 

      Auto Power Down: You can press [Volume 

Up/ Volume Down] key to select the time or 

“Off”, if you select time, duration this time if 

no any operation on receiver, it will go to 

standby mode. 

      Panel Power In Standby: if set to “ON”, the 

front panel will display time or some other 

information in standby mode; if set to 

“OFF”, it will display nothing in standby 

mode.(Note: this function only available 

when the “Deep Standby” item is set to 

“ON”) 

      Standby Mode: if set to “Real”, Press power 

key receiver will be in real standby status, 

the consumption will less than 1 

Watt.(Note: the “Panel Power In Standby” 

item need set to “OFF”); if it’s set to 

“Fake” ,Press power key, receiver will be in 

fake standby status. 

Содержание S2-GrandBox

Страница 1: ...S2 MiniBox S2 GrandBox User s Manual E 311 E 321 EN...

Страница 2: ...ON Place the HD Receiver indoor in order not to expose to lightening rain or sunlight INTRODUCTION Thank you for purchasing the HD Receiver This HD Receiver is fully compliant with the international D...

Страница 3: ...ation Subtitle supported Teletext supported by VBI insertion and software emulation Parental lock facility by channel and program event Program and Channel information transfer from receiver to receiv...

Страница 4: ...he menu or channel list REC Has different functions per menu Teletext Shows teletext information of the current channel supports Subtitle Subtitle Display FIND Use to prompt find channels sort by char...

Страница 5: ...ay LED type Indicates operating status of receiver Optional Rear Panel E 311 LNB IN This port is to connect the coaxial cable from LNB of your Dish AV OUT This Scart connector is used to connect TV us...

Страница 6: ...from the AV OUT jack on the back of the receiver to the LINE AUX SPARE OR EXTRA input jacks on your Hi Fi System TV with Motorized System DiSEqC 1 2 Connect one end of your coaxial cable to the LNB I...

Страница 7: ...In playing mode press Pause key the picture will be paused but the sound of the channel will still continue Press PLAY key again the screen s picture will skip over to the current playing picture and...

Страница 8: ...te Satellite Provider CAS etc Press Green key to select different display mode among Now EPG Next EPG More and Schedule Press Yellow key in EPG menu can set one record timer or go to Timer List menu I...

Страница 9: ...Down In Channel list press Page Page key can page up and page down the channel list TEXT Press green key in full screen you can open teletext page on the channel which has teletext information If the...

Страница 10: ...rganizing favorites Press OK key to enter the Organizing Service If Menu Lock is On it will display an dialogue for user to key in password The default Password is 0000 Press Menu key to go back to ma...

Страница 11: ...ke the following picture Lock Select the channels which you want to edit in channel list by press OK key or other select mode Then press Right key to move the high light to right toolbar Select Lock i...

Страница 12: ...eleting services to and from the favorite group FAV List To choose the FAV List by press FAV button Add To add services into favorites Mark the desired services by press OK button in Service List pres...

Страница 13: ...among Standard User and Universal Unicable mode Diseqc Diseqc You can use Volume Up Volume Down key to switch options There are several options for your selection Disable without Diseqc 1 2 2 2 two po...

Страница 14: ...n you press Blue key there will show up a warning message for reminding whether you will delete all transponders or not If you select OK all transponders will be deleted For the existed transponder yo...

Страница 15: ...the screen like below Satellite Guide is use for user to enter local longitude local latitude and satellite longitude By the evaluation from the receiver evaluate the antenna azimuth and antenna eleva...

Страница 16: ...anish Polish and Italian Second Audio If the channel has no correspond audio with First Audio but have corresponded audio with Second Audio system will play the second audio language as default If no...

Страница 17: ...track data to be LPCM digital audio decoder or HDMI TV will get LPCM digital audio data Auto means system will detect which the connected HDMI TV can decode and then output that data If HDMI TV can d...

Страница 18: ...setting for Record the TV or Radio program to USB Hard Disk and Message reminding message When you select Channel timer setting for channel change and Wakeup Sleep option in Timer Service the screen...

Страница 19: ...Confirm Password and ask you to input the new password again If the password is correct the screen will show up a message of Saving Data Please Wait After finish saving and draw back to System Setup...

Страница 20: ...o edit the file name Press Left Right button select USB A or USB B In Backup to USB you can press OK to start backup software Default Setting Default Value When you press OK key In the Default Setting...

Страница 21: ...ovide two CA slots for user to use Receiver has build in smart card module with CONAX system By using cards in this system provided by operators it is possible to watch many scrambled channels coded i...

Страница 22: ...e volume while you preview the video file press 0 key to sort the file list and press Mute to enable or disable the audio Yellow key To edit the files or folders Include rename copy delete and create...

Страница 23: ...ct the jump time by press left right key Record Path You can select the record path by press left right key Time shift Path You can select the time shift path by press left right key Disk Manage In th...

Страница 24: ...e can play stream media from www youtube com RSS Reader RSS Reader RSS Reader RSS Reader In this menu you can see the news Weather Forecast In this menu you can see the weather forecast press Green ke...

Страница 25: ...m the LNB is incorrectly Connected short circuit or open circuit The position of dish is aligned incorrectly Receiver is on but no picture or sound except the following messages NO TV program Channel...

Страница 26: ...8 DVB S2 1 2 3 5 2 3 3 4 4 5 5 6 8 9 9 10 POWER SUPPLY Input Voltage DC 12V 2A Power Consumption 15W MAX MPEG TS A V Decoding Transport Stream MPEG 2 H 264 Input Rate Max 120Mbit s Aspect Radio 4 3 16...

Страница 27: ...3 5 2 3 3 4 4 5 5 6 8 9 9 10 POWER SUPPLY Input Voltage Free Voltage 100 240V AC 50 60Hz Power Consumption 20W MAX MPEG TS A V Decoding Transport Stream MPEG 2 H 265 Input Rate Max 120Mbit s Aspect R...

Страница 28: ...er notice The manufacturer does not assume any responsibility regarding any errors or mistakes in printing Please note that a new software may change the features of the receiver The manufacturer hold...

Отзывы: