


– 8 –
JA
P
ANESE
ENGLISH
G
ERMAN
F
RENCH
IT
ALIAN
S
P
ANISH
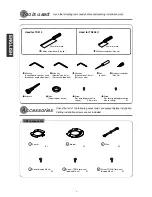
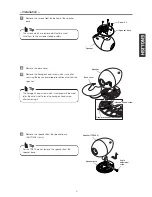
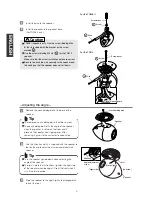
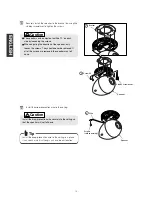
Peel off the backing paper from the double-sided tape
on the spacer, and attach the spacer to the bracket.
15
Install the bracket at the speaker installation position
using the screws (sold separately).
16
•
•
Install the bracket securely so that the speaker will not
fall down.
•
•
The screws which are used to install the bracket to the
ceiling or wall are not provided with the bracket, so
purchase them separately.
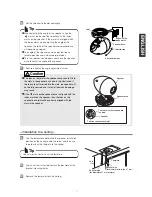
•
•
When securing the bracket to the ceiling or wall with
the screws, do not overtighten the screws, otherwise
the bracket will become bent and it may not be
possible to install the speaker. Take care during
installation so that the screws do not become
overtightened.
•
•
When installing the bracket to the ceiling or wall, vary
the positions and number of screws used in
accordance with the strength of the ceiling or wall and
the locations of beams.
•
•
If the installation location is not strong enough when
the standard installation holes are made, install more
screws (sold separately) using the slits marked with
in order to increase the installation strength.
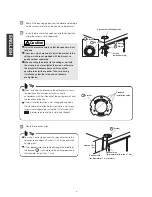
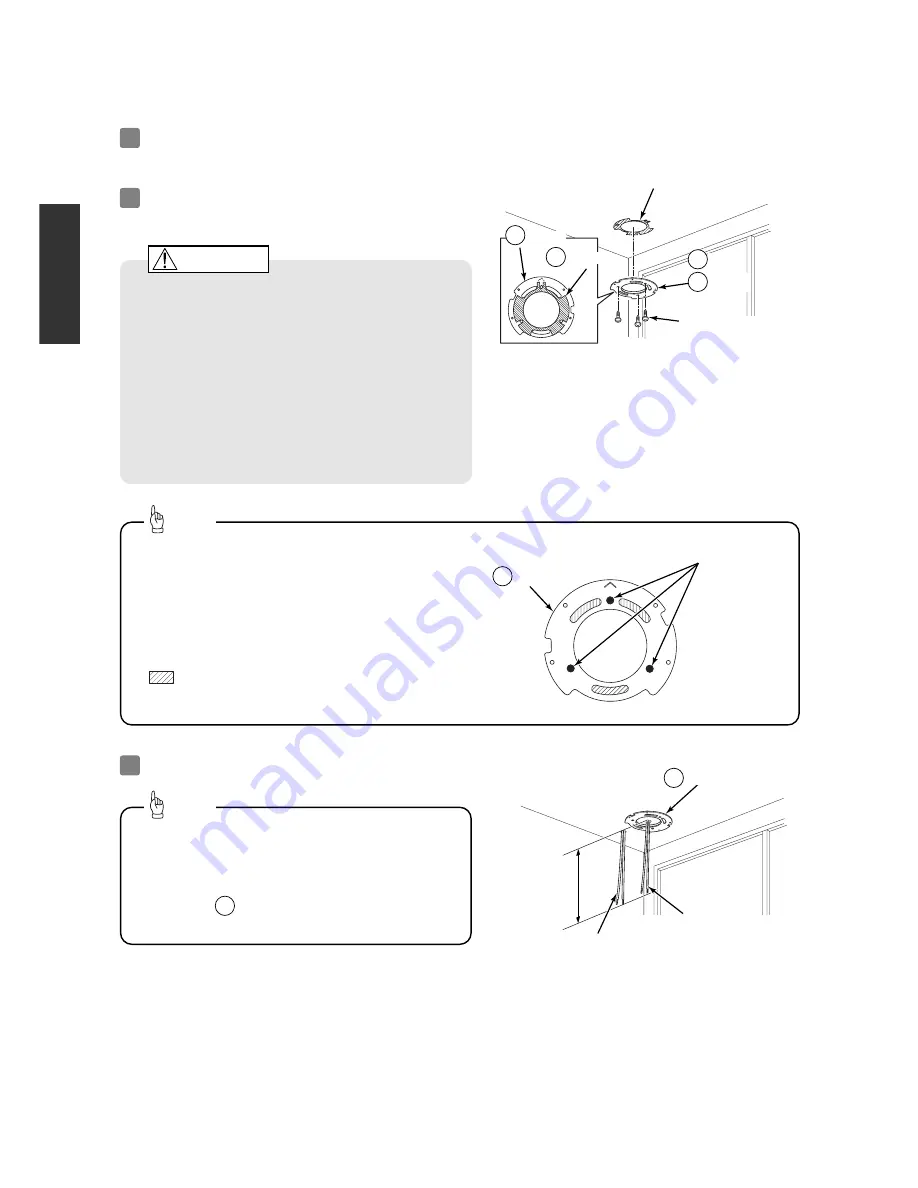
Route the speaker wires.
17
•
•
To make it easier to connect the speaker wires to the
speaker, leave about 40 inches (1 m) of speaker wire
hanging out.
•
•
If the speaker wires are routed through the middle of
the bracket , it will improve the outer appearance.
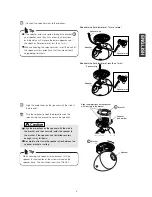
(for diameter of less than 7 mm)
2
Bracket
2
Spacer
1
Speaker installation position
Screws
(sold separately)
Bracket
2
Bracket
2
Approx. 40 in.
(1m)
Bracket
2
Spacer
1
Standard
installation holes
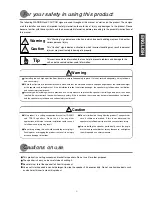
Caution
Tip
Tip
Speaker wire
(for diameter of 7 mm or more)
Speaker wire
(for diameter of less than 7 mm)


