background image

18

5.

After engine fires or five (5) pulls, move choke lever to “Run”
position. Hold throttle trigger fully depressed and pull starter
handle/rope until engine starts and runs. Release throttle trigger
and allow unit to warm up at idle for several minutes.

NOTE
If engine does not start with choke in “Run” position after 5 pulls,
repeat instructions.

6.

After engine warm up, gradually depress throttle trigger to increase
engine RPM to operating speed.

STARTING


WARM


ENGINE

WARNING  

  DANGER

The cutting attachment should not rotate at idle. If attachment
rotates, readjust carburetor according to "Carburetor Adjustment"
instructions in this manual or see your ECHO Dealer, otherwise
serious personal injury may result.

1.

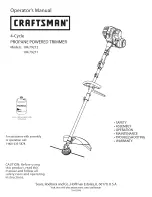
Stop Switch - Start/Run.  Move stop switch button (A) away from
the STOP position.

2.

Start - Pull Rope.  Lay the trimmer on a flat clear area and  pull
the starter handle (D) until the engine fires.

NOTE
If engine does not start after 5 pulls, use Cold Start Procedure.

STOPPING


ENGINE

1.

Release Throttle.  Allow engine to idle for a minute.

2.

Stop Switch - Stop.  Move stop switch button (A) backward to
STOP position.

WARNING  

  DANGER

If engine does not stop when stop switch is moved to STOP
position, close choke - COLD START position - to stall engine.
Have your ECHO dealer repair stop switch before using trimmer
again.

NOTE
Refer to the Grass Trimmer / Brush Cutter Safety Manual for proper
and safe trimming techniques.

GT-2000

GT-2400

D

Содержание GT-2000 Type 1E

Страница 1: ...01 Up Occasional Use GT 2400 TYPE 1E Serial Number 001001 Up Commercial Use WARNING DANGER Readrulesforsafeoperationandinstructionscarefully ECHOprovidesanOperator s ManualandaSafetyManual Bothmustber...

Страница 2: ...Engine 17 StartingWarmEngine 18 Stopping Engine 18 Maintenance 19 SkillLevel 19 Maintenance Intervals 19 AirFilter 20 FuelFilter 20 Spark plug 21 Cooling System 21 Exhaust System 22 Carburetor Adjustm...

Страница 3: ...you locate them Make sure the decals are legible and that you understand and follow the instructions on them If a decal cannot be read a new one can be orderedfromyourECHOdealer SeePARTSORDERINGinstr...

Страница 4: ...rator s Manual Spark Arrestor Catalytic Muffler Muffler The muffler or catalytic muffler controls the exhaust noise and emissions The spark arrestor screen prevents hot glowing particles of carbon fro...

Страница 5: ...lowing pressure to equalize NEVER refuel a unit when the engine is HOT NEVER refuel a unit with the engine running DO NOT fill fuel tanks indoors ALWAYS fill fuel tanks outdoors over bare ground Secur...

Страница 6: ...r Brush Cutter handles Gloves also reduce the transmission of machine vibration to your hands Hearing Protection ECHO recommends wearing hearing protection whenever unit is used Proper Clothing Wear s...

Страница 7: ...50 ft Safety Zone with the required Protective Equipment and clothing WARNING DANGER Do not operate this product indoors or in inadequately ventilated areas Engine exhaust contains poisonous emissions...

Страница 8: ...ss Injuries It is believed that overusing the muscles and tendons of the fingers hands arms and shoulders may cause soreness swelling numbness weakness and extreme pain in those areas Certain repetiti...

Страница 9: ...1999 CALIFORNIA EMISSION REGULATIONS FOR ULGE ENGINES REFER TO OWNER S MANUAL FOR MAINTENANCESPECIFICATIONSANDADJUSTMENTS EMISSION CONTROL The emission control system for this engine is EM Engine Mod...

Страница 10: ...10 12 13 14 15 16 17 18 19 20 21 22 3 4 5 6 7 8 9 10 11 1 2...

Страница 11: ...gloadedtoreturntoidlewhenreleased Duringacceleration presstriggergradually for best operating technique 10 GRIP Rear right hand handle 11 STOPSWITCH GT 2000 TOGGLESWITCH mountedontheengine MoveswitchU...

Страница 12: ...a R l i O l e u F l i o e n i g n e d e l o o c r i a e k o r t s o w t e c n a m r o f r e P h g i H O H C E 1 0 5 e n i l o s a G l o h o c l a l y h t e m g n i n i a t n o c l e u f e s u T O N O...

Страница 13: ...kwise until head is tight IMPORTANT Remember to remove the locking tool FRONT LOOP HANDLE NOTE Front handle is pre installed Re positioning and tightening is all that is required 1 Position front hand...

Страница 14: ...cho engines sold in the past regardless of ratio speci fied in those manuals Mixing Instructions 1 Fill an approved fuel container with half of the required amount of gasoline 2 Add 2 stroke oil to ga...

Страница 15: ...ed fuel to an approved fuel storage container Storage Fuel storage laws vary by locality Contact your local government for the laws affecting your area As a precaution store fuel in an approved air ti...

Страница 16: ...irmly attached and in safe operating condition Check that front loop handle and shoulder strap or shoulder waist harness are adjusted for safe comfortable operation See Assembly for proper adjustment...

Страница 17: ...structions in this manual or see your ECHO Dealer otherwise serious personal injury may result 1 Stop Switch Start Run Move stop switch button A away from the STOP position 2 Choke Lever Cold Start Mo...

Страница 18: ...tructions in this manual or see your ECHO Dealer otherwise serious personal injury may result 1 Stop Switch Start Run Move stop switch button A away from the STOP position 2 Start Pull Rope Lay the tr...

Страница 19: ...o H y l r a e Y r e t l i F r i A e c a l p e R t c e p s n I C I R r e n i a r t S l e u F e c a l p e R t c e p s n I I R e n i L l e u F e c a l p e R t c e p s n I I I r o t e r u b r a C e c a l...

Страница 20: ...fits the cavity in the air cleaner cover is installed with the original side out NOTE Carburetor adjustment may be needed after air filter cleaning replacement See Carburetor Adjustment Section FUEL...

Страница 21: ...brush Parts Required None IMPORTANT To maintain proper engine operating temperatures cooling air must pass freely through the cylinder fin area This flow of air carries combustion heat away from the...

Страница 22: ...etween the starter and fuel tank 5 When installing the cover be certain the tab of the metal deflector shield is in the slot of the cover EXHAUST SYSTEM Spark Arrestor Screen Level2 Tools Required Cro...

Страница 23: ...ment Start engine and turn idle speed adjustment screw C CW until the blades begin to turn then turn the screw CCW until blades stop turning Turn screw CCW an additional 1 4 turn 5 Accelerate to full...

Страница 24: ...his position b Rich drop off With engine idling slowly turn LO B needle CCW out to rich drop off point RPM will increase then gradually slow and drop off 2 Note this position c Final setting Set needl...

Страница 25: ...o get dirt on the flexible drive shaft 5 Install the bearing housing and shield NYLON LINE REPLACEMENT GT 2000 Only Level1 Tools Required Head locking tool 1 8 in dia Rod if head is to be removed Part...

Страница 26: ...er locks in place 8 Pull both lines out and trim to cut off knife length Before installing test head Push center button while pulling on both lines Trimmer line should advance approximately 1 one inch...

Страница 27: ...lded in spool tightly and evenly 4 Place ends of line in the two notches molded in the spool with 12 5 to 15 2 cm 5 to 6 in protruding 5 Feed ends of line out housing eyelets and place spool over spri...

Страница 28: ...e l a e d O H C E r u o y e e S g u l p t a k r a p S k r a p s o N g u l p t a t c e r r o c n i p a g k r a p S n o b r a c h t i w d e r e v o C l e u f h t i w d e l u o F e v i t c e f e d g u l...

Страница 29: ...ame or spark 2 Place the stop switch in the OFF position 3 Remove accumulation of grease oil dirt and debris from exterior of unit 4 Perform all periodic lubrication and services that are required 5 T...

Страница 30: ...30 NOTES...

Страница 31: ...GRASS TRIMMER OPERATOR S MANUAL 31 NOTES...

Страница 32: ...r future reference write them in the space provided below Model No _____________ Type _________SN ______________ SERVICE Service of this product during the warranty period must be performed by an Auth...

Отзывы: