background image


.


© Copyright – ECB Pty Ltd – 2012  

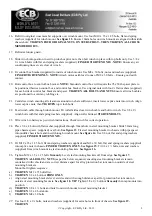
16.  Refit two original cross member supports over winch mount. Use four M10 x 35 x 1.25 bolts, flat and spring 

washers (supplied) for winch mount. 

See figure 12. 

Ensure 10mm holes on winch mount are aligned with middle 

chassis hole. 

TIGHTEN FOUR ORIGINAL NUTS ON STUDS FIRST – THEN TIGHTEN ALL CROSS 

MEMBER BOLTS.


17.   Refit steel under guard. 
 
18.  Slide winch into position, insert top winch captive nuts, then bolt winch in place with top bolts only. Use


3/8 x 

1¼ winch bolts with flat and spring washers (supplied). 

FINGER TIGHTEN ONLY. NOTE: 

Ensure any air 

conditioning lines etc are clear of winch.  

 
19.  Fit control box bracket (supplied) to inside of winch mount. Use M8 x 30 bolts, nuts and washers (supplied) 

FINGER


TIGHTEN ONLY. NOTE:

 Attach motor earth lead to one of M8 x 30 bolts – Ensure good earth 

contact. 

 
20.  Bolt control box to control box bracket. 

NOTE: 

Standard control box will require the 95x 50x6 spacer plate to 

be positioned between control box and control box bracket. Use original nuts with four ¼ flat washers (supplied) 
for each side of control box bracket and spacer. 

TIGHTEN ALL BOLTS AND NUTS


Ensure all winch cables 

are positioned to avoid any rubbing etc. 


21.  Centralise winch ensuring all clearances around winch are sufficient, insert lower captive nuts into winch. Align 

lower captive nuts, then 

TIGHTEN

 top winch bolts. 

 
22.  Feed winch cable through winch mount. Fit roller fairlead over winch cable and bolt to winch. Use 3/8 x 1½  

winch bolts with flat and spring washers (supplied). Align roller fairlead. 

TIGHTEN BOLTS


23.  Wire winch to battery as per winch instructions. Check winch for correct operation. 
 
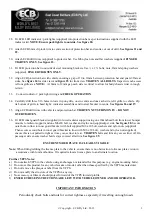
24.  Place 3/8 x 4 bolt with flat washer (supplied) through 10mm hole in steel mounting bracket. Slide 52mm long 

pipe chassis spacer  (supplied) over bolt

. See figure 13

. Fit steel mounting bracket to chassis with pipe spacer 

into middle chassis hole and insert through winch mount. 

See figure 14.

 Use 3/8 nut, flat and spring washers 

(supplied) 

FINGER TIGHTEN ONLY. 

 
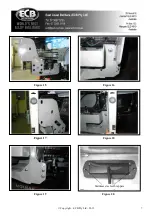
25.  Fit M12 x 35 x 1.25 bolt, flat and spring washers (supplied) and M8 x 30 bolt, flat and spring washers (supplied) 

into captive nuts in chassis. 

FINGER TIGHTEN ONLY. See figure 15

. Fit 3/8 x 1½ bolts, nuts and washers 

(supplied) from winch mount to steel mounting brackets. 

See figure 16.


26.  Tighten M12 x 35 x 1.25 bolts 

firm only

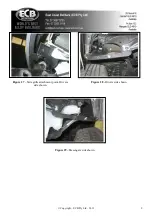
. Level steel mounting brackets off front edge. 

See figure 17.


TIGHTEN ALL BOLTS / NUTS

 (as per the below sequence) ensuring steel mounting brackets remain 

centralised with vehicle and are correct distance apart for alloy protection bar to mount on outside of steel 
mounting brackets. 


Mount bolt tighten sequence: 

a)


TIGHTEN

 M12 x 35 bolts first. 

b)


TIGHTEN

 3/8 x 4 bolt/nut 

FIRM ONLY


c)


Align steel mounting brackets level at sides and with enough distance apart for protection bar to mount on 
outside of steel mounting brackets. 

See figure 18. TIP

: Tighten 3/8x 1½ bolt/nut 

firm only

 then tap mounts into 

position. 

d)


TIGHTEN

 3/8 x 1 ½ bolts and nuts from winch mount to steel mounting bracket.  

e)


TIGHTEN

 3/8 x 4 bolts/nuts. 

f)


TIGHTEN

 M8 x 30 bolts.   


27.

  Use four 3/8 x 1¼ bolts, nuts and washers (supplied) for extra holes in front of chassis. 

See figure 19. 

TIGHTEN

.


Содержание BIG TUBE BT128SY

Страница 1: ...ppers and one 10mm head bolt Disconnect wiring as removing See figure 4 8 Remove plastic bumper cover support brackets from bottom of headlights Two PK screws per light See figure5 9 Remove plastic bumper cover side supports from each guard One 10mm head self tapper See figure 6 10 Connect ECB Quick click indicator park light wiring harness supplied to original wiring loom Refit headlight indicato...

Страница 2: ...lat and spring washers supplied Align roller fairlead TIGHTEN BOLTS 23 Wire winch to battery as per winch instructions Check winch for correct operation 24 Place 3 8 x 4 bolt with flat washer supplied through 10mm hole in steel mounting bracket Slide 52mm long pipe chassis spacer supplied over bolt See figure 13 Fit steel mounting bracket to chassis with pipe spacer into middle chassis hole and in...

Страница 3: ...O NOT OVERTIGHTEN 36 Fit ECB inner guard bracket supplied to lower radiator support using one 10mm head bolt from lower bumper mounts to radiator support and one M6x20 bolt washer and nyloc nut supplied per side See figure 28 Secure outer hole in liner to inner guard bracket with bolt supplied M6 x 20 bolt washers and nyloc nuts supplied Then secure second hole in inner guard bracket to liner with...

Страница 4: ... 25 bolts 18 M6 flat washers 4 M8 x 30 x 1 25 bolts 12 M6 nyloc nuts 6 M8 flat washers 1 Pair ECB Hilux infills IC11LUXINFL 4 M8 spring washers 1 ECB indicator park light kit 2 M8 nuts 1 Quick Click Indi Park kit IC11HILLED100H 2 3 8 x 4 bolts 1 1100mm length 6mm clip lock trim 4 3 8 x 1 bolts 1 700mm length 6mm clip lock trim 6 3 8 x 1 bolts 6 300mm zip ties 24 3 8 flat washers 6 150mm zip ties 1...

Страница 5: ... Copyright ECB Pty Ltd 2012 5 Figure 4 Remove headlight Figure 3 Drivers side shown Figure 6 Remove plastic bumper support from under guard Figure 5 Removing trim from lower headlights Figure 7 Figure 8 ...

Страница 6: ... Copyright ECB Pty Ltd 2012 6 Figure 13 Figure 11 Figure 9 Figure 10 Figure 12 Figure 14 Finger tighten only at this time ...

Страница 7: ... Copyright ECB Pty Ltd 2012 7 Figure 15 Figure 16 Stainless steel self tappers Figure 18 Figure 17 Figure 20 Figure 19 ...

Страница 8: ...Attach 6mm clip lock trim Attach 6mm clip lock trim Note Non winch bar shown Figure 22 Figure 21 Figure 23 Figure 24 Copyright ECB Pty Ltd 2012 8 Figure 25 Figure 26 Centre grille attach point ...

Страница 9: ... Copyright ECB Pty Ltd 2012 9 Figure 27 Side grille attachment point Drivers side shown Figure 28 Drivers side shown Figure 29 Passengers side shown ...

Страница 10: ...ed ______________________________________________________________________________________ ______________________________________________________________________________________ ______________________________________________________________________________________ Yes No Did the installation go well Please provide comments ____________________________________________________________________________...

Страница 11: ...lip lock trim O 1 ECB LED Indicator Park light kit O 1 Pair Hilux infill trims IC11LUXINFL O 1 Quick Click Indi Park kit IC11HILLED100H O 2 ECB overriders Fitted to bar O 5 6mm air scoops Fitted to bar All parts checked and completed by Is this product the best it can be Yes ______ ______ Wrapper s initials Checker initials If NO fix before continuing Nut and bolts __________________________Date__...

Страница 12: ... Copyright ECB Pty Ltd 2012 12 3 BOLTS Infill Trims ICHILINFIL ...

Отзывы: