background image

3

C

ongratulations on your new EXRC™ purchase! EXRC™ pilots experience 
superior remote control fl ight and excellence in the look and feel of our 

products while commanding the skies. Now that you are an honorary EXRC™  
pilot, we recommend reading through this manual thoroughly before  
attempting your fi rst fl ight. Inside this manual you will fi nd fl ight tips, safety 
precautions, and care instructions to keep your EXRC™ helicopter in tip-top 
shape for multiple fl ight missions.  

No need to make sure your seats and tray tables are in the upright and locked 
position, no need to worry about loss of cabin pressure, and no fl ight   
attendants to do a fi nal check before air-craft take off . Just follow the   
instructions, enjoy your EXRC™ helicopter and command the skies.

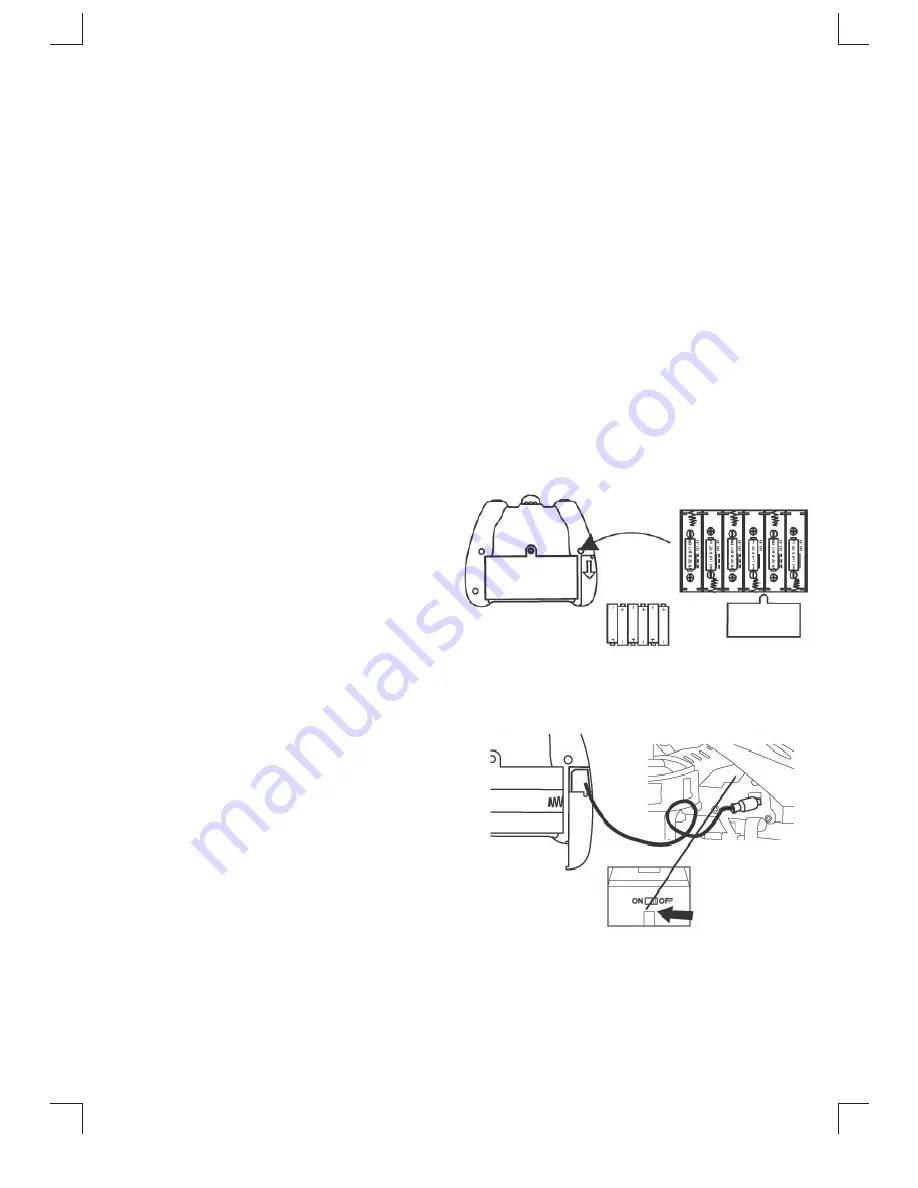
BATTERY INSTALLATION & CHARGING

Installing Batteries in the Remote Control:
1.  Using a Phillips-head screwdriver, 
 

remove the screw from the battery 

 compartment 

cover. 

2.  Insert 6 AA batteries, making sure 
 

to follow the battery polarity 


(+ and -) drawing on product.

3.  Replace the battery compartment 
 

cover and secure with the screw.

Charging the Helicopter:
1.  Pull the cover off  the side compartment 
 

of the controller, and take out the 

 charging 

wire.

2.  Turn the helicopter power OFF.  
 

Insert the charging plug into the 


socket on the helicopter.

3.  The LED will turn green when 
 

charging.  When the product is fully 


charged, the LED will turn off .  


Remove the plug from the helicopter.

Note: If fl ight times begin to decrease, the batteries 
are running low on power and should be replaced.

Requires approximately 

15 minutes charge for

a full 5 minute fl ight.

 DO NOT OVERCHARGE

6 AA 

batteries

Turn unit 

OFF before

charging.

XC6392IS01EXC.indd   3

XC6392IS01EXC.indd   3

8/8/11   2:29 PM

8/8/11   2:29 PM

Содержание Quad Twister

Страница 1: ... Control Helicopter User Guide XC6392 2011 EB Excalibur Inc XC6392IS01EXC 5 x 7 7 24 11 SAVE THESE INSTRUCTIONS READ COMPLETE INSTRUCTIONS BEFORE USE XC6392IS01EXC indd 1 XC6392IS01EXC indd 1 8 8 11 2 29 PM 8 8 11 2 29 PM ...

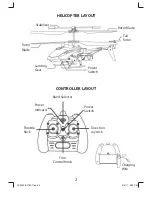
Страница 2: ...Switch Stabilizer Tail Rotor Landing Gear Rotor Blade Rotor Blade Band Selector Throttle Stick Power Switch Charging Wire Trim Control Knob Direction Joystick Power Indicator XC6392IS01EXC indd 2 XC6392IS01EXC indd 2 8 8 11 2 29 PM 8 8 11 2 29 PM ...

Страница 3: ...ERY INSTALLATION CHARGING Installing Batteries in the Remote Control 1 Using a Phillips head screwdriver remove the screw from the battery compartment cover 2 Insert 6 AA batteries making sure to follow the battery polarity and drawing on product 3 Replace the battery compartment cover and secure with the screw Charging the Helicopter 1 Pull the cover off the side compartment of the controller and...

Страница 4: ...ecome damaged in any way NEVER fly the helicopter around another person or animal OPERATING YOUR HELICOPTER LEFT joystick Throttle slowly press UP on the Left joystick to increase the speed of the rotor blades and cause the helicopter to ascend into the air Slowly release the Left joystick to cause the helicopter to descend RIGHT joystick Direction Move the Right joystick to the left or right to t...

Страница 5: ...the remote control in the middle position Do not immediately push into extreme positions Start by gently easing the joystick into the position of the direction you would like to go EXRC recommends for initial piloting of the helicopter focus on learning to control the throttle joystick first During your first flight we recommend you work at learning to keep the helicopter at a constant 3 foot alti...

Страница 6: ...takes flight This is the correct channel Loss of Control Interference of another remote controlled device Interference by other conditions such as lighting Avoid all other remote controlled devices running on the same channel Change environment to better suited conditions Helicopter Spinning out of control Incorrect trim adjustment Adjust the trim as shown above to find the proper adjustment Set t...

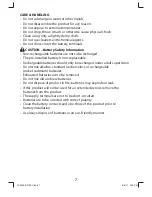
Страница 7: ... should only be recharged under adult supervision Do not mix alkaline standard carbon zinc or rechargeable nickel cadmium batteries Exhausted batteries are to be removed Do not mix old and new batteries Do not dispose of product in fire batteries may explode or leak If this product will not be used for an extended period remove the batteries from the product The supply terminals are not to be shor...

Страница 8: ...ns may cause harmful interference to radio communications However there is no guarantee that interference will not occur in a particular installation If this equipment does cause harmful interference to radio or television reception which can be determined by turning the equipment off and on the user is encouraged to try to correct the interference by one or more of the following measures Reorient...

Отзывы: