


92
8 Operating
Mounting and Operating Instructions CEAG Central Battery System ZB-S 40071860179 (L) November 2018 www.ceag.de
8.4.6 Menu 6 “Luminaire setup”
Select line 1, 2, 4 or the input fields in
line 1 with
S u c c e s s i ve s e l e c t i o n o f S K U
and (final) circuit with
(e.g. (final) circuit 2, of the 8th SKU type
2x3A CG-S on subrack 1)
Line 3 shows the current settings for the
luminaires (1 to 20) in the selected circuit
Luminaire is present (Item 1)
– no luminaire set up (Item 2)
Select a luminaire (line 2) with
(e.g. cursor flashing on position 3)
Line 4 displays, for example, the mes-
sage “Luminaire text” as default or a
luminaire name if previously entered
Changing the luminaire name:
– Select line 4 with
– Select the input point with
– All the possible alphanumeric
characters are displayed cycli-
cally with the cursor keys.
– Once a name has been fully
entered, confirm the entry with
<ok>. The remaining characters
after the current cursor position
are cleared.
Notes:
You can use this menu to view luminaire
assignments and assign / edit luminaire
names without changing the luminaire
configuration.
The procedure is necessary, for example
when the system is first commissioned
or after luminaires have been added or
removed.
These luminaire names are stored on the
memory card and displayed in the LCD
display menus as operator help. Text assign-
ments cannot be made with the
CU CG-S if a memory card is not inserted!
Otherwise, refer to menu option 4.2
Overview:
Main menu
Test & status menu
Block & reset alarms
Basic settings
DLS/TLS Setup
Circuit setup
Luminaire setup
Logbooksetup
Send ServicePinMsg
Menu 6
Add / remove
Luminaire search
Text assignments
DLS/TLS-Assignment
Selection of
menu options
with the keys
<ok>:
confirm selec-
tion
<Menu>: can-
cel and return
to the previous
menu (any
changes en-
tered are saved)
<ESC>: cancel
and return to
the previous
menu (any
changes en-
tered are not
saved)
flashing input
prompt
<ok>
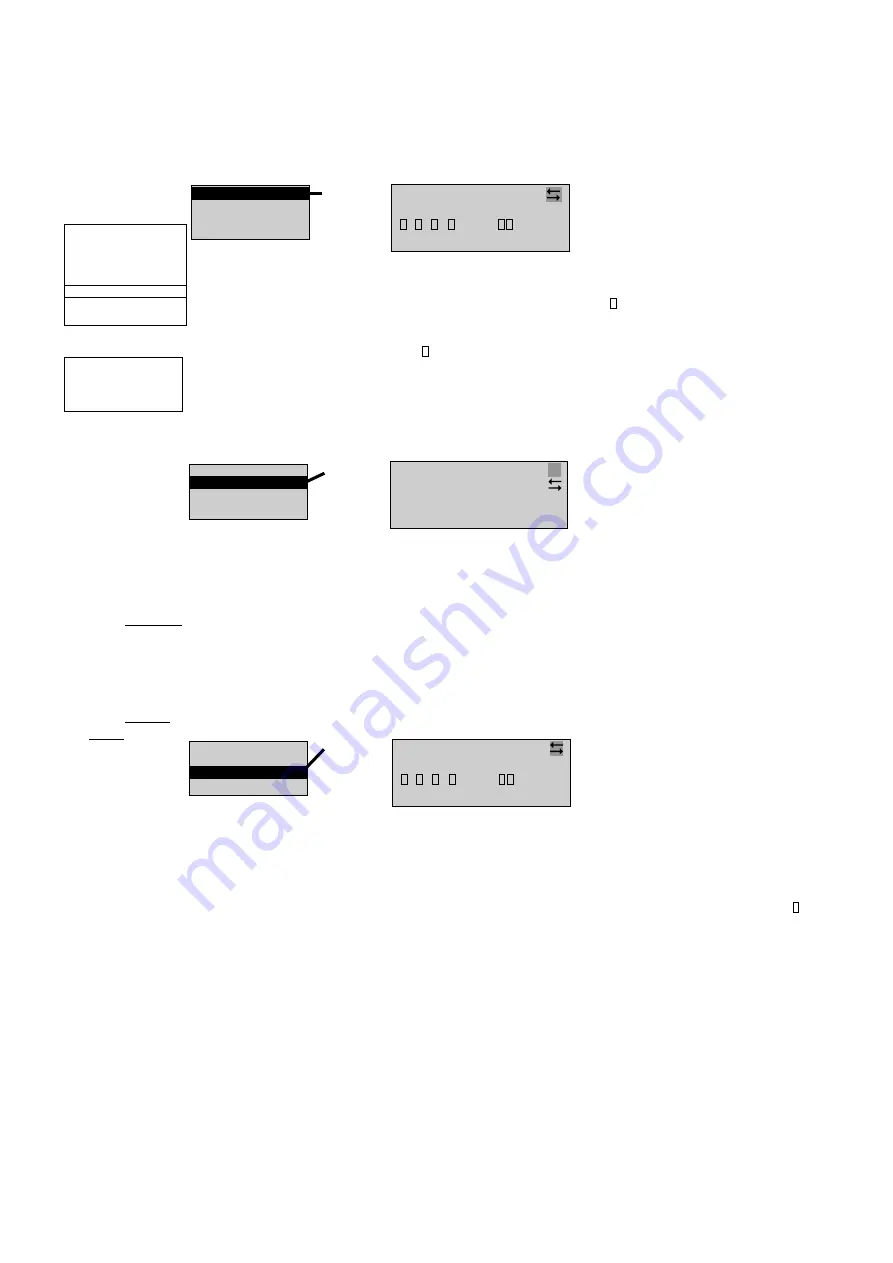
Menu 6.1:
SKU 1/8
circuit:2
...5...10...15...20
-
—————————
-
Luminaire text
<ok>
Menu 6.3:
SKU 1/8
circuit:2
...5...10...15...20
-
—————————
-
Luminaire text
Add / remove
Luminaire search
Text assignments
DLS/TLS-Assignment
Notes:
The SKUs and circuit numbers are assigned
by their placing on the module slots of the
subrack.
Only “present”( ) or “not present”(–) is
displayed on positions 1 to 20. Individual
luminaires can also be selectively taken out
of service (not present) in this way.
Condition and/or switched status can be
polled for CG-S luminaires in menu 1.6
“Luminaire status”.
Select line 1 or the input fields in line
1 with
Successive selection of SKU/subrack
and (final) circuit with
Line 3 shows the current settings for
the luminaires (1 to 20) in the selected
circuit:
Luminaire is present (Item 1)
– no luminaire set up (Item 2)
Select a luminaire (line 2) with
(e.g. cursor flashing on position 3)
Line 4 displays the luminaire text
(Name if previously entered).
Use the <ok> key to set or remove a
luminaire at the selected position.
Add / remove
Luminaire search
Text assignments
DLS/TLS-Assignment
<ok>
Menu 6.2:
all circuits
SKU 1/8
circuit:2
circuit name
Add / remove
Luminaire search
Text assignments
DLS/TLS-Assignment
Select line 1 and 2 resp. the input fields
in line 2 with
Successive selection of SKU/subrack
and (final) circuit with
All connected luminaires with address
of a device will automatic be search
and displayed. Please note that double
addressed lumianres in one circuit will
be identified as 1 address. If nesses-
sary correct the luminaire address of
the affected circuit.
The luminaire search function indicates
newly installed luminaires. A query
screen is displayed with the luminaire
search for selecting whether already
existing luminaires should be deleted.


