2
EATON
IB516002EN
Installation instructions
Installation Instructions - SDL
INSTALLATION
otee:
N
Care must be taken not to set lighting fixture down
on exposed lenses or lift the fixture in the lens area.
Tools Required
Wrench, 3/8” square drive sockets.
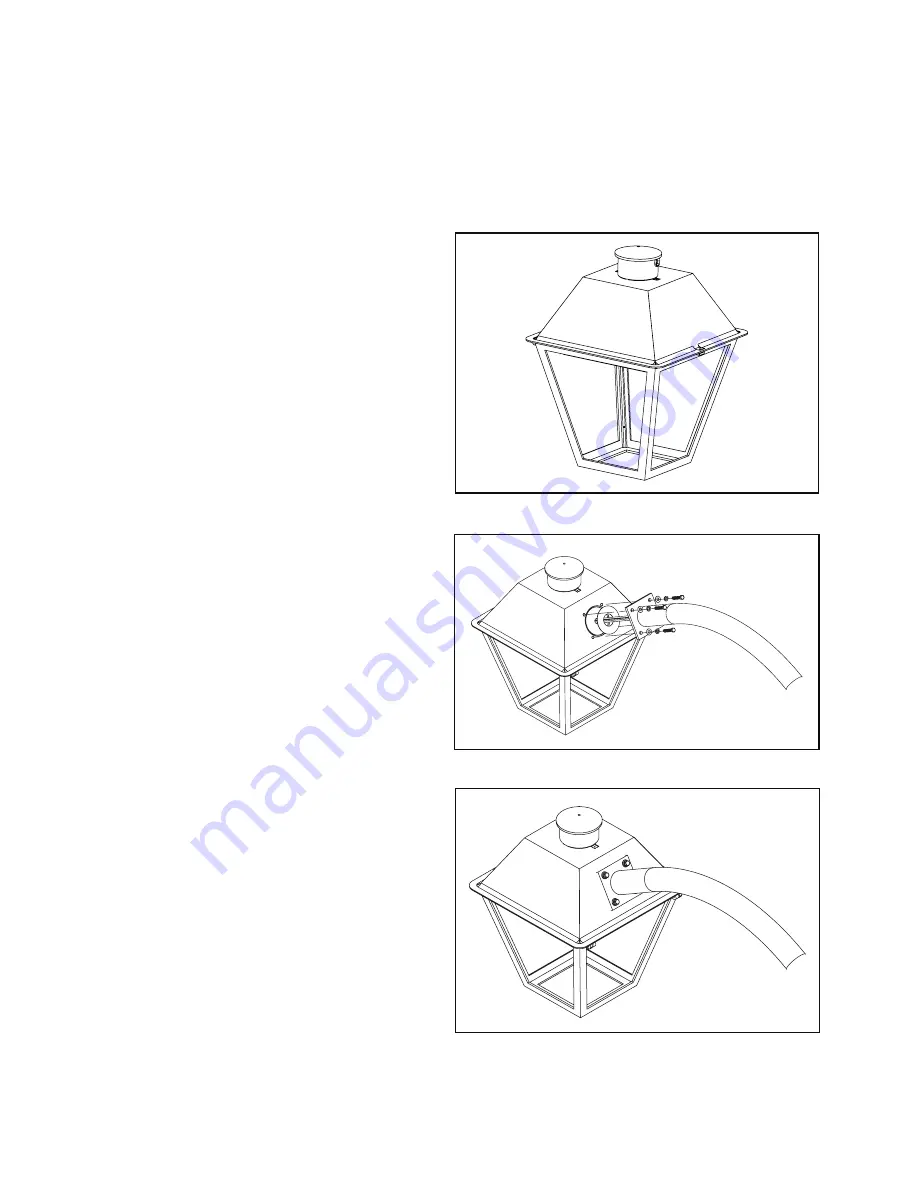
Installation (Figure 1 - Figure 3)
1. Lift the luminaire from the carton then place it on a
flat surface with the bottom lens pointing downward
(Figure 1). If the luminaire comes without lenses, avoid
touching the LED lens on the inside during installation
and handling.
2. To attach the decorative scroll arm (supplied by others)
to the luminaire, pull wires through the scroll arm and
secure with four sets of 3/8-16 hex head bolt, 3/8 split
lock washer, and 3/8 plain washer (Figure 2) supplied
with the luminaire. Torque bolts to 10 ft-lbs.
otee:
N
Bolts and washers supplied with luminaire, arm by others.
3. Before hanging the luminaire on the pole, connect the
luminaire wires to the appropriate supply leads.
●
●
Supply side ground wire to green luminaire lead.
●
●
Supply side neutral wire to white luminaire lead.
●
●
Supply side line voltage wire to black luminaire lead.
4. To attach the scroll arm to the pole (Figure 3), please
refer to scroll arm installation instructions (supplied by
others).
Photocontrol (If Equipped)
1. Using a flat blade screw driver, loosen the two flathead
screws to allow rotation of the receptacle.
2. Insert screwdriver into center slot and rotate receptacle
until indicator arrow points in desired direction.
3. Retighten screws.
4. Insert the photoelectric control (or shorting cap) into
receptacle and twist into locked position.
otee:
N
The photocontrol must contain a soft, resilient gasket
fastened to the bottom surface to assure a proper
weather seal between the control and the receptacle.
Maintenance
otee:
N
A regular maintenance schedule should be
followed to retain optimal light output and thermal
performance.
Optical lens cleaning should be performed with a clean dry
cloth to remove any dust or other contaminants. Additional
cleaning can be performed with using a non-abrasive
polycarbonate cleaner. Remove any dirt, leaves or other
foreign debris from the housing.
Figure 1.
Figure 2.
Figure 3.


