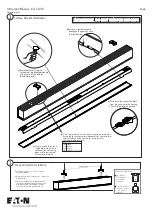
Dimn ‘a’
Dimn ‘a’
Instruction Leaflet
K1121V10
Leat
December 2019
Product luminaires comply with EN60598 and are suitable for use in normal interior conditions.
o
o
This luminaire has an ambient temperature range of -10 C to 25 C for the non-emergency version
o
o
For Emergency variants - This luminaire has an ambient temperature range of 5 C to 25 C, to ensure the batteries work correctly
1
Recessed - Bracket Installation
Fixing Centres (per fitting)
1.0m
1.5m
2.0m
700mm
centre fixing
3.0m
1200mm
1700mm
IMPORTANT:
Once brackets
are fully installed. Plaster surface
before installing the Leat.
a)
Cut aperture to required size.
Using the flat bracket (sold separately) as a drilling template, drill 4 x holes
5mm dia, through pilot holes. See ‘Bracket Orientation’.
Counter sink the drilled holes so c/sk screws (supplied) sit flush with
the plasterboard.
Dimn ‘a’
Drilling Direction
240mm MAX
Plasterboard
160mm MIN
44x44mm
Wooden
Battens
Recommended Wooden Batten Spacing
For Plasterboard Support
Drilling Direction
b)
Secure each slider to
plasterboard using M5
c/sk screws supplied
Dim ‘a’
Trimmed
Trimless
79.0mm
76.0mm
Bracket Orientation
When using the flat bracket for the drill hole locations make sure the metalwork is
in the correct orientation.
The image on the left shows the orientation for the trimless variant and the image on
the right shows the orientation for the trimmed version.
c)
Fold flat bracket over and fix spring clip.
Fit main bracket into slider brackets. Ensure that
dimension ‘a’ from bottom of plasterboard to the inside
face of main face is adhered to. Tighten slider
bracket screws to hold main bracket in place.
D
im ‘a’
Aperture
Trim - 65.5mm wide
Trimless - 57.0mm wide
Fixing crs
Aperture
Trim - Run 8.0mm
Trimless - Run 10.5mm


