background image

9

10/09 AWB1230-1605

Effective October 2009

Operation and maintenance of

IZM low voltage air circuit breakers


MOELLER

 www.moeller.net/de/support 

Section 2: Receiving, handling,  

and installation

General information

IZM air circuit breakers, when supplied as part of an assembly,  

may be shipped already installed in their respective breaker  

compartments. Receiving and handling of this equipment is 

addressed in an assembly instruction manual supplied with the 

assembled equipment. This instruction manual applies to only  

the circuit breakers.

Suggested tools

A large number of different tools are not required to properly  

install and maintain IZM circuit breakers. The following tools are,  

however, suggested:

• 

Flat-blade screwdriver

• 

Phillips head screwdriver

• 

3/8-inch socket (ratchet) wrench

• 

10 mm socket

• 

17 mm socket

• 

Secondary wiring removal tool

Unpacking circuit breaker

Before beginning to unpack new IZM circuit breakers, read and 

understand these directions. Following the directions will ensure 

that no damage is caused.
Shipping containers should be inspected for obvious signs of rough 

handling and/or external damage incurred during the transportation 

phase. Record any observed damage for reporting to the transpor-

tation carrier and Moeller, once the inspection is completed. All 

reports and claims should be as specific as possible and include  

the order number and other applicable nameplate information.
Every effort is made to ensure that IZM circuit breakers arrive at 

their destination undamaged and ready for installation. Care should 

be exercised, however, to protect the breakers from impact at all 

times. Do not remove protective packaging until the breakers are 

ready for inspection, testing, and/or installation. 
When ready to inspect and install the IZM circuit breaker, carefully 

remove the banding straps and lift off the cardboard box. Remove 

any additional packing material and internally packed documentation. 

The circuit breaker and/or cassette are mounted to a wooden  

shipping pallet.
On drawout circuit breakers shipped without a cassette, two  

shipping clamps hook into the breaker side plates and are held to 

the pallet with four lag screws (

Figure 3

). Remove the lag screws 

and clamps. Save the screws and clamps for future shipment of the 

breaker. On empty cassettes, remove the four or five lag screws 

and/or machine screws that pass through the floorpan of the  

cassette holding it to the wooden pallet. On drawout breakers 

shipped in a cassette, first remove the breaker from the cassette 

using the levering mechanism and drawout rails. After the breaker  

is removed, the machine screws passing through the floorpan can  

be removed. On fixed breakers, remove the lag screws passing 

through the mounting feet that hold the breaker to the pallet. 
Circuit breakers are designed to be easily lifted from the wooden 

pallet using an appropriate lifting yoke and overhead or portable  

lifting device. 

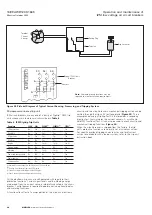
Figure 3. Shipping Clamps for Drawout Circuit Breaker

Storing circuit breaker

If it is necessary to store a circuit breaker before installation, do  

so in its original shipping container. Keep the circuit breaker in a 

clean dry place. Ensure there is ample air circulation and heat, if  

necessary, to prevent condensation. It is very important that the  

circuit breaker not be exposed to dirt or moisture.

 nOTiCE

a CirCUiT BrEakEr THaT HaS BEEn STOrED FOr anY LEngTH OF TiME 

SHOULD BE OPEraTED a MiniMUM OF FiVE TiMES BEFOrE iT iS PLaCED 

in SErViCE.

Lifting circuit breaker

 CaUTiOn

DO nOT aTTEMPT TO LiFT CirCUiT BrEakErS WiTH OrDinarY CranE 

HOOkS, rOPES, CHainS, Or OTHEr SUCH DEViCES. FaiLUrE TO FOLLOW 

THiS CaUTiOn COULD rESULT in DaMagE TO ViTaL ParTS, SUCH aS arC 

CHUTES, BarriErS, anD Wiring Or THE EnTirE CirCUiT BrEakEr.

To closely examine, install, or just become more familiar with the 

circuit breaker, carefully lift and place the circuit breaker on a solid 

work surface capable of handling the circuit breaker’s weight  

(

Table 2

or on the captive drawout extension rails of the breaker 

compartment. This is accomplished by using the appropriate lifting 

yoke and lifter. The lifting yoke consists of two steel hooks specially 

shaped to hook under the integral molded lifting handles on both 

sides of the circuit breaker (

Figure 14

). Every effort should be made 

during lifting to minimize circuit breaker swing and tilt.
If the circuit breaker is to be lifted onto compartment extension rails, 

follow the instructions on page 11 “Installing drawout circuit breaker.”

Circuit breaker inspection

All circuit breakers, once removed from their shipping containers, 

should be visually inspected for any obvious damage.
The current rating of the rating plug installed in the trip unit should 

match the current rating of the sensors mounted on the lower 

primary stabs of the circuit breaker. Check to make sure that this 

match exists. The rating plug rating can be viewed from the front 

of the circuit breaker (

Figure 17

). The sensor rating can be viewed 

through the viewing windows at the rear of the circuit breaker 

(

Figure 4

). Sensors and rating plugs can be easily changed as 

described in Section 6.

Shipping 

Clamp

Содержание IZM40

Страница 1: ...covered in individual instruction leaflets specific to the accessory This information is also available from the Moeller Web site at www moeller net de support For application information consult Moe...

Страница 2: ...rawout circuit breaker 11 Fixed circuit breaker 14 Circuit breaker operation 15 Section 3 Circuit breaker description and operation 16 Introduction 16 Basic circuit breaker assembly 20 Pole units 20 O...

Страница 3: ...ing Spring 22 Figure 25 Cross Section of Conductor and Arc Control System 22 Figure 26 Integral Arc Runner Viewed From Top of Arc Chamber Arc Chute Removed Circuit Breaker Closed 23 Figure 27 IZM Arc...

Страница 4: ...Mounted on Cassette 38 Figure 60 Door Escutcheon and Gasket 39 Figure 61 Cassette Mounted Two Way Cable Interlock 39 Figure 62 Drawout Circuit Breaker in Cassette 40 Figure 63 Drawout Circuit Breaker...

Страница 5: ...ker Weights 10 Table 3 Rejection Interlock Pin Locations 12 Table 4 IZM Digitrip Trip Units 24 Table 5 IZM Current Sensors and Matching Rating Plugs 25 Table 6 Shunt Trip Ratings 34 Table 7 Spring Rel...

Страница 6: ...tracking resistance The drawout IZM circuit breaker is a through the door design having three breaker positions with the compartment door closed CONNECT TEST DISCONNECT and one position out of its co...

Страница 7: ...aker not IZM99 or IZM63 Figure 2 Typical IZM Nameplate m warning TYPE IZM CIRCUIT BREAKERS ARE ROBUST AND are PROVIDED WITH SAFETY FEATURES NEVERTHELESS THE VOLTAGES CURRENTS AND POWER LEVELS AVAILABL...

Страница 8: ...pecting circuit breakers and their associated assembly a qualified person should also be trained with respect to the hazards inherent to working with electricity and the proper way to perform such wor...

Страница 9: ...a cassette first remove the breaker from the cassette using the levering mechanism and drawout rails After the breaker is removed the machine screws passing through the floorpan can be removed On fix...

Страница 10: ...IZM20N 08 43 00 54 00 48 00 62 00 IZM93N 10 IZM20N 10 43 00 54 00 48 00 62 00 IZM93N 12 IZM20N 12 43 00 54 00 48 00 62 00 IZM93N 16 IZM20N 16 43 00 54 00 48 00 62 00 IZM93N 20 IZM20N 20 43 00 54 00 4...

Страница 11: ...ed the rejection pins will block the insertion of the circuit breaker into the cassette before the levering in mechanism is engaged Molded Rail Supports Extension Rail Cutout Before attempting to push...

Страница 12: ...TEST Figure 9 CONNECT Figure 10 The REMOVE position is a position outside the compartment on the cassette s drawout rails where the circuit breaker is not engaged with the levering mechanism The DISCO...

Страница 13: ...onnection Made Breaker Still Behind Door Typical Storage Position Circuit Breaker Side View Compartment Front Door Secondary Connection Made Rear of Compartment Primary Connections Not Made Breaker an...

Страница 14: ...aged To remove the circuit breaker from its compartment follow the procedure just described using a counterclockwise ratcheting motion m notice The circuit breaker mechanism is interlocked such that c...

Страница 15: ...that the panel on which a fixed circuit breaker is to be mounted is capable of supporting the weight Circuit breaker operation Circuit breakers should be operated manually and or electrically before t...

Страница 16: ...breakers utilize six or eight sets of rear primary connections these circuit breakers are available from the factory with several different phase sequences The phase sequence is also labeled on the r...

Страница 17: ...ircuit Breaker Features Front and Rear Views 6 1 Baffled Arc Chute Cover 2 Secondary Disconnect 3 Faceplate front cover 4 Integral Lifting Handle 5 Fixed Horizontal Primary Terminal 6 Fixed Primary Te...

Страница 18: ...Standard Frame Fixed Circuit Breaker Features Front and Rear Views 1 Baffled Arc Chute Cover 2 Secondary Contact Connector 3 Faceplate front cover 4 Integral Lifting Handle 5 Fixed Vertical Primary T...

Страница 19: ...OFF Button push 8 Manual ON Button push 9 Manual Charge Handle 10 Optional Operation Counter 11 Padlockable Levering Device Access Door for Drawout Breaker 12 Color Coded Breaker Position Indicator 1...

Страница 20: ...rtion and a fixed portion The exact design configuration depends upon the breaker s frame size IZM63 and IZM99 circuit breakers use two pole units and arc chute assemblies connected mechanically and e...

Страница 21: ...ains available after a closing operation Figure 23 Electrically Operated Drawout Circuit Breaker with Front Cover Removed Manual operation On manually operated circuit breakers the closing spring can...

Страница 22: ...also available to trip open an electrically operated circuit breaker Refer to Accessory devices on page 34 for more details on both standard and optional devices Electrical Motor Operator Anti pump fe...

Страница 23: ...e 27 IZM Arc Plate Assembly Arc chute components are assembled in an insulating jacket that is removable from the top of the circuit breaker as previously described in Lifting circuit breaker on page...

Страница 24: ...nt curves to coordinate with a load or system refer to the trip unit instruction book Microprocessor based trip unit IZM circuit breakers use any one of a family of DigitripE RMS trip units whose main...

Страница 25: ...evel by sensor rating If the rating plug is removed from the trip unit the circuit breaker will trip if it is carrying current Make certain the rating plug is secured in position with its retaining sc...

Страница 26: ...a peak instantaneous current of 25 x In this corresponds to an rms current of 11 x In with maximum asymmetry The making current release is enabled only for the first two cycles following a circuit br...

Страница 27: ...hout terminal block If a terminal block for customer use is not required the circuit breaker is supplied with both plug in connectors male and female just described in the two previous paragraphs The...

Страница 28: ...release the closing pulse will occur when the mechanism is charged and reset LCS open Voltage must be removed and reapplied to the spring release for subsequent operation 6 To provide selected time de...

Страница 29: ...time delays for short time and or ground time functions for testing or non zone interlocking applications a jumper from b 8 to b 9 is required 5 On three pole breakers only having ground fault functio...

Страница 30: ...se pulse is initiated If voltage is maintained to the spring release the closing pulse will occur when the mechanism is charged and reset LCS open Voltage must be removed and reapplied to the spring r...

Страница 31: ...se pulse is initiated If voltage is maintained to the spring release the closing pulse will occur when the mechanism is charged and reset LCS open Voltage must be removed and reapplied to the spring r...

Страница 32: ...If voltage is maintained to the spring release the closing pulse will occur when the mechanism is charged and reset LCS open Voltage must be removed and reapplied to the spring release for subsequent...

Страница 33: ...If voltage is maintained to the spring release the closing pulse will occur when the mechanism is charged and reset LCS open Voltage must be removed and reapplied to the spring release for subsequent...

Страница 34: ...mounted on a IZM circuit breaker Table 6 Shunt Trip Ratings Control Voltages Operational Voltage Range 70 100 Inrush Power Consumption a Opening Time ms 24 Vdc 17 26 Vdc 250W 35 48 Vdc 34 53 Vdc 250W...

Страница 35: ...roviding remote electrical indication if the circuit breaker is open or closed Figure 49 Up to three auxiliary switches can be mounted in the circuit breaker Each switch has two normally open a and tw...

Страница 36: ...an overcurrent condition Opening as a result of a circuit breaker s manual open button shunt trip or undervoltage release does not cause the overcurrent trip switch to operate The overcurrent trip sw...

Страница 37: ...wed through the front cover Figure 53 The customer supplies the key lock The provisions available are for Kirk Castell Ronis or CES Figure 53 Cover Mounted Key Lock and Operations Counter Cassette loc...

Страница 38: ...reaker is levered from the CONNECT position the shutters automatically close to cover the fixed primary contacts Figure 56 When the circuit breaker is levered into the cassette the shutters automatica...

Страница 39: ...e when others are closed A lever assembly is mounted on each breaker that interfaces with the pole shaft and the tripper bar The lever assemblies are interconnected with either cables depending upon t...

Страница 40: ...y interfaces to the drawout circuit breaker including automatic primary and secondary connections For the IEC circuit breaker a cassette style using horizontal stabs and horizontal customer bus bar te...

Страница 41: ...upport Figure 64 Drawout Cassette Features Front and Rear Views Front View Rear View 1 Extension Rails 2 Extension Rail Cutout 3 Secondary Plug in Connectors 4 Secondary Terminal Blocks 5 Arc Hood 6 O...

Страница 42: ...dimensions associated with all fixed circuit breakers and any appropriate primary bus connections can be found in a separate document The installation of a fixed circuit breaker was discussed in Sect...

Страница 43: ...the equipment if there are earlier opportunities If possible make a visual inspection each time a circuit breaker compartment door is opened and especially when a circuit breaker is withdrawn on its...

Страница 44: ...est function the Digitrip Test Kit or the hand held IZM Functional Test Kit Review test kit instructions for the trip unit Instruction leaflet Section 1 2 or 1 3 applies for instantaneous test procedu...

Страница 45: ...r each primary contact and indicates whether or not the contact should be replaced Inspection of the contacts using the contact wear indicators is conducted only with the circuit breaker closed Figure...

Страница 46: ...cribed here do not under ordinary circumstances require any assistance beyond the appropriate instructional material If further assistance is required however contact your Moeller representative Ratin...

Страница 47: ...vertical adapters must be removed Each primary disconnect finger cluster is removed by loosening the two hex head bolts with a 10 mm wrench These bolts do not have to be completely removed to slide t...

Страница 48: ...ed Contact Moeller service center Circuit breaker makes no attempt to close with either local manual or remote controls springs do not discharge Closing spring not fully charged check SPRING CHARGED i...

Страница 49: ...nd or typecode is not known it would help to refer to a pictorial and or graphic reference Also include the circuit breaker type General Order number and other information as shown on the nameplate on...

Страница 50: ...50 Operation and maintenance of IZM low voltage air circuit breakers MOELLER www moeller net de support 10 09 AWB1230 1605 Effective October 2009...

Страница 51: ...51 10 09 AWB1230 1605 Effective October 2009 Operation and maintenance of IZM low voltage air circuit breakers MOELLER www moeller net de support...

Страница 52: ...w voltage air circuit breakers Moeller GmbH Industrieautomation 2009 by Moeller GmbH nderungen vorbehalten Subject to alterations 10 09 AWB1230 1605EN Z8700 Moon Doku Heng Printed in USA 10 09 10 09 A...

Отзывы: