background image

4

EATON

  ET1187 Operating Instructions E-EQCR-11001-E1  November 2018

Operating 

Instructions

Establishing Crimp Settings 

(Same procedure utilized for both Core and Winner Product Groups)

Install FT1380-200-XXX Die Cage 

per crimp die chart on the front of the 

machine.

Step 1:

Reference the crimp specification chart 

on the front of the crimp machine to 

detemine proper crimp dies for hose 

and fitting.

Step 2:

Rotate hose product selection collar un-

til desired product group is facing opera-

tor.  Note:  Collar has detents at each 

position to help ensure proper alignment 

with corresponding product groups.

Crimp Procedures

(using FT1380-200-MXXX Series Die Cages

Step 3:

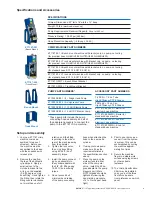
The color coded collar and crimp adjustment knob above the pusher is designed to easily adjust to the Aeroquip and Weath-

erhead core products to determine the crimp diameter for each combination of hose, fitting, and die cage (See below).  Simply 

turn the collar to the correct color to match the lay line on the hose, adjust the ring so that the correct size dot aligns with the 

correct size line on the collar and the machine is set for the correct crimp.  Load the correct crimp die based on the crimp die 

chart attached to the machine, and the machine is ready to crimp.

The micrometer section can be used to crimp other products not captured on the 3 primary collar settings, based on crimp 

target settings available in PowerSource.

GH781 / H280


Standard machine comes 

with GH781/H280 settings 

built in for use with TTC/Z 

fittings in sizes -4 through 

-20. 


GH493 / H430

Standard machine comes 

with GH493/H430 set-

tings built in for use with 

TTC12/4S fittings in sizes -6 

through -10, and 4S fittings 

in sizes -12 and -16. 

Micrometer Dial

The micrometer section can 

be used to crimp other 

products not captured on 

the 3 primary collar settings, 

based on crimp target set-

tings available in Power-

Source.

GH681 / H180 

Standard machine comes 

with GH681/H180 settings 

built in for use with TTC/Z fit

-

tings in sizes -4 through -20. 


-12 size setting shown

-8 size setting shown

-16 size setting shown

Содержание ET1187

Страница 1: ...Portable Variable Crimp Machine ET1187 Crimp Machine Operator s Manual ...

Страница 2: ... this equipment unless they have read and thoroughly under stand this manual 2 WEAR SAFETY GLASSES 3 AVOID PINCH POINTS Do not rest your hand on the crimp ring Keep your hands clear of all moving parts Do not allow anyone other than the operator close to the equipment while it is in operation 4 MAINTAIN DIES WITH CARE Dies used in the ET1187 crimp machine are hardened steel offering the best combi...

Страница 3: ...ecure the machine frame to a stable work surface using lag screws or other suitable fasteners 10 The Crimp Specification Chart may be installed on any one of the three front shroud panels User preference on which panel ET1187 001 Bench Mount ET1187 002 Truck Mount Bench Mount Truck Mount SPECIFICATIONS Crimper Dimensions 22 tall x 16 width x 14 deep Weight 70 lbs machine stand only Pump Requiremen...

Страница 4: ...ollar to the correct color to match the lay line on the hose adjust the ring so that the correct size dot aligns with the correct size line on the collar and the machine is set for the correct crimp Load the correct crimp die based on the crimp die chart attached to the machine and the machine is ready to crimp The micrometer section can be used to crimp other products not captured on the 3 primar...

Страница 5: ... ring is in correct posi tion for crimping 16 when vertical lines on the crimp adjustment ring and prod uct selection collar are aligned and 16 horizontal line on the collar is even with the top of the crimp adjustment ring Step 6 Crimp cycle is complete when cylinder travel stops and the green indicator ring on the piston shows beneath the top plate After completion visually inspect the crimp and...

Страница 6: ...justment knob is rotated to the top most position on the crimper and the 0 mark is located as shown in Figure 11 the machine setting is 400 Each complete upward rotation of the adjustment knob increases the target setting by 025 each mark around the dial corresponds to a 001 change in target setting For example to achieve a target setting of 050 the adjustment knob is rotated until the top of it c...

Страница 7: ...ied Accrolube 2 Die cage maintenance should be performed at 1000 crimp intervals or every six months which ever occurs first Die cages should be clean of grease and debris and inspected for worn or damaged components a The sliding surface of the dies should appear smooth with no apparent galling Galled dies must be replaced Individual dies in a cage can be replaced without replacing all eight dies...

Страница 8: ...87C 0009 ADJUSTABLE KNOB 1 7 ET1187C 0010 PINCH POINT HAT 1 8 140 05691 SEAL KIT PISTON Not Shown 1 9 ET1187C 0011 SPRING Not Shown 1 10 T 400 G LUBRICANT Not Shown 1 11 ET1187C 0012 QUICK RELEASE PIN 2 12 ET1187C 0013 QUICK RELEASE PIN 2 13 ET1187C 0014 SHOULDER SCREW 2 14 ET1187C 0015 SPRING PLUNGERS 2 15 ET1187C 0016 ROLL PIN 2 16 ET1187C 0017 BENCH MOUNT STAND 1 17 ET1187C 0018 SHROUD 1 18 ET1...

Страница 9: ...9 EATON ET1187 Operating Instructions E EQCR 11001 E1 November 2018 Intentionally Left Blank ...

Страница 10: ...raulics Group USA 14615 Lone Oak Road Eden Prairie MN 55344 USA Tel 952 937 9800 Fax 952 294 7722 www eaton com hydraulics 2018 Eaton All Rights Reserved Printed in USA Document No E EQCR 11001 E1 November 2018 ...

Отзывы: