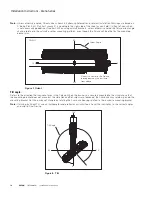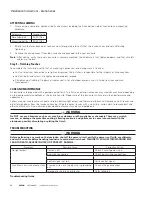
6
EATON
IB528001EN
Installation instructions
Installation Instructions - Arena Series
Installing Center Stud Mounted Luminaire:
1. Set luminaire in place and install lock washer and nut to securely fasten the Luminaire mounting bracket to the mounting
structure. Tighten hardware so that Luminaire is secure but do not fully torque hardware until aiming is complete.
2. Install the safety cable through the luminaire mounting bracket and around a building structure such as catwalk rail or
building truss.
3. Use of thread locking compound is recommended.
otee:
N
Safety cables must be installed on every luminaire
Mounting Option 2 - Secondary Option - Multi-Mount
Included mounting points:
Recommended Connection Methods:
1. For multi mount configurations, the installer shall supply all required hardware, unless otherwise noted.
otee:
N
During installation, ensure power and control wires are not pinched or pulled taut.
a. If attaching to the inner thread of the center piece, thread the attachment (hook or pendant) completely into
the luminaire stud. Torque set screw to 5 ft-lbs against attachment (ex. Hook or pendant). Apply thread-locking
compound to all threaded connections to prevent loosening.
b. If attaching to the 5/16-18 threaded stud, torque all hardware connections to minimum of 10 ft-lbs. Apply
thread-locking compound to all threaded connections.
WARNING
An impact driver may be used on mounting hardware while the power is off, but NEVER use any power tools on
the Luminaire while the power is on. The vibration caused by power tools may damage the Luminaire. FAILURE TO
FOLLOW THIS WARNING MAY LEAD TO LUMINAIRE INTERNAL DAMAGE AND FAILURE.
Step 2 – Label the Luminaires (If Required)
otee:
N
For outdoor applications where smaller groups of luminaires are installed on poles, it is not necessary to label the
Luminaires.
For indoor applications where luminaires are installed along a catwalk, the Luminaires are typically labeled to allow
identification of each one at a glance from the catwalk.
1. Label each Luminaire with Luminaire Number as indicated on the schedules in the photometrics or project Installation
drawings.
2. Labels shall be white background with black lettering. Text shall be at least 1/4” tall.
3. Affix the label to the mounting bracket in a prominent location, avoiding manufacturer labels.
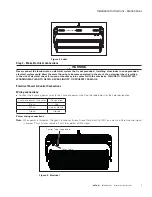
Figure 3. Multimount
5/16-18
Threaded
Stud
1 NPT Outer Threaded
3/4 NPT Inner Thread

