31
6. Press the trigger on the puncturer.
7. Withdraw the puncturer.
8. Wipe away the first drop of blood.
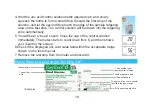
9. Apply the second drop of blood on the edge
of the test strip target area. The blood will be
absorbed and cause the target area to turn red. The testing reaction starts when
the meter beeps. The meter counts down from 6 and then shows your result on the
screen. The meter stores your result in its memory automatically.
NOTE:
How much blood should be applied?
Although only a small amount of blood is needed, it is very important that you put
enough blood on your test strip so that the entire reaction zone is filled. This ensures
that your meter can give accurate and reliable results.
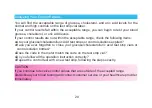
Caution:
If you don’t apply enough blood, you might need to use a new test strip to do the test
again.
10. Record the uric acid value in your log book.
11. Pull the test strip out of the meter. The meter will turn off by itself.
Unscrew the adjustable tip of the puncturer.


