background image

(A)


If the light flash at fast rate, means the extruder is heating, it needs to wait about 1 minute, 

once extruder complete heating, the light will flash at steady rate. Then wait another 10 seconds, 

Motor begins to pull the material into extruder gear. If the filament comes out from the nozzle, 

means filament installed successfully. Then slide the switch back to the middle gear, the indicator 

light become normal light without flashing.


(B)


If the light become flash at steady rate, it needs to wait about 10 seconds, Motor begins to pull 

the  material  into  extruder  gear,  filament  comes  out  from  the  nozzle,  means  filament  installed 

successfully. Then slide the switch back to the middle gear, the indicator light become normal light 

without flashing.


Precaution:  After  the  first  filament  installation,  there  is  no  need  to  repeat  the  work  of  feeding 

filament every time, when print different models. Only need to feed when the filament runs out.
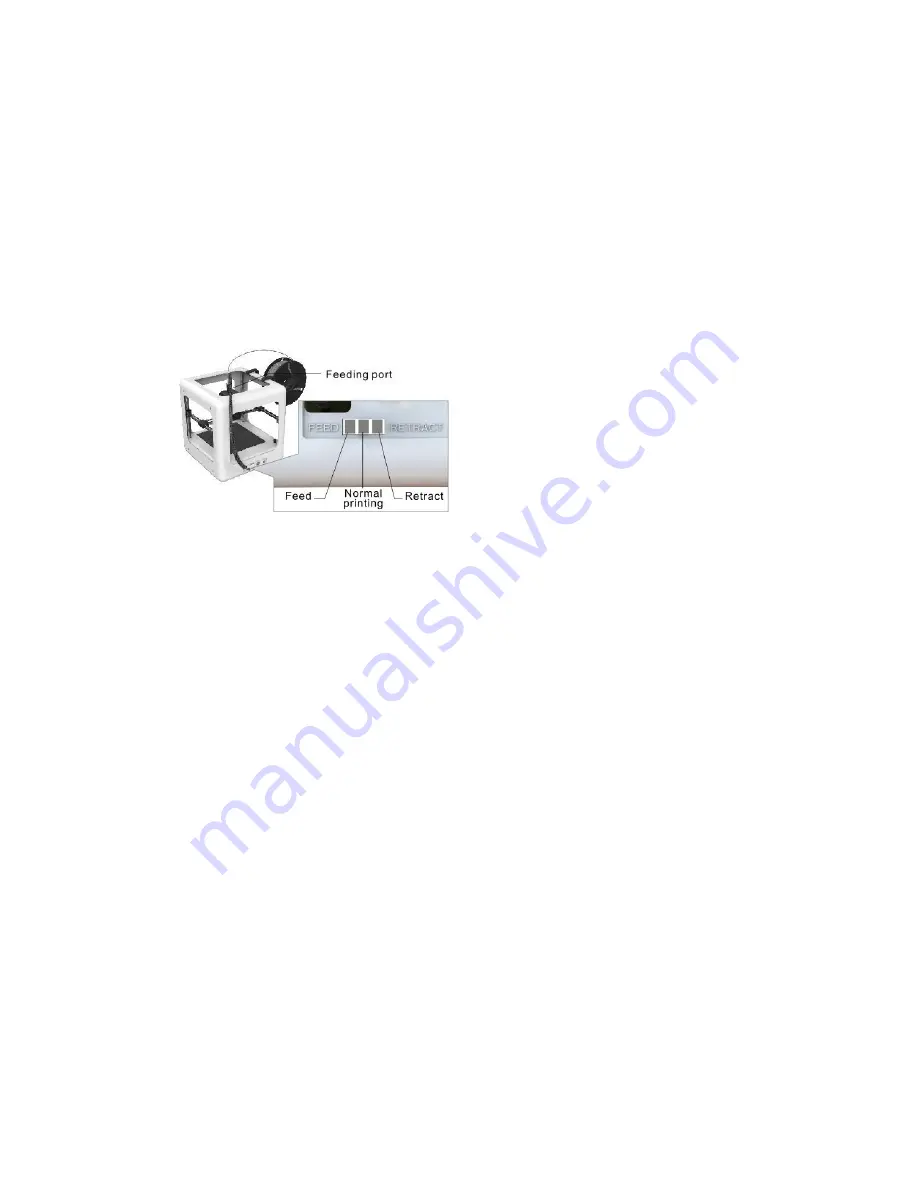
 

Retract:


If want to replace another roll of filament or the machine does not print for long time. Then needs 

to retract the filament. First slide switch to “RETRACT” gear, the print button in front will flash green 

light at fast rate or at steady rate.


(A)


If light flash at fast rate, means the extruder is heating, it needs to wait about 1 minute, once 

extruder complete heating, the light will flash at steady rate. Then wait another 10 seconds, Motor 

begins to work, use hand to pull the material until it completely retract from the tube, then slide 

the switch back to middle gear. The indicator light become normal light without flashing.


(B)


If light flash at steady rate, it needs to wait about 10 seconds, Motor begins to work, use hand 

to pull the material until it completely retract from the tube, then slide the switch back to middle 

gear, the indicator light become normal light without flashing.


Precaution: After feeding and retracting, both needs to slide the switch back to the middle gear (at 

the back of printer), then the indicator light become normal light without flashing.


4.2


Slicing model 


Download models from easythreed model library in SD card or to download from internet, then 

slicing in E3D Nano software and copy to SD card, please refer to the instruction of 3D NANO slicing 

Содержание NANO

Страница 1: ...USER S MANUAL ...

Страница 2: ...This Manual is subject to change For updated information please visit www easythreed com NANO Specification Building size 90 110 110mm Layer thickness 0 1 0 3mm Nozzle diameter 0 4mm Supported filament PLA Printing temperature 180 210 Filament diameter 1 75mm Print speed 10 20mm s Resolution 0 1 0 2mm Slicing software E3D NANO Supported file format STL Support OS Windows XP 7 8 10 32 bit 64bit Mac...

Страница 3: ...filament holder and screw driver 3 Be sure to remove the Gantry Clips located on the front left and front right corners of the printer The clips are only for protection during transportation As shown in figure 1 figure 1 4 Place the filament holder at the left or right side of the printer then attach the filament on the side As shown in figure 2 Precaution Do not place the filament holder at the f...

Страница 4: ...power adaptor into the power plug and the print button indicator light should be on 2 To power off the NANO 3d printer unplug the power adaptor from the back of the machine when it s not operating 4 3 Steps Easy Printing 4 1 Install 3D filament Feed Insert filament into the guiding tube until it cannot goes further and gently press the filament to stop it runs back Then use another hand to slide t...

Страница 5: ...ot print for long time Then needs to retract the filament First slide switch to RETRACT gear the print button in front will flash green light at fast rate or at steady rate A If light flash at fast rate means the extruder is heating it needs to wait about 1 minute once extruder complete heating the light will flash at steady rate Then wait another 10 seconds Motor begins to work use hand to pull t...

Страница 6: ... the process of printing then needs to adjust the screws in the bed Gently rotate the screws clockwise the bed will goes down rotate the screws anti clockwise the bed will goes up Bed removable after printing You can remove the bed from the printer as the picture is showing 5 5 0 Online printing For Experts 5 1 Install the USB driver in SD card or download from easythreed com to computer 5 2 Insta...

Страница 7: ...vironment Relative humidity should not exceed 80 the minimum should not be less than 20 7 0 Safety 1 Safety and Warnings Children under the age of 10 should use the product under adult supervision The print head exposed nozzle extruded plastic and areas near the nozzle may be extremely hot Keep finders away from the print head and extruded material unless it has been unplugged for at least 10 minu...

Страница 8: ...will retract successfully in the normal situation If failed please try to feed first then retract again Please Pay special attention that gently pull up the material to help till filament completely get out of the printer Q4 What s the reason that the model cannot stick to the printing bed in the initial printing or in the process of printing A The bed is too far away from the nozzle need to adjus...

Страница 9: ...rby the nozzle in the process of printing Model become mess of silks A There are several situation 1 When it happens in the initial printing the distance between nozzle and bed is too far the silks cannot stick to the bed so it would become messy filament Please twist the 4 bed screws 90 degree anti clockwise If still not ok then please twist 90 degree anti clockwise again till normal printing 2 T...

Страница 10: ...the switch to feed gear wait about 10 seconds till the filament come down Then slide switch to the middle gear and press printing button shortly to resume printing Please pay special attention that after feeding 10 seconds timely slide switch to the middle gear in avoid that the filament pimple appear in the model Q15 When print the first layer there is no filament on the bed why A Please check if...

Страница 11: ...xtension name to gcode Select the file click right mouse and select to open with notepad Enter the following characters G28 X0 Y0 G28 Z0 Save and exit Copy this file to the SD card press the print button the printer s X Y Z axis begins to zero THANK YOU FOR USING E3D NANO www easythreed com ...

Отзывы: