Easypix DV5008 Скачать руководство пользователя страница 24


24 

English         

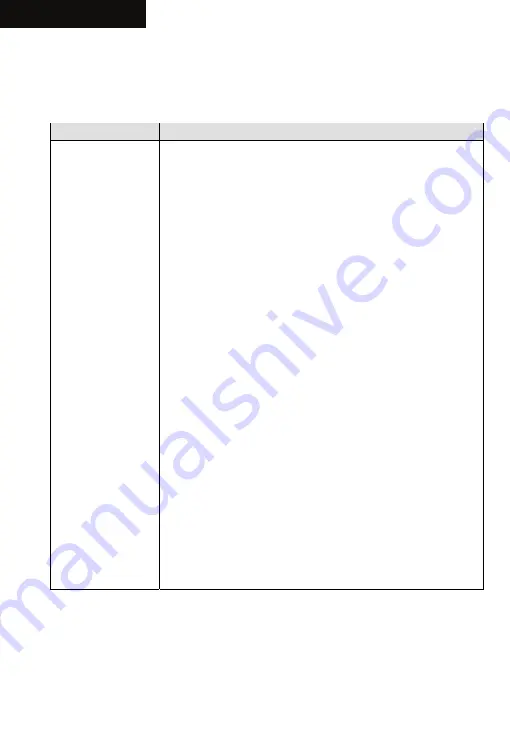
12) Setting Flicker Frequency 

This video camera provides two light frequencies for your selection.


There are two different light frequencies 50Hz and 60Hz for different area. This function is 
designed for avoiding camera LCD display flicker. Please set the option according your area.  
 

60HZ 

50HZ 

Tahiti  

China 

Denmark 

South Africa 

Japan 

Papua New Guinea 

Belgium 

Chad 

North Korea 

Qatar 

Ireland Northern 

Tunisia 

Taiwan Saba  Iceland Ghana 
Guatemala Abu 

Dhabi  Hungary  Uganda 

South Korea 

Brunei 

Spain 

Mali 

Philippines Bangladesh Greece 

Malagassy 

Rep 

Trinidad & Tobago 

Solomon Islands 

Poland 

Malawi 

Ecuador Oman  France  Cameroon 
Brazil Afghanistan 

Gibraltar 

Ivory 

Coast 

Bahamas Cambodia Finland  Senegal 
Canada Kuwait  Bulgaria Seychelles 
Cuba Egypt Yugoslavia 

Sierra 

Leone 

Nicaragua Malaysia  United 

Kingdom 

Dahomey 

Guatemala Fiji 

Islands Norway 

Morocco 

Dominican Rep 

Sri Lanka 

Malta 

Rwanda 

Bermuda Vietnam  Czech 

Republic 

Lesotho 

Honduras Cyprus  Netherlands 

Zaire 

Belize Mauritius 

Slovakia 

Rhodesia 

Venezuela Burma 

Austria 

Sudan 

Puerto Rico 

Lebanon 

Ireland of Rep 

Libya 

Colombia Barbados Italy 

Tanzania 

Costa Rica 

Paraguay 

Portugal 

Nigeria 

Haiti Jamaica 

Sri 

Lanka 

Zambia 

Peru Antigua 

Germany 

Botswana 

Virgin Islands 

Anguilla 

Monaco 

Kenya 

Monteserrat French 

Guiana 

Luxembourg Algeria 

Mexico Argentina 

Romania 

St. 

Vincent 

El Salvador 

Bolivia 

Australia 

St. Lucia 

Guam 

Guadeloupe 

New Zealand 

Falkland Islands 

Surinam Grenada Swaziland 

Guyana 

Cayman Island 

Uruguay 

Niger 

Saba 

Liberia Martinique 

Togo  Bolivia 


 Neth. 

Antilles 

Angola 

Russia 


 Chile 

Ethiopia 


Содержание DV5008

Страница 1: ...1 English...

Страница 2: ...nor can they be stored into any search system or translated into any language or computer language Brand name and product name are the trademarks or registered trademarks of respective company Statem...

Страница 3: ...Mode 10 2 4 1 Definition of Display Icons 10 3 Use the Video Camera 12 3 1 Working Modes 12 3 1 1 Video Capture 12 3 1 2 Shooting 14 3 1 3 Voice Recording 18 3 1 4 Playback Mode 18 3 1 5 Setting Mode...

Страница 4: ...tal video device integrating high quality digital video camera digital camera super MP3 digital pen recorder and PC Cam It will bring you endless new experiences in digital video 1 1 Accessories AC Ad...

Страница 5: ...Microspur Switch 3 Strap Attaching Hole 4 Indicator 5 Menu Button 6 5 Direction Button 7 Shutter Button 8 Flash Button 9 Shooting Playback Mode Switch 10 Mode Button 11 Power Button 12 Microphone 13 L...

Страница 6: ...al MemoryCard Battery Cover 19 Battery 20 Battery Lock 21 Storage Card Slot 22 Cradle Connector 23 DC Input Port 24 USB Port 25 Audio Video Output Port Note The bundled AC Adaptor output voltage is 5V...

Страница 7: ...wn the power button for 1 second or longer to turn off the system normally Note From LCD display you can see the battery status as shown below Battery power is full and you can use the video camera no...

Страница 8: ...mputer 3 The charging indicator will become red when it starts charging 4 Wait until the charging indicator turns into green indicating that the battery is fully charged 2 1 4 Removing Battery 1 Move...

Страница 9: ...amera off and open the card battery cover 2 Insert the memory card into the slot as shown below until you hear a click 3 Slide and close the card battery cover Removing SD Card 1 Turn the video camera...

Страница 10: ...e display Then you can align the lens toward yourself for self shot To return to normal status just press RIGHT direction button again 2 4 Selecting Operation Mode 1 Set to to select the shoot mode Se...

Страница 11: ...ation 5 Memory Card 6 Date Stamp 7 Digital Zoom 8 Photo counting Recorded Recordable 9 Microspur Status 10 Photo Size 11 Self shot Indication 12 Photo Quality 13 White Balance Mode 14 Flash Mode Voice...

Страница 12: ...de dose not supports flash function 1 Setting Digital Zoom The preset status is No Digital Zoom This video camera is provided with digital zoom function To activate the digital zoom please press UP bu...

Страница 13: ...matically The users are recommended to adopt this mode except that the lighting is of great difference from the normal conditions Daylight Suitable for outdoor environment where the sunshine is very s...

Страница 14: ...igital zoom function please adjust until this icon disappears Note T Zoom in the view W Zoom out the view 2 Instant Playback Function To view the photo immediately after shooting please press OK butto...

Страница 15: ...t that the lighting is of great difference from the normal conditions Daylight Suitable for outdoor environment where the sunshine is very strong Tungsten Suitable for indoor environment where tungste...

Страница 16: ...se the flash automatically c OFF There will be no flash under any lighting conditions 10 Setting the Color Mode Preset as Standard Switch the working mode to shoot mode then press MENU button to enter...

Страница 17: ...setting its property and press OK to confirm ON If this function is turned on the photo will be quickly shown on the display after you finish one shot OFF If this function is turned off the photo wil...

Страница 18: ...large screen display press shutter button to play movie or voice b During play use UP DOWN button to adjust the voice press OK to pause the play and press shutter button to exit the play c During play...

Страница 19: ...of thumbnail images please press OK again 5 Viewing the Enlarged Image Set the shoot playback mode switch to playback mode then press MODE to switch to photo playback mode Use 5 direction button to se...

Страница 20: ...n only works when the USB Mode is set to Mass storage a First set the USB mode to Mass storage in SETUP menu then connect USB to the printer until the icon appears on the upper of the display Then pre...

Страница 21: ...yback mode switch to shoot mode then press MENU button to enter into the menu Press RIGHT button to enter into SETUP menu list Use 5 direction button to select the function you want to set Press OK to...

Страница 22: ...Selecting ON the welcome banner will be firstly displayed upon each start of the video camera Selecting OFF the video camera will be directly started without displaying the welcome banner c Press OK t...

Страница 23: ...htness a Select LCD Brightness and press OK An indication bar for brightness adjustment will be shown on the menu interface b Use LEFT RIGHT button to adjust the screen to your desired brightness c Pr...

Страница 24: ...amas Cambodia Finland Senegal Canada Kuwait Bulgaria Seychelles Cuba Egypt Yugoslavia Sierra Leone Nicaragua Malaysia United Kingdom Dahomey Guatemala Fiji Islands Norway Morocco Dominican Rep Sri Lan...

Страница 25: ...HUTTER to exit the play d To delete an MP3 file you may press FLASH button for quick deletion from MP3 list or switch to browser mode to execute the deletion from menu e This video camera supports syn...

Страница 26: ...ded a Use 5 direction button to select the file folder or a single file b To edit a file you can select this file and then press RIGHT button An icon will be shown on the display to prompt that the fi...

Страница 27: ...lation CD is inserted into CD ROM drive 4 2 Connecting to Computer 1 Insert the video camera into the base 2 Use the bundled USB cable to connect between the base and computer The video camera screen...

Страница 28: ...ght at a short distance otherwise the light will hurt your eye and cause injury 5 2 Care and Storage Do not use the video camera beyond following environmental conditions Temperature 0 40 C Relative h...

Страница 29: ...propriately before using the video camera Extreme temperature will shorten the service life of the battery Please confirm the polarity before correct installation of the battery Do not strip off or da...

Страница 30: ...is necessary to replace with a new one The camera does not shoot after the shutter is pressed down The camera is not set to recording mode Set the mode to recording mode The image is blurred The lens...

Страница 31: ...00 ME XP or the computer has no USB port Window 98 is installed with USB driver Check the cable connection Install Windows 98 98SE 2000 ME XP and USB port Install Window 98USB driver General Notice Th...

Страница 32: ...ed 1 15 1 2000 second Exposure Program AE Exposure Compensation 2EV with 0 5EV as one step Image Compression JPEG White Balance Auto Sunny Cloudy Flour Tungsten Flash GN 5 0 in built Music Mp3 Movie F...

Страница 33: ...h liquids such as vases or open drinks should be placed on or next to the device Before a storm and or thunder storm with the danger of lightning strike please separate the device from mains Disposal...

Отзывы: