background image

EN


General instructions 

Please read this manual and its safety instructions before 

using this product. Follow all instructions. This will prevent 
hazards that could result in property damage and/or 
serious injury. 
The product may only be used by persons who have fully 
read and understood the contents of this user manual. 
Make sure that each person using the product has read and 

follows these warnings and instructions. 
Keep all safety information and instructions for future 
reference and pass them on to subsequent users of the 
product. 
The manufacturer is not liable for damage to property or 
personal injury resulting from incorrect handling or failure 

to observe the safety instructions.   

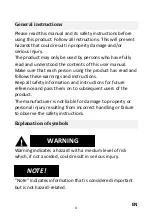
Explanation of symbols   


Warning indicates a hazard with a medium level of risk 
which, if not avoided, could result in serious injury. 


"Note" indicates information that is considered important 
but is not hazard-related. 


WARNING 


NOTE! 

Содержание AQUAPIX WDV5630

Страница 1: ...a sua lingua pu essere trovato su Internet ES Puede encontrar un manual en su idioma en Internet PT Um manual em seu idioma pode ser encontrado na Internet PL Instrukcj w swoim j zyku mo esz znale na...

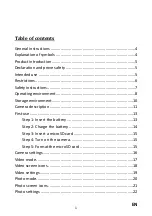
Страница 2: ...tions 7 Operating environment 8 Storage environment 10 Camera description 11 First use 13 Step 1 Insert the battery 13 Step 2 Charge the battery 14 Step 3 Insert a microSD card 15 Step 4 Turn on the c...

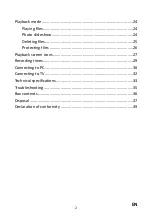
Страница 3: ...to slideshow 24 Deleting files 25 Protecting files 26 Playback screen icons 27 Recording times 29 Connecting to PC 30 Connecting to TV 32 Technical specifications 33 Troubleshooting 35 Box contents 36...

Страница 4: ...let us know All relevant state regional and local safety regulations must be observed when installing and using this product For safety reasons and to ensure compliance with the documented system dat...

Страница 5: ...product has read and follows these warnings and instructions Keep all safety information and instructions for future reference and pass them on to subsequent users of the product The manufacturer is...

Страница 6: ...e best user experience Declaration and prove safety The product has been verified in accordance with the essential requirements and other relevant provisions of Directives 2014 30 EU 2011 65 EU EU 201...

Страница 7: ...efore using the product in water ensure the battery compartment cover is securely closed and locked After use in salt or chlorinated water clean the housing under tap water and allow it to dry Do not...

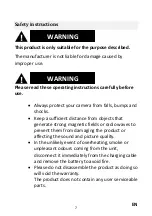
Страница 8: ...nt distance from objects that generate strong magnetic fields or radio waves to prevent them from damaging the product or affecting the sound and picture quality In the unlikely event of overheating s...

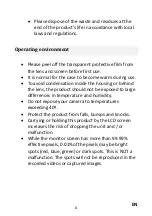
Страница 9: ...d the lens the product should not be exposed to large differences in temperature and humidity Do not expose your camera to temperatures exceeding 40 Protect the product from falls bumps and knocks Car...

Страница 10: ...irtight When the temperature rises during use condensation can occur inside the lens due to the internal humidity To minimise this effect please consider the following measures Avoid frequent exposure...

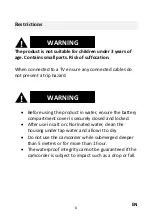
Страница 11: ...the camcorder in sea water and fresh water at a depth deeper than 5 meters or for more than 1 hour at a time The waterproof functionality cannot be guaranteed if the camcorder is subject to impact su...

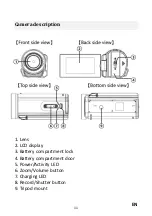
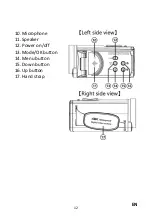
Страница 12: ...EN 11 Camera description 1 Lens 2 LCD display 3 Battery compartment lock 4 Battery compartment door 5 Power Activity LED 6 Zoom Volume button 7 Charging LED 8 Record Shutter button 9 Tripod mount...

Страница 13: ...EN 12 10 Microphone 11 Speaker 12 Power on off 13 Mode OK button 14 Menu button 15 Down button 16 Up button 17 Hand strap...

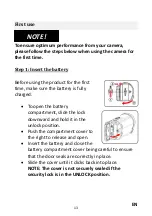
Страница 14: ...fully charged To open the battery compartment slide the lock downward and hold it in the unlock position Push the compartment cover to the right to release and open Insert the battery and close the ba...

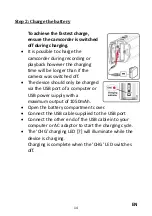
Страница 15: ...era was switched off The device should only be charged via the USB port of a computer or USB power supply with a maximum output of 1050mAh Open the battery compartment cover Connect the USB cable supp...

Страница 16: ...or up to 3 seconds to turn on the camera To turn off the camera press and hold the Power button again for up to 3 seconds Step 5 Format the microSD card To ensure the optimum performance of the memory...

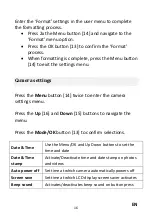
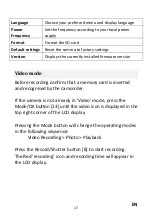
Страница 17: ...the Menu button 14 twice to enter the camera settings menu Press the Up 16 and Down 15 buttons to navigate the menu Press the Mode OK button 13 to confirm selections Date Time Use the Menu OK and Up...

Страница 18: ...ode Before recording confirm that a memory card is inserted and recognised by the camcorder If the camera is not already in Video mode press the Mode OK button 13 until the video icon is displayed in...

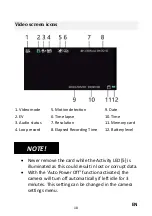
Страница 19: ...4 Loop record 8 Elapsed Recording Time 12 Battery level Never remove the card while the Activity LED 5 is illuminated as this could result in lost or corrupt data With the Auto Power Off function acti...

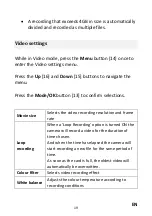
Страница 20: ...ections Movie size Selects the video recording resolution and frame rate Loop recording When a Loop Recording option is turned ON the camera will record a video for the duration of time chosen And whe...

Страница 21: ...audio Activate Mute recording of audio on videos Time lapse Time Lapse Video allows a video recording taken over a long duration to be compressed into a video with just a few minutes playing time thu...

Страница 22: ...EN 21 Photo screen icons 1 Photo mode 6 Self timer 11 Date 2 ISO 7 Burst 12 Time 3 EV 8 Time lapse 13 Memory card 4 White balance 9 Resolution 14 Battery 5 Quality 10 Shots remaining...

Страница 23: ...hotos in repetition until the shutter button is pressed to stop the sequence The time taken between each photo can be set in the menu option Self timer With the Photo Timer turned ON the camera automa...

Страница 24: ...e the shutter button is pressed to take a photo Metering Metering evaluates the light of a scene to determine the correct shutter speed aperture or ISO Average Metering uses light information from the...

Страница 25: ...start video playback or view a photo Use the Zoom button 6 to adjust the volume during playback During video playback use the Down button 15 to fast forward playback 2X 4X 8X Use the Up button 16 to r...

Страница 26: ...the Mode OK button 13 to confirm The camera will then start the slideshow automatically If the slide show does not start automatically press the Mode OK button 13 Press the Mode OK button 13 to pause...

Страница 27: ...n 14 and press the Down button 15 to highlight the Protect option Press the Mode OK button 13 to enter the protect sub menu Choose whether you wish to lock unlock the currently selected single file or...

Страница 28: ...reen icons 1 Video file 8 Video resolution 2 Video file name 9 Current time display 3 Pause 10 Date of recording 4 Stop 11 Time of recording 5 Fast rewind 12 Memory card 6 Fast forward 13 Battery leve...

Страница 29: ...EN 28 10 Date of recording 14 Photo file 11 Time of recording 15 Photo file name 12 Memory card 16 Photo resolution 13 Battery level 17 Protected File 17...

Страница 30: ...o recording file size reaches 4GB of data while recording the camcorder automatically divides the recording and starts a new file Recording is not interrupted However the final recording will be compr...

Страница 31: ...nnect the camera to the USB port your computer using the USB cable supplied Open the LCD display The camcorder will automatically power on and display options for Mass Storage File Transfer or PC Came...

Страница 32: ...r as a webcam select PC Camera If your computer does not display an image from the camcorder you may need to use the camera settings on your computer to select USB Camera as the camera device being us...

Страница 33: ...HDMI output settings file playback may be limited Using the HDMI cable connect the HDMI Output on the camcorder to the HDMI Input on the TV Select the relevant HDMI Input on the TV Enter Playback mod...

Страница 34: ...m Sensor 13MP CMOS Sensor ISO Auto 100 200 400 800 1600 Lens Fixed F 2 6 f 7 0 mm Focus range 1 m infinity Waterproof Waterproof up to 5m Microphone Speaker Built in mic and speaker Memory card Suppor...

Страница 35: ...sec White balance Auto Daylight Cloudy Tungsten Light Fluorescent Exposure 3 0EV 3 0EV Metering Average Center weighted Spot Photo quality Fine Normal Economy Photo sharpness Soft Normal Strong Record...

Страница 36: ...leted Auto power off function enabled Charge battery Adjust auto power off settings Files not saved Power interruption while saving Charge battery when CHG LED 7 turns red Problem focusing Subject out...

Страница 37: ...camcorder Battery Storage bag USB cable HDMI cable Manual English German Operating instructions in other languages are available for download at https bit ly 3JtIJuI or www easypix info download manu...

Страница 38: ...e recyclable waste collection Waste electrical and electronic equipment and or batteries disposed of by users in private households in the European Union This symbol on the product or on its packaging...

Страница 39: ...cycled in a way that protects human health and the environment Warning regarding batteries Do not disassemble or hit the battery Be careful not to short circuit the battery Do not expose the battery t...

Страница 40: ...65 EU EU 2015 863 The full text of the EU Declaration of Conformity can be found in German and English at www easypix info download pdf doc wdv5630 pdf UKCA Declaration of conformity We hereby declar...

Отзывы: