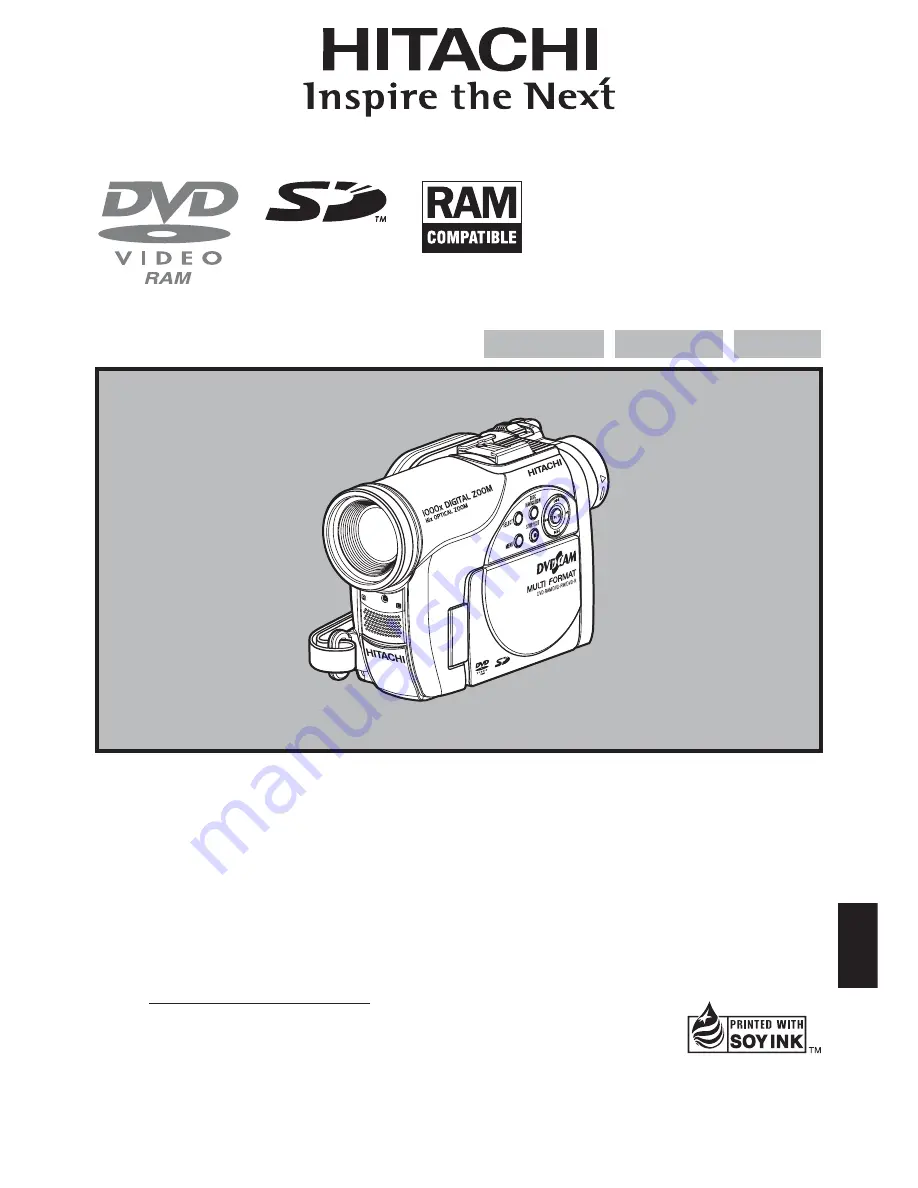
background image

English

QR35746 ©Hitachi, Ltd. 2006

Printed in Japan OR-M(I)

Instruction Manual

This manual was printed
with soy based ink.

Printed on recycled paper

DVDCAM PC Software Support Center

URL http://dvdcam-pc.support.hitachi.ca/

DZ-BX31E (UK)/DZ-BX31E (AU)

DVD-RAM

DVD-RW

DVD-R

Instruction manual

To obtain the best performance and ensure years of
trouble-free use, please read this instruction 
manual completely.

DZ-BX31E

HITACHI EUROPE LTD.
Consumer Affairs Department
PO Box 3007
Maidenhead
SL6 8ZE
UNITED KINGDOM
Tel: 0870 405 4405
Email: consumer.mail

    @Hitachi-eu.com

HITACHI AUSTRALIA LTD.
Level3,82
Waterloo Road
North Ryde N.S.W 2113
Tel: +61-2-9888-4100
Fax: +61-2-9888-4188

Содержание DZ-BX31E

Страница 1: ...UK DZ BX31E AU DVD RAM DVD RW DVD R Instruction manual To obtain thebestperformance andensure years of trouble free use please read this instruction manual completely DZ BX31E HITACHI EUROPE LTD Consumer Affairs Department PO Box 3007 Maidenhead SL6 8ZE UNITED KINGDOM Tel 0870 405 4405 Email consumer mail Hitachi eu com HITACHI AUSTRALIA LTD Level3 82 Waterloo Road North Ryde N S W 2113 Tel 61 2 9...

Страница 2: ...K HAZARD DO NOT EXPOSE THIS UNIT TO RAIN OR MOISTURE WARNING TO PREVENT FIRE OR SHOCK HAZARD USE THE RECOMMENDED ACCESSORIES ONLY CAUTION RISK OF ELECTRIC SHOCK DO NOT OPEN This symbol warns the user that uninsulated voltage within the unit may have sufficient magnitude to cause electric shock Therefore it is dangerous to make any kind of contact with any inside part of this unit This symbol alert...

Страница 3: ...reach a power point then obtain an appropriate safety approved extension lead or consult your dealer If there is no alternative to cutting off the mains plug ensure that you dispose of it immediately having first removed the fuse to avoid a possible shock hazard by inadvertent connection to the mains supply IMPORTANT The wires in the mains lead are coloured in accordance with the following code Bl...

Страница 4: ...d particularly at plugs convenience receptacles and the point where they exit from the apparatus 10 Only use attachments accessories specified by the manufacturer 11 Use only with the cart stand tripod bracket or table specified by the manufacturer or sold with the apparatus When a cart is used use caution when moving the cart apparatus combination to avoid injury from tip over 12 Unplug this appa...

Страница 5: ...fere with recording The LCD screen and viewfinder will be slightly dimmer than usual when the DVD video camera recorder is at low temperature as in cold areas or immediately after power is turned on Normal brightness will be restored when the temperature inside the DVD video camera recorder rises Hold the DVD video camera recorder correctly Do not hold the viewfinder or LCD monitor when lifting th...

Страница 6: ...se could enter video and audio that are being recorded During playback of normally recorded video and audio noise may also be present in picture and sound At worst the DVD video camera recorder could malfunction Do not expose the DVD video camera recorder to soot or steam Thick soot or steam could damage the DVD video camera recorder case or cause malfunctions Do not use the DVD video camera recor...

Страница 7: ...wing so as not to damage the data Remove battery Disconnect AC adapter charger Plug or unplug PC connection cable Remove disc or card Subject DVD video camera recorder to severe vibrations or impact Violently open or close the LCD monitor The ACCESS PC indicator will light for a while after recording is finished While it is lit do not subject the DVD video camera recorder to any vibration or impac...

Страница 8: ...g Always make a trial recording before doing actual recording to make sure that recording is normal The data that have not been stored normally because of a defect in the DVD video camera recorder cannot be restored It is recommended that you use DVD RAM disc from which recorded contents can be deleted for trial recording Do not use the DVD video camera recorder for professional applications This ...

Страница 9: ... 24 Recording Movie 46 Playing Back 55 Connecting to a TV 75 Functions Available with Disc Navigation 100 About This Manual Displays in this manual Understand that the displays are different from those you will actually see in the viewfinder or on the LCD screen Notation of cancel button Press the STOP EXIT button to stop your operation midway or return the menu screen to the preceding one The exp...

Страница 10: ...previously recorded data You can immediately play back desired recorded scenes p 98 You do not need to rewind unlike recorders using tape You can select any scene you want and immediately play it back using Disc Navigation function Use Disc Navigation to create your original movie p 117 You can delete unnecessary scenes move any scenes etc and create your original movie work Play List If you stop ...

Страница 11: ...nes of your child for example on play list of Disc Navigation function and create an original movie Then simply play back the play list and dub it on VCR or DVD recorder Up to now you had to repeatedly press buttons With a DVD you can simply play it back on this DVD video camera recorder Press the record button on VCR or DVD recorder ...

Страница 12: ...D TIME 35 Setting Up the Battery 36 CHARGING BATTERY 36 ATTACHING BATTERY TO DVD VIDEO CAMERA RECORDER 37 REMOVING BATTERY 37 BATTERY REMAINING LEVEL INDICATOR 39 EFFICIENT USE OF BATTERY 39 USING DVD VIDEO CAMERA RECORDER WITH AC ADAPTER CHARGER 40 Turning DVD Video Camera Recorder On and Off 41 Inserting and Removing Disc 42 INSERTING DISC 42 REMOVING DISC 44 Inserting and Removing Card 45 Basic...

Страница 13: ... POWER SAVE 93 TURNING RECORD LED ON OR OFF RECORD LED 94 CHANGING DISPLAY LANGUAGE LANGUAGE 94 RESETTING MENU SETTINGS TO DEFAULTS RESET 95 Disc Navigation Using Disc Navigation 96 STARTING OR TERMINATING DISC NAVIGATION 96 PLAYING BACK FROM DISC NAVIGATION SCREEN 98 SELECTING MULTIPLE SCENES 99 SELECTING CONSECUTIVE SCENES TOGETHER 99 FUNCTIONS AVAILABLE WITH DISC NAVIGATION 100 UNDERSTANDING FL...

Страница 14: ...SC 128 Others 129 DISPLAYING MOVIES OR STILLS INDEPENDENTLY CATEGORY 129 PLAYING BACK SCENES REPEATEDLY REPEAT PLAY 129 SLIDE SHOW CONTINUOUS PLAYBACK OF STILLS 130 Subsidiary Information Introduction to Optional Accessories 131 CAMERA ACCESSORIES 131 POWER SUPPLY 131 Removing Disc from Its Package 132 REMOVING AND REPLACING FROM IN ROUND DVD HOLDER 132 REMOVING DISC FROM CARTRIDGE 133 Cleaning 13...

Страница 15: ... the DVD video camera recorder from AC outlet or charge battery DC power cord When powering the DVD video camera recorder from household AC outlet use this cord to connect the DVD video camera recorder and AC adapter charger Mains lead Connect between household AC outlet and AC adapter charger AV S output cable Used when viewing the picture played back on the DVD video camera recorder on TV screen...

Страница 16: ...tical 16 zoom lens p 53 5 Lens hood p 54 Always remove this lens hood when using generally available tele conversion or wide conversion lens 6 Zoom lever p 53 Push the lever to the T side for telephoto or to the W side for wide angle 7 AV output jack p 75 8 External microphone jack p 74 9 2 5 type liquid crystal display inside p 32 9 8 7 4 5 6 Inside the cover 1 2 3 ...

Страница 17: ... p 42 Press down and release this button to open the cover of disc insertion block 15 Disc insertion block p 42 16 BATTERY EJECT button p 37 Press this button when removing the battery 17 Battery attachment platform p 37 18 Record button REC p 46 19 LOCK switch p 47 It is recommended that you set the LOCK switch to to the upper position to prevent the power switch in the position from accidentally...

Страница 18: ...m the factory 31 DISPLAY Screen display button p 49 59 Press this button to display the details of image being played back or camera setting status or switch the display off 32 CARD ACCESS indicator p 7 48 33 Volume control buttons VOL buttons p 55 71 73 To adjust the volume of sound from speaker etc 34 Card insertion block p 45 35 BLC backlight compensation button p 73 Press this button when subj...

Страница 19: ...p 23 1 Connect a power supply p 40 1 3 2 4 Mains lead AC adapter charger DC power cord To AC outlet The shape of plug varies depending on the model 2 Insert a disc p 42 1 Press down the DISC EJECT button once and release it 2 Gently open the cover until it stops 3 Push the disc against the turntable at the centre of disc insertion block to lock it until a click is heard and then close the cover of...

Страница 20: ...FF OFF Note When using an unformatted disc format initialise it on this DVD video camera recorder If unformatted disc is inserted into this DVD video camera recorder a message will appear Format the disc following the instructions on screen p 23 43 125 Initialising the DVD RAM DVD RW disc will erase all the recorded contents Make sure the contents on disc are not valuable before initialising the d...

Страница 21: ...y p 40 1 3 2 4 Mains lead AC adapter charger DC power cord To AC outlet The shape of plug varies depending on the model 2 Insert a card p 45 1 Open the LCD monitor p 32 2 Open the cover of card insertion block with power turned off 3 Put in a card 4 Insert the card all the way until it locks and then close the cover of card insertion block ...

Страница 22: ...9 indicator will turn purple 4 Press the PHOTO button all the way full press OFF O F F Note See page 23 for the cards that can be used on this DVD video camera recorder See Check 2 on p 138 if recording is not possible with 4 View the playback of recorded content on LCD monitor screen p 32 1 Press the button in recording pause status The recorded scene will be played back 2 Press the button to sto...

Страница 23: ...05 106 To play on other DVD device p 128 1 1 2 2 2 3 To use new disc or new card without formatting 4 4 To initialise and reuse Functions available Not available 1 Playable on devices that conform to either 8 cm DVD RAM or 8 cm DVD RW VR mode 2 Must be finalised see Terminology p 135 Cannot be played on some DVD players or DVD recorders 3 Some DVD devices conform to SD memory card 4 When media tha...

Страница 24: ...c this DVD video camera recorder is not compatible with that mode Note When using an unformatted DVD R or DVD RW disc it is necessary to format it on this DVD video camera recorder see page 43 Do not insert a DVD RW VF mode DVD R disc recorded on this DVD video camera recorder but not finalised into a recordable device such as a DVD recorder The recorded data may be damaged except for devices that...

Страница 25: ...r 2 0 DVD R double layered DVD R DVD ROM DVD Video RW Discs other than those with diameter of 8 cm Note Discs recorded on PC or DVD recorder may not be playable on this DVD video camera recorder If so message This disc cannot be used will appear Also blue thumbnails will appear Fig 1 on page 26 or normal playback will not be possible ...

Страница 26: ... recording This will cause recording to be interrupted for several seconds to several minutes and multiple thumbnails will be created by one recording session as shown above In this case the recordable time on disc will decrease Be careful when removing the disc since the metal of removal slot of DVD video camera recorder and disc itself may be hot Storing discs When storing disc replace it in the...

Страница 27: ...writing of data Do not use DVD video camera recorder in a place subject to static electricity or electrical noise Do not have printing done at a print lab or DPE service Note This DVD video camera recorder can play back image data recorded on other digital cameras conforming to the DCF Design rule for Camera File system standard The range of image data playable on this DVD video camera recorder is...

Страница 28: ...to approx 6 Mbps so the best quality will not be obtainable If a disc recorded is used at high temperatures normal playback may be impossible Turn the DVD video camera recorder off once wait until the ambient temperature becomes lower and then operate it again RECORDABLE STILLS PHOTOS ON DVD RAM Number of recordable stills on one side of disc Can record up to approx 999 photos If the disc still ha...

Страница 29: ... a photo recorded on DVD RAM disc in status is equal to or larger than that recorded on card using the FINE quality in JPEG Joint Photographic Experts Group JPEG is one of the photo image compression standards It is widely used in digital still cameras since JPEG files can be used on ordinary PC When this DVD video camera recorder records on DVD RAM disc in status a JPEG photo will be recorded alo...

Страница 30: ...on where you can easily operate the REC button and the Zoom lever Adjust the length of hand strap so that the DVD video camera recorder is stable when you press the REC button with your thumb Note Do not adjust the hand strap while holding the DVD video camera recorder Doing this could cause the DVD video camera recorder to fall and be damaged Caution Do not lift the DVD video camera recorder by h...

Страница 31: ...sh the both sides of cap inward and attach it over the lens Note Always keep the lens cap on when not using the DVD video camera recorder to protect the lens When recording attach the lens cap to the hand strap by hooking the tab inside the cap onto strap for comfortable shooting Pass the shoulder strap through the shoulder strap attachments Be sure to pass through the 2 slots Shorter end Longer e...

Страница 32: ...f the LCD monitor is turned 180º so the screen faces in the same direction as the lens during recording subject image will also appear in the viewfinder as a mirror image left right reversed Tilt the LCD monitor to adjust its vertical angle so that you can see the screen easily Note If no image appears on LCD monitor screen refer to Check 7 on page 138 If LCD monitor lights white refer to page 82 ...

Страница 33: ...y locked to the DVD video camera recorder no image will appear in the viewfinder VIEWING SUBJECT THROUGH VIEWFINDER 1 Pull out the viewfinder 2 Turn the dioptre control knob to adjust the focus to suit your eyesight Note If no image appears in viewfinder refer to Check 6 on page 138 If the LCD monitor is opened approximately 90º the viewfinder will be off Turn the open LCD monitor 180º so that it ...

Страница 34: ...p date time setting midway press the button 6 After setting the current date and time press the button The screen for verifying the set date will appear 7 If the displayed date and time are correct use press the 0 button to choose YES and then press the button The date and time will be set and the DVD video camera recorder will enter the recording pause status Choosing NO will restore the menu scr...

Страница 35: ...hed to the currently selected option 3 Use the 2 1 0 buttons to select the desired date display format and then press the button The menu screen for setting date will be restored and the Date Mode has been changed as you designated 4 Press the MENU button to switch off the menu screen Note If the date display format has been changed the display format during playback as well as during recording wi...

Страница 36: ...into AC outlet unplug it from the AC outlet wait a few moments and then plug it into the AC outlet again If the CHARGE indicator still does not light the AC adapter charger may be faulty Unplug it from the AC outlet and consult your dealer The AC adapter charger can be used around the world An AC plug adapter is required in some foreign countries If you need one purchase it from your local electro...

Страница 37: ...ownward until a click is heard Note Make sure that the battery is in the correct orientation Make sure that the battery is securely attached Incomplete attachment could cause the battery to fall resulting in damage REMOVING BATTERY After using the DVD video camera recorder remove the battery from it 1 While holding down the BATTERY EJECT button slide the battery upward to remove it Note For safety...

Страница 38: ...ra recorder is used if recording and recording pause are repeated at short intervals etc Note that the battery discharges faster in cold places Note See Troubleshooting on page 146 when charging is not possible The charge time will vary depending on the battery remaining level During and after charging and when the DVD video camera recorder is being used the battery will be warm but this does not ...

Страница 39: ...mera recorder remove the battery and store it in a cool dark place If you store it in a place where the temperature is high the battery life will be shortened Be especially sure not to store the battery in an environment in a closed vehicle over 60ºC Neglecting this could damage the battery Also do not store the battery in a place which is too cold such as in a refrigerator Doing so could cause co...

Страница 40: ...rger DZ ACS2 E to power the DVD video camera recorder Using other AC adapter chargers could cause electric shock or result in fire 1 Connect the mains lead to AC adapter charger 2 Plug the mains lead into AC outlet 3 Plug one end of DC power cord into the DC output jack on AC adapter charger 4 Attach the other end of DC power cord to the battery attachment platform on DVD video camera recorder 1 3...

Страница 41: ...D video camera recorder on the ACCESS indicator will light or blink to show that the DVD video camera recorder is recognising the disc or card During this time no operation such as recording can be performed After several seconds the ACCESS indicator will go out and operating the DVD video camera recorder will be possible If the ACCESS indicator does not go out refer to Check 4 on page 138 When th...

Страница 42: ...e Do not use a dirtied or scratched disc The recording side must face the inside DVD video camera recorder 4 Push the section marked PUSH CLOSE on the cover of disc insertion block to close the cover Then the DVD video camera recorder will automatically recognise the disc While the ACCESS indicator is lit do not cut off the power supply and do not subject the DVD video camera recorder to any vibra...

Страница 43: ...e side is finished recording or playback will not move automatically to the other side Remove the disc once from the DVD video camera recorder turn over the disc and insert it again for continued use The recording surfaces of double sided disc are likely to become dirtied or scratched Always make sure that there is no dirt or scratch on the recording surface facing the pickup lens and then use the...

Страница 44: ... indicated PUSH CLOSE on the cover of disc insertion block to close the cover Note Do not remove the battery or disconnect the AC adapter charger during removal of the disc or until power is completely turned off If you do the disc cover will not open If this happens reattach the battery or AC adapter charger push down the DISC EJECT button once and then release it Do not insert anything other tha...

Страница 45: ...Insert card with its terminal inward until it locks Removing Card Push the centre of card edge The card will come out so that it can be held by fingers 5 Close the cover of card insertion block Note No card is provided with this DVD video camera recorder Buy cards if you need them See page 29 for the capacity of cards and the number of recordable photos on them ...

Страница 46: ...finder close the LCD monitor before pulling out the viewfinder 4 Press the REC button The 9 mark in the viewfinder or on the LCD screen will change to the mark and recording will start During recording the recording indicator on the front of DVD video camera recorder will light Pressing REC again during recording will set the DVD video camera recorder to the recording pause status 5 When recording...

Страница 47: ...e is approximately 3 seconds See page 94 for setting of Record LED recording indicator On Off For various functions available during recording see Setting Up Camera Functions on page 81 Hitachi cannot be responsible for video and audio that cannot be recorded or edited because of any defect The power switch can be changed over even during recording but the operation will not be changed It is recom...

Страница 48: ...tre of screen first locate the subject at the centre of screen press the PHOTO button halfway down determine the composition to be recorded and then press the PHOTO button all the way down If you press the PHOTO button all the way down at one stroke without pressing it half way recording will be possible but the focus may be incorrect See SIZE AND QUALITY OF PHOTOS on page 29 for details of photos...

Страница 49: ...CCESS REM The above screen is an example for explanation It is different from the actual display 8 2 Programme AE 3 White balance A 4 EIS B 5 Manual Focus 6 Backlight compensation 1 Recording mode 11 Zoom 12 Exposure correction Warning message 13 Disc Card type 14 Movie recording quality C 7 Microphone filter 8 16 9 mode 9 Self timer 10 Recording status Movie recording time 15 Remaining space on d...

Страница 50: ...ensation ON No display Microphone filter OFF C Microphone filter ON No display 16 9 mode OFF 16 9 mode ON No display Self timer OFF D Self timer ON countdown is from 10 seconds During recording 9 During recording pause lights in green When focus locks during photo recording lights in purple No display 1 Digital Zoom Off Digital Zoom 60 Digital Zoom 1 000 only in movie recording mode No display Aut...

Страница 51: ...LAY DURING PLAYBACK on page 59 XTRA Best quality FINE High quality STD Standard quality FINE High quality NORM Standard quality ECO Number of recordable stills is prioritised REM XX MIN 4 Remaining recordable minutes during movie recording REM XX 5 Number of remaining recordable still images during still recording J full charge K L M low remaining charge The volume can be adjusted during playback ...

Страница 52: ...same direction as the lens Note If the LCD screen is set facing the same direction as the lens the LCD screen will display a mirror image left and right reversed If the LCD screen is set facing the same direction as the lens you can also view subject image in the viewfinder Although you can switch to the manual focus exposure and on screen display modes even during recording with LCD screen facing...

Страница 53: ...ITAL ZOOM button on remote control to switch the digital zoom setting Pressing the button during movie recording will switch the setting between Off 60 and 1 000 Pressing the button during photo recording will switch between Off and 60 If you set zoom to 1 000 when recording photo the digital zoom will be up to 60 When a subject is zoomed it may be momentarily out of focus When digital zoom is eng...

Страница 54: ...angle effect Filter diameter 34 mm Thread pitch 0 5 mm When attaching the optional DZ TL1 tele conversion lens or DZ WL1 wide conversion lens use the optional step up ring DZ SR3437 see page 131 1 Remove the lens hood from DVD video camera recorder and attach the step up ring over the lens 2 Remove the cap of conversion lens and screw the lens into the thread of step up ring Note Be careful not to...

Страница 55: ...the button Press the button again to restart playback Even if you stop playback midway and immediately start recording again the new image will be recorded after the last scene on disc or card the previous images will not be overwritten Image data edited on PC etc or the recorded image may not appear on this DVD video camera recorder also the recorded sound may not play back depending on the type ...

Страница 56: ...AME ADVANCE FRAME BACK SLOW PLAYBACK OF MOVIE During playback pause press the 0 or button Frame advance frame back or slow playback will start Press once Picture will advance one frame Press 0 once Picture will go back one frame Hold down Forward slow playback Hold down 0 Reverse slow playback After frame advance frame back or slow playback the DVD video camera recorder will enter the playback pau...

Страница 57: ...ng of the located scene Pressing the 1 button in the last scene on disc will set the DVD video camera recorder to the playback pause status at the last image See Check 3 on page 138 if skip playback does not operate normally PLAYING BACK STILLS Press the 2 or 1 button during playback to quickly play back stills in sequence Press 1 once To display stills one by one forward Press 2 once To display s...

Страница 58: ...nt Note If multiple scenes are selected using the Disc Navigation function or SELECT button choosing Top will jump to the beginning of selected scenes p 124 When multiple scenes are selected the total time of selected scenes will appear in the total recording time display With card the number of stills will appear at the TOP CURRENT END and GO TO indicators The cursor may not move at same pitch in...

Страница 59: ...27 No display Playback information display Recording date time 006 06 0 00 16 RAM RAM Recording mode 1 Scene No Repeat play 5 Programme No or Play List No 3 Programme or Play List 2 Counter Disc type 4 Playback operation 6 003 100 0003 Recording mode 1 Scene No File name Lock 5 Playback operation 6 Slide Show 5 1 VIDEO or PHOTO with disc Only PHOTO with card 2 Programme or Play List 3 Number of pr...

Страница 60: ...ch the cursor is positioned will be displayed across the bottom of menu No explanation on function will appear in the Normal Menu Use the 2 1 0 buttons to select a menu item and then press the button to choose the option See Operating Menu shown below for how to set the menu No menu appears during recording 1 Press the QUICK MENU button How to interpret the menu screen Camera Functions RAM RAM Qu ...

Страница 61: ...ox one minute without any operation QUICK MENU RAM RAM Qu i c k Me n u 1 6 9 O f f Me n u f o r r e c o r d f u n c t i o n s s e t u p ENTER RETURN V I DEO Mo d e F I NE RAM RAM Qu i c k Me n u Da t e Se t Me n u f o r d a t e s e t u p ENTER RETURN RAM RAM Qu i c k Me n u 1 6 9 Se l e c t t h e mo v i e q u a l i t y ENTER RETURN V I DEO Mo d e F I NE Press the button directly to choose an optio...

Страница 62: ...i c k Me n u 1 6 9 Se l e c t t h e mo v i e q u a l i t y ENTER RETURN V I DEO Mo d e F I NE RAM RAM Qu i c k Me n u 1 6 9 F I NE STD F i n e I ma g e Qu a l i t y ENTER RETURN V I DEO Mo d e XTRA RAM RAM Qu i c k Me n u 1 6 9 On O f f Re c o r d i n g b y 4 3 ENTER RETURN V I DEO Mo d e p 86 p 87 RAM RAM Qu i c k Me n u 1 6 9 O f f 1 6 9 mo d e i s s e t ENTER RETURN V I DEO Mo d e RAM RAM Qu i ...

Страница 63: ...u I t a l i a n o ENTER RETURN En g l i s h RAM RAM Qu i c k Me n u L a n g u a g e Demo Mo d e Au t o Re s e t Se l e c t d emo n s t r a t i o n mo d e s e t t i n g ENTER RETURN RAM RAM Qu i c k Me n u L a n g u a g e Au t o Demo Mo d e O f f Re s e t S t a r t S t a r t d emo n s t r a t i o n a f t e r a p p r o x 3 m i n u t e s ENTER RETURN RAM RAM Qu i c k Me n u L a n g u a g e Demo Mo d ...

Страница 64: ...e t he l a n g u a g e d i s p l a y ENTER RETURN RAM RAM Qu i c k Me n u L a n g u a g e F r a n ç a i s Demo Mo d e Es p a ñ o l Re s e t De u t s c h Ch a n g e t h e l a n g u I t a l i a n o ENTER RETURN En g l i s h RAM RAM Qu i c k Me n u L a n g u a g e Demo Mo d e Au t o Re s e t Se l e c t d emo n s t r a t i o n mo d e s e t t i n g ENTER RETURN RAM RAM Qu i c k Me n u L a n g u a g e A...

Страница 65: ... e s e l f t i me r ENTER RETURN Qu a l i t y Qu i c k Me n u Se l f T i me r On O f f ENTER RETURN Qu a l i t y Ca n c e l t h e s e l f t i me r r e c o r d i n g Qu i c k Me n u Se l f T i me r Se l e c t t h e p h o t o q u a l i t y ENTER RETURN Qu a l i t y F I NE Qu i c k Me n u Se l f T i me r NORM ECO F i n e I ma g e Qu a l i t y ENTER RETURN Qu a l i t y F I NE p 89 p 89 Qu i c k Me n u...

Страница 66: ...N Qu i c k Me n u L a n g u a g e En g l i s h Demo Mo d e Re s e t Ch a n g e t h e l a n g u a g e d i s p l a y ENTER RETURN Qu i c k Me n u L a n g u a g e F r a n ç a i s Demo Mo d e Es p a ñ o l Re s e t De u t s c h Ch a n g e t h e l a n g u I t a l i a n o ENTER RETURN En g l i s h Qu i c k Me n u L a n g u a g e Demo Mo d e Au t o Re s e t Se l e c t d emo n s t r a t i o n mo d e s e t ...

Страница 67: ... i c k Me n u E f f e c t Co p y Co p y t h e s e l e c t e d p h o t o t o c a r d ENTER RETURN Ed i t ETC RAM RAM Qu i c k Me n u E f f e c t De l e t e Co p y D i v i d e s c e n e ENTER RETURN Ed i t D i v i d e ETC RAM RAM Qu i c k Me n u E f f e c t De l e t e Co p y De l e t e s e l e c t e d s c e n e ENTER RETURN Ed i t D i v i d e p 105 p 110 p 107 p 103 ETC RAM RAM Qu i c k Me n u Fo r ...

Страница 68: ...e l e c t e d s c e n e ENTER RETURN Ed i t D i v i d e ETC RWVR Qu i c k Me n u E f f e c t Fa d e Sc e n e e f f e c t i s s e t u p ENTER RETURN Ed i t ETC RWVR Qu i c k Me n u E f f e c t Fa d e Ad d f a d i n g t o t h e b e g i n n i n g a n d o r e n d o f s c e n e ENTER RETURN Ed i t p 105 p 107 p 103 ETC RWVR Qu i c k Me n u F i n a l i z e D i s c Fo r ma t D i s c ENTER RETURN Me n u f...

Страница 69: ...c k Me n u Re p e a t P l a y O f f Se l e c t t h e r e p e a t p l a y s e t t i n g ENTER RETURN ETC RWVR Qu i c k Me n u Re p e a t P l a y On O f f Ca n c e l r e p e a t p l a y ENTER RETURN p 129 ETC R R Qu i c k Me n u ENTER RETURN F i n a l i z e D i s c Me n u f o r d i s c ETC R R Qu i c k Me n u F i n a l i z e DVD R d i s c ENTER RETURN F i n a l i z e D i s c p 128 ETC R R Qu i c k M...

Страница 70: ...u f o r s c e n e Qu i c k Me n u De l e t e s e l e c t e d p h o t o ENTER RETURN De l e t e Qu i c k Me n u Fo r ma t Ca r d ENTER RETURN Me n u f o r c a r d Qu i c k Me n u Fo r ma t Ca r d Ca r d Fo r ma t ENTER RETURN Qu i c k Me n u S t a r t ENTER RETURN S l i d e s h ow o f a l l s c e n e s Qu i c k Me n u S t a r t S t a r t s l i d e s h ow ENTER RETURN p 103 p 125 p 130 ...

Страница 71: ...ton during recording MF will appear on the screen 2 Press the zoom lever to T control side to zoom in on subject 3 Use the buttons to adjust the focus while viewing the image in the viewfinder or on the LCD screen Note Pressing FOCUS will alternate between manual focus and auto focus With auto focus no indication will appear on the screen Be sure to zoom in on your subject before manually focusing...

Страница 72: ...not in the centre of screen Objects that are far and near at the same time Objects with little variation in brightness such as white wall Objects moving rapidly Dark objects Objects lit by neon sign spotlight etc which glares or emits strong light Object behind glass with water droplets dirt on it Night view ...

Страница 73: ...indication will appear on the screen The exposure setting will return to Auto when the DVD video camera recorder is turned off Compensating for Backlight 1 Press the BLC button during recording The backlight correction icon will appear Note Pressing the BLC button will alternate between backlight setting between on and off The backlight setting will automatically return to off when the DVD video c...

Страница 74: ...g For details on external microphone see Major Specifications on page 151 Note Depending on the shape of its plug an external microphone cannot be plugged in while the cable is left plugged in the AV S input output terminal Unplug the AV S output cable to use the external microphone This DVD video camera recorder cannot use a plug in power type microphone Power is not supplied from this DVD video ...

Страница 75: ...is may cause howling see Terminology p 135 from the TV speakers Insert the AV S output cable plugs into jacks straight Obliquely inserting them could damage the jacks If your TV has an S VIDEO input jack you can connect the S VIDEO plug to it To AV output jack AV S output cable provided To video audio input jacks Red Yellow White To S VIDEO input jack S VIDEO VIDEO AUDIO L R VIDEO AUDIO L R VIDEO ...

Страница 76: ...ng an image on TV screen However if you use a Hitachi VCR the remote control may inadvertently operate the VCR if it is near the DVD video camera recorder To prevent this set the remote control code of the VCR to a position other than VCR2 Information that the DVD video camera recorder is recording will appear on the TV screen You can also display only part of information or switch off the display...

Страница 77: ...ised disc Note Use this DVD video camera recorder to finalise the DVD R disc recorded on the DVD video camera recorder 2 Insert the disc into the DVD player and play it back See the instruction manual for DVD player Note Do not insert a DVD RW VF mode DVD R disc that has not been finalised into any DVD recorder The disc may be unusable except for devices that allow playback of a DVD R disc not fin...

Страница 78: ... the speaker If the volume is too high noise may enter the dubbed image It is recommended that you use Disc Navigation to create a play list including the scenes to be dubbed among the scenes recorded on this DVD video camera recorder p 117 Be sure to use the AC adapter charger to power the DVD video camera recorder from AC outlet to prevent battery power from shutting off during recording on anot...

Страница 79: ...a menu item and then press the button to choose the option See page 61 for the setting method The screens used here to explain are displayed when DVD RAM disc is used Some items will not appear when a DVD RW DVD R disc or card is used or when no disc is inserted No menu appears during recording Menu screen for setting Camera Functions Spo r t s Por t r a i t Spo t l i ght Sand Snow Low L i gh t Au...

Страница 80: ...set p 95 1 Displayed only in status 2 Not displayed with DVD RAM disc in status The quality mode is displayed in status p 89 3 Not displayed in or status 4 Displayed with DVD RAM disc in status or status 5 Not displayed in Quick Menu On Au t o Pr og r am AE Whi te Ba l Dig Zoom MIC F i l t er E I S ENTER RETURN 60x Of f Au t o Came r a Fun c t i ons Se t up RAM RAM VIDEO Mode F INE OSD Ou t pu t O...

Страница 81: ...fore recommended that you use a tripod in such cases If the Sports mode is used under a fluorescent light the image may flicker In this case use the Auto mode for recording 4 Auto The camera recorder automatically judges the subject and surrounding environment for optimum recording Sports Reduces blurring when recording rapidly moving subjects such as in golf or tennis Portrait Makes a subject suc...

Страница 82: ...n as the lens The LCD monitor will light white Note Use the viewfinder to check the image to be recorded The LCD monitor light allows you to record a subject up to 1 m even in a dark place An after image will appear when filming a moving subject or if camera shake occurs it is recommended that you use a tripod If a subject cannot be focused properly manually adjust the focus see page 71 Spo r t s ...

Страница 83: ...he auto white balance may not operate depending on the recording conditions If this happens set to the mode to match the recording conditions or manually set the white balance Be sure to remove the lens cap before turning the DVD video camera recorder on If the DVD video camera recorder is turned on with the lens capped the white balance will not work normally Mode Setting content On screen displa...

Страница 84: ...loured object when setting the white balance The appropriate tint cannot be set The setting on white balance Set may not be possible in a dark place Also the white balance cannot be set when the zoom bar is in the digital zoom range p 53 In such status the indicator will remain blinking Set the white balance in a bright place with Dig Zoom Off specified If the recording conditions have changed re ...

Страница 85: ... page 53 for setting on digital zoom REDUCING WIND NOISE DURING RECORDING MIC FILTER When recording sound from the microphone built into this DVD video camera recorder you can reduce wind noise in recording If MIC Filter ON is specified the low frequency components in the sound picked up by microphone will be cut off during recording This makes it easier to hear the target voice or sound during pl...

Страница 86: ...e screen mode first used with the disc for recording The movie quality setting is effective only during movie recording The setting will not be displayed during recording of stills Block like noise may appear in recorded image or the outline of subject image is distorted under the recording conditions listed below Pan the DVD video camera recorder as slowly as possible Block noise is likely to app...

Страница 87: ...press the button 3 Press the MENU button to end the setting When viewing playback on an ordinary TV screen later specify 16 9 Off Recording with 16 9 On specified will be played back on an ordinary TV with longer vertical direction of image An image recorded with 16 9 On specified will appear as follows 16 9 Off specified aspect ratio 4 3 16 9 On specified aspect ratio 16 9 8 0 0 3 0 9 2 0 0 6 3 0...

Страница 88: ...acters of dates and titles will be longer in the vertical direction on a wide screen TV and on the LCD monitor of this DVD video camera recorder When 16 9 On is specified black bands will appear across the top and bottom of LCD monitor screen except on menu or Disc Navigation screen or playback image recorded with 16 9 Off is specified The 16 9 setting is not compatible with ID 1 ID 2 To view imag...

Страница 89: ... to end the setting 4 Press the PHOTO button The recording indicator at the front of DVD video camera recorder will blink The self timer indicator will start to count down and recording will commence approximately 10 seconds later Note You can also check that self timer has been set by reviewing the on screen information To release the self timer mode choose Off on the menu screen or turn DVD vide...

Страница 90: ...he MENU button to end the setting Note The OSD Output setting will be stored in memory even when the DVD video camera recorder is turned off Even if Off is chosen the on screen information will appear during playback See page 59 for playback on screen information display Even after the on screen information is removed from the TV screen it will still appear in the viewfinder or on the LCD screen E...

Страница 91: ... button use the 2 1 0 buttons to choose Adjust on the LCD EVF Setup menu screen and then choose EVF Brightness 2 Use the 0 buttons for adjustment Press 0 The screen becomes dimmer Press The screen becomes brighter 3 Press the MENU button to end the adjustment Note The brightness setting is stored in memory even after the DVD video camera recorder is turned off Ad j us t EVF D i sp l ay ENTER RETUR...

Страница 92: ...n or viewfinder is changed the brightness or density of the recorded image itself will not change ALWAYS DISPLAYING IMAGE IN VIEWFINDER 1 Press the MENU button use the 2 1 0 buttons to choose EVF Display on the LCD EVF Setup menu screen 2 Choose On and decide it 3 Press the MENU button to end the setting Images will always appear in the viewfinder regardless of whether the LCD monitor is open clos...

Страница 93: ...a recorder on again from automatic off activated by the power save function set the power switch to OFF and then set it to or The Power Save setting will not appear in the on screen information display The Power Save setting will be stored in memory even when the DVD video camera recorder is turned off Setting Content On Beep is heard when the power switch is changed over the REC button is pressed...

Страница 94: ... LANGUAGE LANGUAGE You can change the language used to display the menu and information The following shows that English is changed to French 1 Press the MENU button use the 2 1 0 buttons to choose Language on the Initial Setup menu screen and then press the button 2 Select Français and then press the button 3 Press the MENU button to end the setting Note The language setting will be stored in mem...

Страница 95: ...en press the button The screen for verifying reset will appear 2 If you are sure that you wish to reset use the 0 button to choose YES and then press the button The setting items have now been reset to defaults 3 Press the MENU button to end the setting Note To cancel resetting midway choose NO on the screen for verification in step 2 or press the button Record LED Power S ave Be e p ENTER RETURN ...

Страница 96: ...hen DVD RAM disc is used Some items will not appear when DVD RW DVD R disc or card is used but the operation is the same 1 Press the DISC NAVIGATION button The Disc Navigation screen shown on page 97 will appear 2 Press the DISC NAVIGATION button again Disc Navigation will be terminated and the DVD video camera recorder will enter the recording pause status You can also press the button to end Dis...

Страница 97: ...screen will appear or some message will be displayed Write protected disc Finalised DVD RW VF mode DVD R disc DVD RW VF mode DVD R recorded on a Hitachi DVD video camera recorder model older than DZ BX31E MV730ME Locked card Do not leave the disc navigation screen displayed on TV to which the DVD video camera recorder is connected Doing so could damage the TV screen possibly by burning 1 Scene num...

Страница 98: ...playback pause status continues for as long as 5 minutes the Disc Navigation screen will automatically be restored Playing back photos A photo on DVD RAM disc will be displayed for approx 3 seconds When playing back photos on card playback will stop after each photo playback Note Press the button to temporarily stop playback Pressing again will start from that point If you press the button after p...

Страница 99: ...lected Note You can know the status of scenes from the colours of cursor and bargraph Pressing the button after selecting scenes will play back only the selected scenes from the beginning of each To cancel a selected scene select the scene to be cancelled and then press the SELECT button To cancel all selected scenes press the button You can also select scenes in reverse from the last scene in the...

Страница 100: ...n DVD RAM disc to card 110 Scene lock You can lock any scene so that it will not be deleted by mistake Essential scenes are thereby protected and recording another still is possible 111 Scene information display You can display information on one scene or multiple scenes such as image quality recording time etc 113 Changing title You can change the title of play list or programme 115 123 Creation ...

Страница 101: ... p 107 Skip p 108 Thumbnail p 109 Start Current p 112 Current End p 112 All p 112 Play list Switch p 118 Go To Top p 124 Play p 118 End p 124 Create p 117 Edit p 119 122 Disc Finalize Disc 4 p 128 Title p 123 Format Disc p 125 Delete p 123 Protect Disc p 126 Capacity p 126 Program Switch p 114 Update Control Info p 127 Play p 115 4 DVD RW VR mode only Title p 115 Others Category 3 p 129 All p 129 ...

Страница 102: ...102 When using card Scene Delete p 103 Lock p 111 Select p 112 Start Current p 112 Detail p 113 Current End p 112 All p 112 Go To Top p 124 Slide Show Start p 130 End p 124 Card Format Card p 125 Capacity p 126 ...

Страница 103: ...eat steps 5 and 6 to delete other scenes 7 Press the button to quit Note If you point the cursor at the scene to be deleted on DISC NAVIGATION screen and then press the DELETE button on remote control the screen in step 5 will appear To delete an unwanted part of a scene on DVD RAM DVD RW VR mode disc divide the scene first and then delete the unnecessary part see page 105 If you delete all data o...

Страница 104: ...ER RETURN RAM RAM De l e t e Ex i t Se l ec t ENTER RETURN RAM RAM S t a r t Cu r r en t Cu r r en t End A l l Go To ENTER RETURN RAM RAM End To p Edit Delete To delete selected scenes Exit To restore the Disc Navigation screen Select Start Current To select scenes from the start to the one that the cursor is on at the moment Current End To select scenes from the scene the cursor is on to the end ...

Страница 105: ...dvance are useful when designating division points Combining scenes that were divided will restore the original scene see page 106 If a special effect has been added to the original scene the IN effect will be added to the first half of scene and the OUT effect to the latter half The division point may drift before or after the designated point by approximately 0 5 seconds Since a scene with a ski...

Страница 106: ...are those of the first and last scenes to be combined Choose NO to cancel combination After Yes or No setting the Combine Scenes screen will be restored The thumbnail of the first scene will appear in the combined scene Repeat steps 5 and 6 to combine other scenes 7 Press the button to quit Note If you press the MENU button before pressing the button in step 5 the submenu will appear see page 104 ...

Страница 107: ... will be restored after a message appears Repeat steps 5 and 6 to add fade to other scenes 7 Press the button to quit The 2 and or 3 icon s will appear in the scenes for which fade in and or fade out have been set Note If a disc on which fade has been set on scene with this DVD video camera recorder is played on a DVD reorder player or the scene is captured into a PC the set fade will not be refle...

Страница 108: ...f other scenes 6 Press the button to quit A skip icon will appear in the thumbnail of any scene for which skipping has been set Releasing Skip Perform the same procedure as setting skip The skip icon will disappear and skipping of the scene will be released Note Multiple scenes can be selected for skipping p 99 If you press the MENU button before pressing the button in step 5 the submenu screen wi...

Страница 109: ... verifying switching of thumbnail will appear Choose YES and then press the button Choose NO to cancel switching of thumbnail After Yes or No setting the Change Thumbnail screen will be restored Repeat steps 5 7 to change the other scenes 8 Press the button to quit Note If you press the MENU button before pressing the button in step 5 the submenu screen will appear See page 104 A thumbnail of stil...

Страница 110: ...t steps 6 and 7 to copy other stills to card 8 Press the button to quit Note No movie can be copied If you press the MENU button before pressing the button in step 6 the submenu screen will appear p 104 See Category p 129 to check the stills recorded on DVD RAM disc You can also select multiple scenes p 99 Even if all scenes including movies are selected to be copied only stills will be copied Dat...

Страница 111: ...hange it on this screen After setting the Lock Set screen will be restored Repeat step 6 to lock another scene 7 Press the button to quit The lock icon will appear on any scene for which lock has been set To unlock the scene Select the locked scene and then use the same procedure as above to unlock the scene The lock icon will disappear and locking will be released Note If you press the MENU butto...

Страница 112: ...en selected choose the scene to be deselected and then press the SELECT button Note Up to 999 scenes can be selected Deselecting all the selected scenes at once While you are displaying the All Programs screen on which scenes have been selected press the button Scene ENTER RETURN RAM RAM Ed i t Ef f ec t Copy Se l ect De t a i l ETC S t a r t Cu r r en t Cu r r en t End A l l 006 011 Al l Programs...

Страница 113: ...displayed with a DVD RAM DVD RW DVD R finalised disc that was recorded on another device 4 May not appear if the loaded card does not comply with DCF 5 Number of pixels on still in horizontal direction This may not appear with a JPEG file that does not conform to this DVD video camera recorder De t a i l Scene No 007 V IDEO F I NE 1mi n13 sec Da t e 30 9 2006 8 00 00 Sk i p Of f Fade IN None OUT N...

Страница 114: ...s the button 4 Select the programme to be displayed and then press the button The Disc Navigation screen of the selected programme will appear Note Pressing the button on the Switch Program screen will restore the Disc Navigation screen If a disc recorded on another device is loaded in this DVD video camera recorder the programme may not be a collection of recordings on the same date 9 00 10 20 11...

Страница 115: ...C NAVIGATION button 2 Press the MENU button 3 Choose Title on the Program menu screen and then press the button 4 Select the programme whose title you want to change and then press the button The screen for setting a title will appear 5 Use 2 1 0 to select a letter and then press the button The selected letter will be entered Repeat this procedure to create a title Up to 20 characters can be input...

Страница 116: ...ress the button on the screen for verifying change in title the title setting screen will be restored Double byte characters set on other devices may be displayed blank on this DVD video camera recorder Titles set on this DVD video camera recorder may not be visible on other devices Characters available for entering title You can use the SELECT button to select characters from the capital letter s...

Страница 117: ...screen see pages 99 and 112 6 When creation of a play list is complete the created play list will appear on the Disc Navigation screen Note You can also select multiple scenes p 99 Only the data on scenes is recorded on play list If you create or delete play lists the original scenes in programmes will not be erased Editing scenes on play list will not affect the scenes in programmes If the added ...

Страница 118: ...se the 2 1 0 buttons to choose Play on the PlayList menu screen and then press the button 4 Use the Start Playlist screen to select the play list to be played back and then press the button The selected play list will be played back from the first scene To cancel playback midway press the button The Disc navigation screen of the play list being played back will appear Note If Repeat Play On is spe...

Страница 119: ...mpleted the edited play list will appear Repeat steps 5 7 to add other scenes 8 Press the button The screen for verifying exit will appear Note The cursor shows the position where the scene is to be added You can also select multiple scenes p 99 Pressing in the middle of adding scenes will display the screen for verifying an exit from Edit PlayList Choose YES to exit the edition of play list Choos...

Страница 120: ...he editing screen of the play list to be edited Perform steps 2 4 on page 119 3 From the play list in lower row select the position where you wish to insert a scene 4 Select the scenes to be added from the upper row 5 Press the MENU button 6 Choose Add and then press the button Repeat steps 3 6 to add other scenes 7 Press the button The screen for verifying exit will appear Note The selected scene...

Страница 121: ...list This Select menu item is useful when selecting consecutive multiple scenes in items for adding or deleting scenes using menu on page 112 1 Press the DISC NAVIGATION button 2 Display the editing screen of the play list to be edited Perform steps 2 4 on page 119 3 Specify the first or last scene of those you wish to select and then press the MENU button To select all scenes simply press the MEN...

Страница 122: ...e scene selected in step 4 you can do it on this screen 8 Move the mark to the position where you wish to move the scene and then press the button 9 The screen for verifying move will appear Choose YES and then press the button Choose NO to cancel move After Yes or No setting the scene select screen will be restored Repeat steps 7 9 to move another scene 10Press the button to quit Note If you pres...

Страница 123: ...NU button 3 Use the 2 1 0 buttons to choose Delete on the PlayList menu screen and then press the button 4 Use the Delete Playlist screen to select the play list you wish to delete and then press the button 5 The screen for verifying deletion will appear Choose YES and then press the button Choose NO to cancel deletion After Yes or No setting the Disc Navigation screen of all programmes will be re...

Страница 124: ...cene or last scene TOP END 1 Press the DISC NAVIGATION button 2 Press the MENU button 3 Use the 2 1 0 buttons to choose Top or End on the Go To menu screen and then press the button Go To ENTER RETURN RAM RAM End ETC To p 014 014 Al l Programs PLAY RAM RAM When End is specified ...

Страница 125: ... DVD video camera recorder may not recognise some discs or cards that have been initialised on PC or a device other than this DVD video camera recorder If you choose the VR mode when initialising a finalised DVD RW VR mode the finalisation will not be released The DVD RW will be a finalised disc without any recorded data and recording will be possible on it Choosing the VF mode will release the fi...

Страница 126: ...e disc to release the protection VERIFYING REMAINING FREE SPACE ON DISC OR CARD CAPACITY You can find out how long you will be able to record on one side of disc or on card 1 Press the DISC NAVIGATION button 2 Press the MENU button 3 Use the 2 1 0 buttons to choose Capacity on the Disc or Card menu screen and then press the button 4 Press the button to quit The Disc Navigation screen will be resto...

Страница 127: ...verifying Update Control Info will appear 4 Choose YES and then press the button The message for proceeding will appear and then the Disc Navigation menu screen will be restored A black screen may appear while the message for updating is displayed Choose NO to cancel updating Note It may take time to update the control information if the disc has many recorded scenes Even if control information is...

Страница 128: ...in the DVD video camera recorder has already been finalised you cannot choose Finalize Disc The time required to finalise disc that appears on the Finalize Disc screen is only for reference The shorter the recording time on disc the longer it will take to finalise it The second and later finalisation will be faster with a disc which has previously been finalised Before You Begin Be sure to use the...

Страница 129: ...to cancel Repeat Play setting When Repeat Play is set If one scene has been specified When playback of the last scene is finished playback of all scenes will repeat from the first scene If the range for playback has been specified Playback of the scenes in that range will repeat To release Repeat Play Use one of the following 3 methods to release Choose Off in step 4 above Turn the DVD video camer...

Страница 130: ...uttons to choose Slide Show Start and then press the button When playback is finished the DVD video camera recorder will enter the playback pause status at the final still Pressing the button will restore the Disc Navigation screen Note One still is played for approx 5 seconds With slide show playback will start from the first photo on card regardless of the position of cursor If you press the but...

Страница 131: ...ion lens DZ TL1 Step up ring DZ SR3437 When using camera accessories be sure to read the instruction manuals for each accessory When attaching the wide or tele conversion lens to this DVD video camera recorder you will need the optional step up ring Attach it after removing the lens hood covering the lens p 54 Battery DZ BP7SW Battery DZ BP14SW ...

Страница 132: ... instruction sheet The following explains how to remove the discs made by Hitachi Maxell REMOVING AND REPLACING FROM IN ROUND DVD HOLDER 1 Hold the Round DVD Holder with SIDE A facing up While pushing the two release levers in the direction of arrows 1 marked on holder slowly open SIDE A of the holder in the direction of arrows 2 taking care not to drop the disc 2 Without touching the recording su...

Страница 133: ...VD video camera recorder Cleaning LCD screen and camera lens Use dry soft cloth to wipe dirt off When cleaning the LCD screen be careful not to use force scratch it or subject it to impact Doing such could cause a defect in the screen result in display unevenness or damage the LCD monitor If dust adheres to the viewfinder lens remove it using a cotton swab etc Do not rub the lens with force Doing ...

Страница 134: ... disappear To stop the demonstration midway press the button The demo mode will end when the DVD video camera recorder is turned off or the DISC EJECT button is pressed down Note You can press the DISC NAVIGATION button to stop demonstration midway The Disc Navigation screen will appear If you choose Auto the demonstration will not start if a disc is loaded with the power switch set to or or a car...

Страница 135: ...ten If recordable space remains on the disc additional recording will be possible if the disc has not been finalised DVD RAM DISC Rewritable DVD disc DVD RECORDER This device can record video and audio on any recordable DVD disc such as DVD RAM that conforms to the DVD video recording format Some DVD recorders can record on a DVD R disc conforming to DVD video format A DVD recorder that is compati...

Страница 136: ... positional relationship between the DVD video camera recorder and TV or by turning down the volume on TV INFRARED SENSOR This sensor is used to adjust the white balance LASER PICKUP BLOCK This block emits laser beam to a disc and then collects the laser beam reflected from the disc to convert it to an electric signal The block consists of a laser lens receiving element etc LINEAR PCM Audio record...

Страница 137: ...wide 2 1 mm thick and has 9 pins THUMBNAIL This refers to a reduced screen displayed on Disc Navigation in order to identify the recorded image contents VIDEO SELECTOR This device can input multiple audio and video signals and select the desired audio and video signals among those input signals to output them ...

Страница 138: ...t work well If the temperature inside the DVD video camera recorder is high normal operation may not be possible Turn the DVD video camera recorder off wait for a few moments and then turn it on again for operation Check 4 No operation can be performed because the ACCESS or CARD ACCESS indicator on this DVD video camera recorder remains lit or blinking After disc or card is inserted it takes some ...

Страница 139: ...longer up to one hour Be sure to use the AC adapter charger to power the DVD video camera recorder when repairing data Repair is not possible using a battery If a battery has been attached turn the power switch off once connect the AC adapter charger and then start repairing Data may not be repaired depending on the timing when power was turned off Data may not be repaired normally if data recorde...

Страница 140: ...c is firmly pushed against the turntable See 3 on page 145 for troubleshooting 26 42 CANNOT RECORD PHOTOS Are you using DVD RW DVD R disc You cannot record still image on DVD RW DVD R disc recordable of still images from PC Use DVD RAM disc to record still images 23 29 Cannot replace thumbnail on PHOTO scenes The thumbnail of a still cannot be changed Select a movie 109 Cannot select any more scen...

Страница 141: ...isappears and you can start to use the DVD video camera recorder 138 DISC ALMOST FULL Remaining free space on disc is less than 1 minute of video or 10 photos Delete unnecessary scenes or use another disc 28 103 Disc error has occurred Finalizing is not complete Disc error occurred during finalising and finalising failed Replace the disc See 3 on page 145 128 Disc error has occurred Format the dis...

Страница 142: ...mera recorder Initialisation will delete all data on the disc See 2 on page 145 125 Drive overheat Please retry later The temperature inside the DVD video camera recorder is too high and reading or writing of the data on disc may not be performed normally Turn the DVD video camera recorder off and wait for a while The temperature will be effectively decreased if the DVD video camera recorder is pl...

Страница 143: ...ck the surface bottom of disc and reinsert it correctly 42 43 No more scenes Play List was deleted All scenes are deleted from the play list Since a play list with no scenes cannot be supported by specifications a play list from which all registered scenes have been deselected will be deleted 120 121 Photo cannot be divided Still image cannot be divided 105 PlayLists over limit An attempt was made...

Страница 144: ...ising even a disc used on this DVD video camera recorder may be necessary initialising will erase all recorded contents on disc If this message appears try to initialise the disc If the same message still appears the disc may be damaged Use another disc 125 See 2 on page 145 26 Use AC adapter charger Finalisation is not possible when the DVD video camera recorder is powered by a battery Use the AC...

Страница 145: ...d the disc is not dirty choose repair 2 This message may also appear when dirt adheres to disc In this case do not initialise the disc Remove it and then use the provided disc cleaning cloth to clean off the dirt before using it This message may also appear when condensation occurs In this case do not initialise the disc turn the DVD video camera recorder off wait until it dries out and then turn ...

Страница 146: ...he performance of battery will deteriorate if it is used for an extended period of time or frequently Purchase a new battery 39 The CHARGE indicator on AC adapter charger is blinking Is the ambient temperature too low or too high Charge the battery in environment where the temperature is 10 30ºC The battery has possibly discharged excessively Continue charging After a while the battery will be cha...

Страница 147: ...st its angle so that LCD screen is not exposed to direct sunlight 32 33 Unevenness appears on LCD monitor screen Did you press the LCD monitor or the area around it If the LCD monitor is pressed some unevenness will occur Release your hand and leave the LCD monitor for a while Normal display will be restored Focus is not correct Is it difficult to use auto focus with your subject Focus manually 72...

Страница 148: ...ly Check the connections 75 Playback picture is momentarily interrupted Is disc scratched or does dirt or fingerprint adhere to it Clean the disc 26 No sound Is the TV volume control set correctly Adjust TV volume control and be sure to adjust the volume on TV 76 Photos on card cannot be played back This DVD video camera recorder can play back image data recorded on SD memory card in other digital...

Страница 149: ...er will not open Did you detach the battery or AC adapter charger before setting the power switch to OFF Is the battery charged Connect a charged battery or the AC adapter charger and then press the DISC EJECT button to remove the disc Did the DVD video camera recorder turn off because the battery remaining level ran out Connect a charged battery or the AC adapter charger set the power switch to O...

Страница 150: ...eral seconds All settings will be reset Note Do not press the reset button with undue force List of setting items Some items will not appear depending on the disc or card inserted Item Default Setting method Camera Functions Setup Program AE Auto p 81 White Bal Auto p 83 ElS On p 85 Dig Zoom 60 p 53 MIC Filter Off p 85 Record Functions Setup VIDEO Mode FINE p 86 Quality FINE p 89 16 9 Off p 87 Sel...

Страница 151: ...rding mode Movie with sound Still with DVD RAM disc SD memory card Maximum recordable time per side DVD RAM DVD RW DVD R disc approx 18 minutes XTRA approx 30 minutes FINE approx 60 minutes STD Maximum number of recordable stills DVD RAM disc per side approx 999 If movies and stills are mixed on one disc the recordable number will decrease SD memory card when using 32 MB card approx 232 in FINE mo...

Страница 152: ...em Lithium ion Power consumption When recording with LCD monitor off DVD RAM disc used approx 3 2W in FINE mode Dimensions W H D approx 51 89 133 mm excluding projections Operating temperature humidity 0 40ºC less than 80 Storage temperature 20 60ºC Weight approx 450 g without battery or disc Total weight when recording approx 505 g Provided accessories AC adapter charger Battery AV S output cable...

Страница 153: ...3 Delete scene 103 120 Demo Mode 134 Detail scene 113 Dig Zoom 53 Dioptre control 33 Disc 24 Available 24 Capacity 28 Finalise 128 Format 125 Handling 26 Protect 126 Update Control Info 127 DISC EJECT button 42 Display 49 Information LCD 49 Scenes information 113 Viewfinder 33 Divide 105 DVD player 77 135 DVD R 24 DVD RAM 24 DVD recorder 77 135 DVD RW 24 DVD video format 135 DVD video recording DV...

Страница 154: ...9 RESET 95 Reset settings 95 system 150 RESET button 150 S Sand Snow Programme AE 81 Scene Combine 106 Delete 103 Detail 113 Divide 105 Fade 107 Move 122 Select 112 Skip 108 Searching for image 56 Select Scene 99 SELECT button 99 Self Timer 89 Shoulder Strap 31 Skip Scene 108 Skip playback 57 Slide Show 130 Sports Programme AE 81 Spotlight Programme AE 81 STD VIDEO Mode 86 Stereo microphone 47 Sub...

Страница 155: ...witched on when it is unattended unless it is specifically stated that it is designed for unattended operation or has a standby mode Switch off using the switch on the equipment and make sure that your family know how to do this Special arrangements may need to be made for infirm or handicapped people DON T use equipment such as personal stereos or radios so that you are distracted from the requir...

Страница 156: ...metal objects which may cause a short circuit resulting in leakage or in extreme cases fire or even an explosion ALWAYS Removedeadbatteriesfromequipmentand all batteries from equipment you know you are not going to use for a long time Otherwise the batteries may leak and cause damage NEVER Never dispose of batteries in fire as this can cause them to explode Please put dead batteries in with the no...

Страница 157: ... consommateur hitachi eu com HITACHI EUROPE S A 364 Kifissias Ave 1 Delfon Str 152 33 Chalandri Athens GREECE Tel 1 6837200 Fax 1 6835694 Email service hellas hitachi eu com HITACHI EUROPE S A Gran Via Carlos III Trade Torre Este 08028 Bar 86 Planta 5a Edificios celona SPAIN Tel 93 409 2550 Fax 93 491 3513 Email atencion cliente hitachi eu com HITACHI EUROPE AB Box 77 S 164 94 KISTA SWEDEN Tel 08 ...

Отзывы: