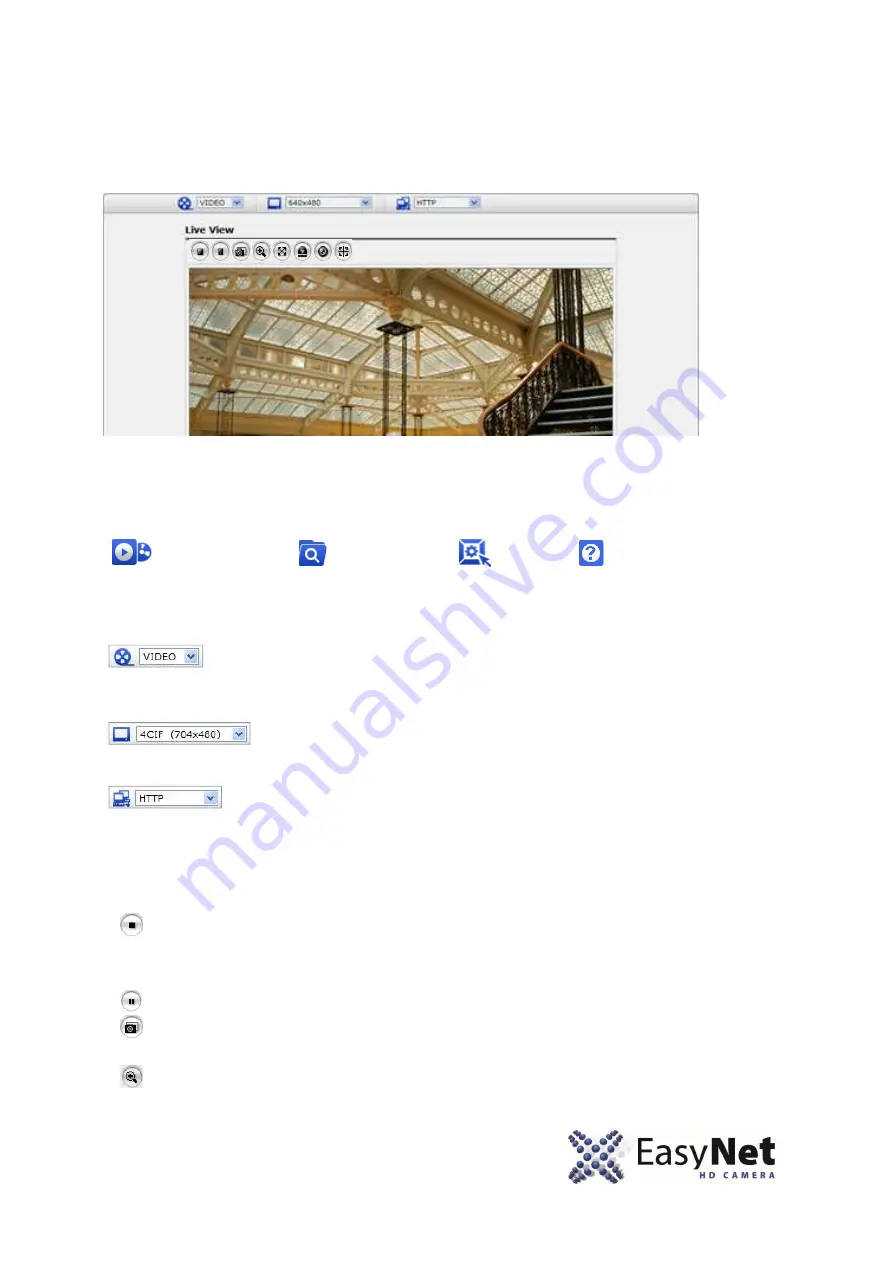
background image


15


3.5 Live View Page 


The live view page comes in several screen modes like 1920x1080, 1280x1024, 1280x720, 704x480(576), 
640x480, 352x240(288), and 320x240. Users are allowed to select the most suitable one out of those modes. 
Please adjust the mode in accordance with your PC specifications and monitoring purposes. 


1) 

General controls 


Live  View Page       Search & Playback Page      Setup Page       Help Page 


      The video drop-down list allows you to select a customized or pre-programmed video 

stream on the live view page. Stream profiles are configured under Setup > Basic Configuration > Video & 
Image. For more information, please see “3.5.1 Basic Configuration > Video & Image” of User’s Manual. 


                                   The resolution drop-down list allows you to select the most suitable one out of video 
resolutions to be displayed on live view page. 


                             The protocol drop-down list allows you to select which combination of protocols and 
methods to use depends on your viewing requirements, and on the properties of your network. 

 
2) 

Control toolbar 
The live viewer toolbar is available in the web browser page only. It displays the following buttons: 


The Stop button stops the video stream being played. Pressing the key again toggles the  


start and stop. The Start button connects to the network camera or start playing a  


video stream. 


The Pause button pause the video stream being played. 


The Snapshot button takes a snapshot of the current image. The location where the 


image is saved can be specified.  


The digital zoom activates a zoom-in or zoom-out function for video image on the live 


screen. 

Содержание EC-2M-B3N-ONV

Страница 1: ...a mistaken operation or malfunction of the cameras peripheral devices or unapproved unsupported devices Warning and Caution WARNING TO REDUCE THE RISK OF FIRE OR ELECTRIC SHOCK DO NOT EXPOSE THIS PRO...

Страница 2: ...Y CAUSE HARMFUL INTERFERENCE TO RADIO COMMUNICATIONS OPERATION OF THIS EQUIPMENT IN A RESIDENTIAL AREA IS LIKELY TO CAUSE HARMFUL INTERFERENCE IN WHICH CASE THE USER WILL BE REQUIRED TO CORRECT THE IN...

Страница 3: ...t of the obsolete outlet Protect the power cord from being walked on or pinched particularly at plugs convenience receptacles and the point where they exit from the equipment Only use attachments acce...

Страница 4: ...tallation 8 2 2 Connection Cable 9 2 3 Using Service Monitor Port and Wire Controller 10 2 4 Resetting to the Factory Default Settings 11 3 Program and Operation 12 3 1 Detecting IP Cameras with IP Ca...

Страница 5: ...ts 1 1 Key features Brilliant video image utilizing H 264 video compression Triple network streams simultaneously in Full HD 1920x1080 CIF 320x240 and MJPEG 320x240 for increased flexibility depending...

Страница 6: ...tion Before installing the camera please make sure that all of the following items are included in the box 1 EC 2M B3N ONV HD Camera 2 Installation Guide 3 Mounting Template Sheet 4 Service Monitor Ca...

Страница 7: ...7 1 Introduction 1 3 EC 2M B3N ONV HD Camera Dimensions...

Страница 8: ...to the wall or ceiling using the supplied camera mounting bracket 2 Installation and Configuration Secure the HD camera to the wall or ceiling using the supplied camera mounting bracket Secure the HD...

Страница 9: ...ack Service Monitor Port 2 Black Ethernet RJ 45 port compatible with 10 100Mbps having PoE functionality Modular Jack 3 Red DC12V White GND Main Power 2pin terminal DC12V 500mA 6 0W 4 Pink Alarm In Ye...

Страница 10: ...sed for two purposes 1 Using handheld service monitor you can determine where the camera is pointing towards 2 Change Camera ID and IP Address On rare instances if you must you can change the Name or...

Страница 11: ...Cat6 network cable if it is connected to Power over Ethernet 2 Remove the rear cap of the camera 3 Press and hold the Reset button with a straightened paperclip while reconnecting the power 4 Keep the...

Страница 12: ...NUVICO IP Cameras on your network So please http www nuvico com downloadfile htm id 430 The factory default IP is 192 168 30 220 Connect the Network Camera to the network and power up Start All Progra...

Страница 13: ...on The Network Camera can be used with Windows operating system and web browsers browsers are Internet Explorer Safari Firefox Opera and Google Chrome with Windows To view streaming video in Microsoft...

Страница 14: ...which is displayed when the network camera is accessed for the setup at the first time Enter your admin name and password set by the administrator Note The default administrator username and password...

Страница 15: ...resolution drop down list allows you to select the most suitable one out of video resolutions to be displayed on live view page The protocol drop down list allows you to select which combination of pr...

Страница 16: ...m remotely via network readjusts focus automatically provides several images and video stream formats Your requirements and the properties of your network will determine the type you use Network Camer...

Страница 17: ...tup in the top right hand corner of the Live View page Click on this page to access the online help that explains the setup tools When accessing the Network Camera for the first time the Admin Passwor...

Отзывы: