background image

To order parts and supplies: 800.343.9353  >>  eastwood.com 

9

•  Pre-plan the piece to be formed 

by making a template out of 
medium-bodied cardboard or 
manila folder material. 

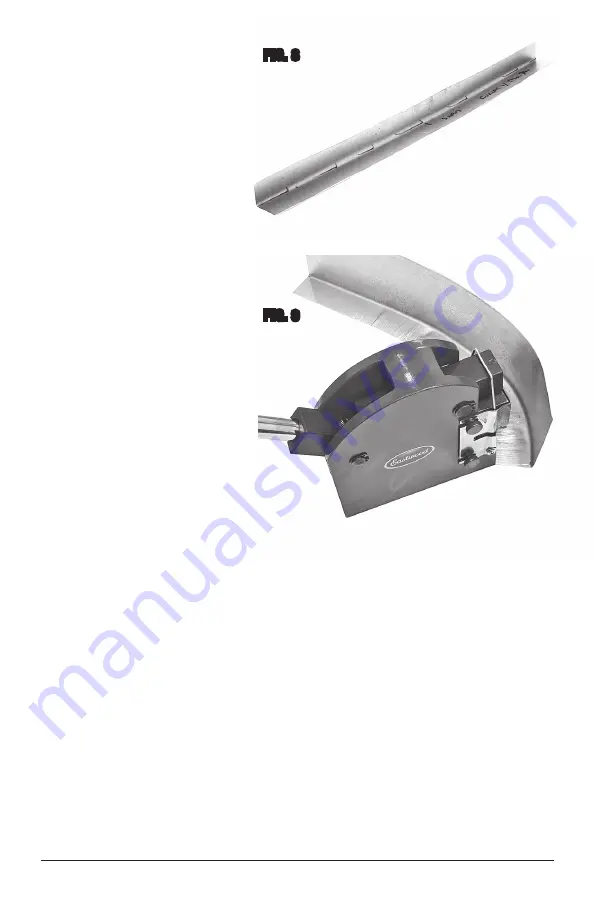
•  Before fabricating on the 

Shrinker Stretcher, pre-bend 
the metal to be formed to a 
90˚ angle along its length on a 
sheet metal brake (The #14042 
Eastwood Versa Bend 20 Inch 
Offset Sheet Metal Brake works 
well), creating a maximum 
flange depth that is no greater 
than 1” 

(Fig 8)

.

•  Tracing the outline of the piece 

to be formed from template to 
metal is critical to achieving 
a good initial fit with minimal 
adjustments 

(Fig 8)

.

•  Make multiple passes by work-

ing no more than 1/4” from the 
edge of the metal piece first 
then going deeper into the jaws 
with each successive pass. This 
“breaks down” the maximum 
resistance and permits easy 
and accurate working thereafter 

(Fig 9)

.

•  Always work the piece a little at 

a time moving the piece through 
the Jaws along its entire 
planned length so that each 
area is exposed to the Jaws 
numerous times rather than 
trying to shrink or stretch  
“all in one bite”.

FIG. 8

FIG. 9

Содержание 51088

Страница 1: ...SHRINKER STRETCHER COMBO SET INSTRUCTIONS Item 51088...

Страница 2: ...r inside curves use the stretcher to expand metal for outside curves CONTENTS 2 Housings 1 Set of Shrinker Jaws installed in Housing 1 Set of Stretcher Jaws installed in Housing 8 M4 x 0 70 x 8mm Thum...

Страница 3: ...uld inflict serious personal injury or property damage Always work in a clean uncluttered environment Be sure there is sufficient working room around the tool to allow for safe handling of various len...

Страница 4: ...Also inspect Shrinker Stretcher components for looseness or damage The Shrinker Stretcher consists of heavy metal components which can present a hand finger pinch hazard and cause potentially serious...

Страница 5: ...is strongly recommended Use 2 3 8 16 x 1 bolts not included and washers to secure base to an optional 20357 Base Plate for vise mounting or drilled work surface Fig 3 FIG 2 FIG 3 FIG 1 The optionally...

Страница 6: ...techelp eastwood com ASSEMBLY Place Handle into bore of the Fulcrum Lever so that the an nular groove is positioned under the Set Screw FIG 4 Using a 3mm Hex Key not included tighten Set Screw in Fulc...

Страница 7: ...M4 x 0 70 x 8mm Thumb Screws each REMOVING JAWS Loosen Do Not Remove Jaw Thumb Screws 2 per side FIG 6 Pull Jaws away from Body and slide Wire Bail off the Actuating Bar FIG 7 ATTACHING JAWS Slide Ja...

Страница 8: ...s or any other devices which would add additional length to the Handle to increase bending force This will exceed the design limits of the tool and can result in severe injury and or component failure...

Страница 9: ...1 Fig 8 Tracing the outline of the piece to be formed from template to metal is critical to achieving a good initial fit with minimal adjustments Fig 8 Make multiple passes by work ing no more than 1...

Страница 10: ...l between them as the hardened gripping teeth of the jaws will be permanently damaged The Shrinker and the Stretcher Jaws are toothed to allow them to grip and push inward toward the center together t...

Страница 11: ...ng Teeth Brushing with a brass or stainless steel wire brush is highly recommended Check tightness of all hardware Check operation for binding Lubricate sliding parts and pivot points periodically wit...

Страница 12: ...wood com PDF version of this manual is available at eastwood com The Eastwood Company 263 Shoemaker Road Pottstown PA 19464 USA 800 343 9353 eastwood com ADDITIONAL ITEMS 51437 Replacement Shrinker St...

Отзывы: