background image

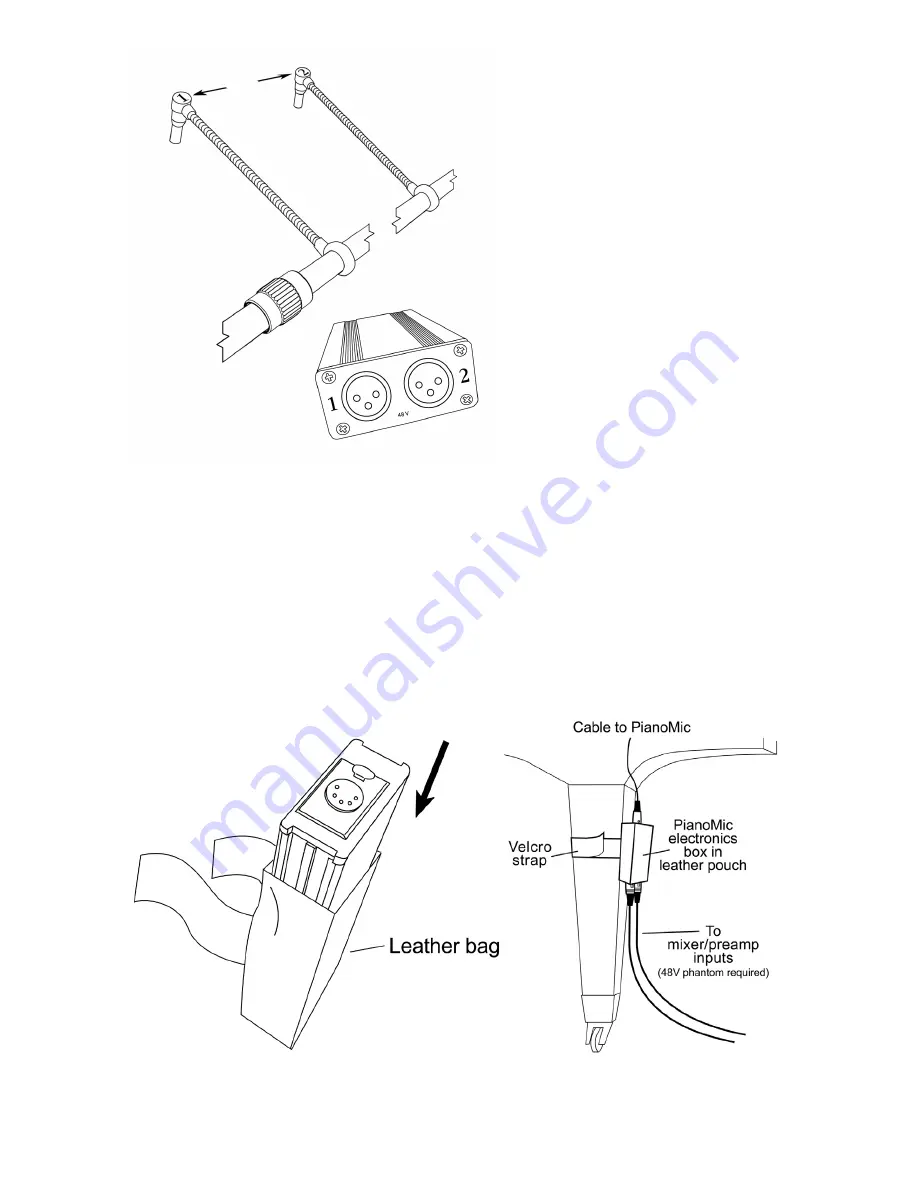
via  a  5-pin  XLR  connector.  The 

bottom of the electronics box has 

two  XLR-3  connectors  that  will 

connect the microphone outputs to 

the preamp inputs of your mixer.

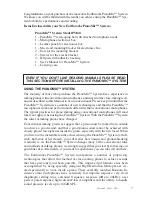
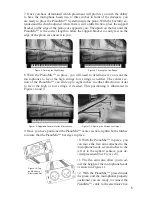
13. Notice that the top of each 

microphone head has a number. 

These numbers correspond to 

the numbers on the bottom of the 

electronics box. Depending upon 

how the PianoMic™ is placed in 

the piano the high strings will be 

indicated by either the number 1 

or number 2. Once the PianoM-

ic™ has been placed, identify the 

microphone numbers on the mic 

heads for both the high and low 

strings and remember that they correspond to the numbers on the bottom of the 

electronics box. This will allow you to correctly identify the microphone signals 

for high and low strings that are connected to the preamps of your mixer. Re-

member that the PianoMic™ requires 48-volt phantom power.

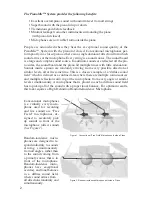
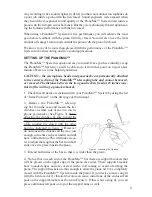
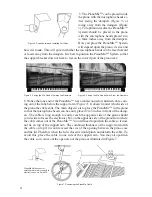
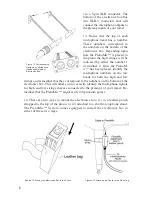
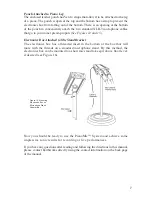
14. There are two ways to mount the electronics box: (1) in a leather pouch 

strapped to the leg of the piano, or (2) attached to a short microphone stand. 

The PianoMic™ System comes equipped to install the electronics box in 

either of these two ways.


Figure 13. Corresponding 

Numbers on Microphone 

Heads and Outputs of 

Electronics Box.

Figures 14. Placing the Electronics Box in the Pouch.

14.

15.

Figures 15. Attaching the Pouch to the Piano Leg.

6

Содержание PianoMic PM40

Страница 1: ......

Страница 2: ......

Страница 3: ...ve changed Conventional miking practices suggest that a piano must be miked from outside to achieve a good sound and that a good piano sound cannot be achieved with closely placed microphones inside t...

Страница 4: ...a classic example of a diffuse sound field which is defined as a confined area where there are multiple sound sources and multiple reflections arriving at the microphone from every angle at similar le...

Страница 5: ...iano keyboard 1 Check that all items are included with your PianoMic System by using the list of Items Enclosed on the first page of this manual 2 Remove the PianoMic telescop ing bar from the case an...

Страница 6: ...piano so that the microphone heads can be easily placed 2 to 3 inches in front of the damp ers The cable is long enough to easily reach the opposite side of the piano should you decide to locate the...

Страница 7: ...o eight inches in either direction in order to favor the high or low strings if desired This positioning is illustrated in Figures 8 and 9 9 Once you have positioned the PianoMic center section tighte...

Страница 8: ...low strings and remember that they correspond to the numbers on the bottom of the electronics box This will allow you to correctly identify the microphone signals for high and low strings that are co...

Страница 9: ...Stand Bracket The electronics box has a threaded insert in the bottom of the box that will mate with the threads on a standard microphone stand By this method the electronics box can be mounted to a...

Страница 10: ...rthworks engineers have continued to develop new innovations in microphone design such as the PianoMic System FIFTEEN YEAR WARRANTY All Earthworks products excluding accessories carry a fifteen year l...

Страница 11: ......

Страница 12: ...Made in U S A Earthworks Inc 37 Wilton Rd Milford NH 03055 603 654 6427 ext 14 www earthworksaudio com email sales earthworksaudio com Printed in U S A...

Отзывы: