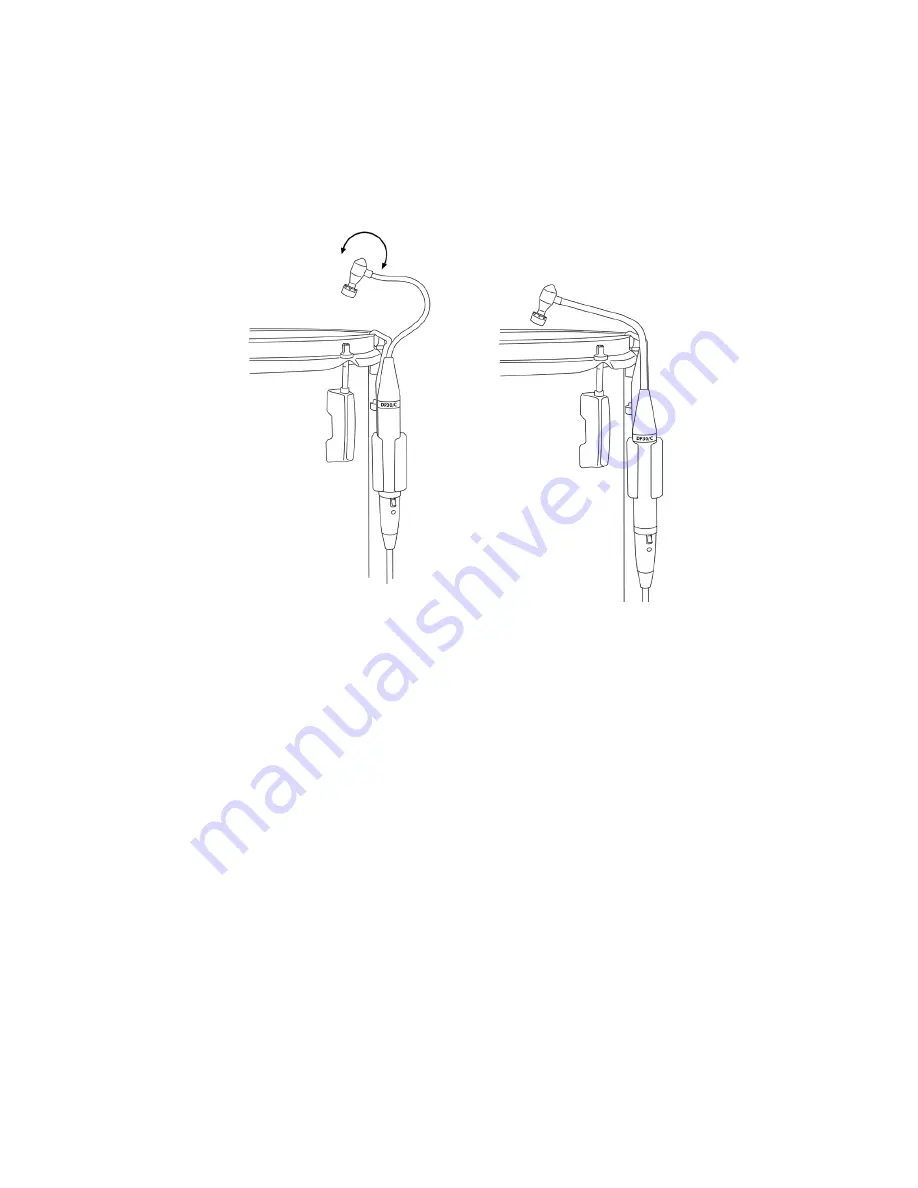
The flexible mini-gooseneck will allow you to move the microphone head
either up or down above the drumhead as well as in and out from the drum
rim. In addition, you can change the angle of the microphone head for your
desired results. Figure 6-A shows how the microphone head can be rotated
while Figure 6-B shows how the microphone head can be moved more toward
the center of the drum by changing the positioning of the mini-gooseneck.
Figure 6-A and 6-B Positioning the Microphone Head
Plug in the LevelPad, if necessary
In close miking drums, one should keep in mind that the peak sound level at
the microphone head is extremely loud. Microphones used for close miking
drums should have a sound pressure handling capability of at least 140dB SPL
with no audible distortion. The Drum Periscope™ microphones will handle
up to 145dB SPL without distortion. However, as mentioned earlier, with this
kind of high sound pressure level, it is possible for the microphone output to
be as much as +24dBV which may overload some microphone preamplifiers.
The use of the Earthworks LevelPad in the microphone line will prevent any
such distortion or overload. So, to be safe, we suggest that you first plug a
LevelPad into the mic line feeding the Drum Periscope microphone. For full
information refer to pages 3 and 4 of this manual.
Close Miking Snare Drums with the DP25/C
As previously mentioned, when close miking drums with a Drum Periscope™
microphone, never position the microphone head parallel to the drumhead. Al-
ways position the microphone head at an angle to the drumhead. It is also sug-
gested that the microphone head be positioned between 1.5 inches and 3 inches
above the drumhead.
10
A.
B.


