background image

Peripherals

42

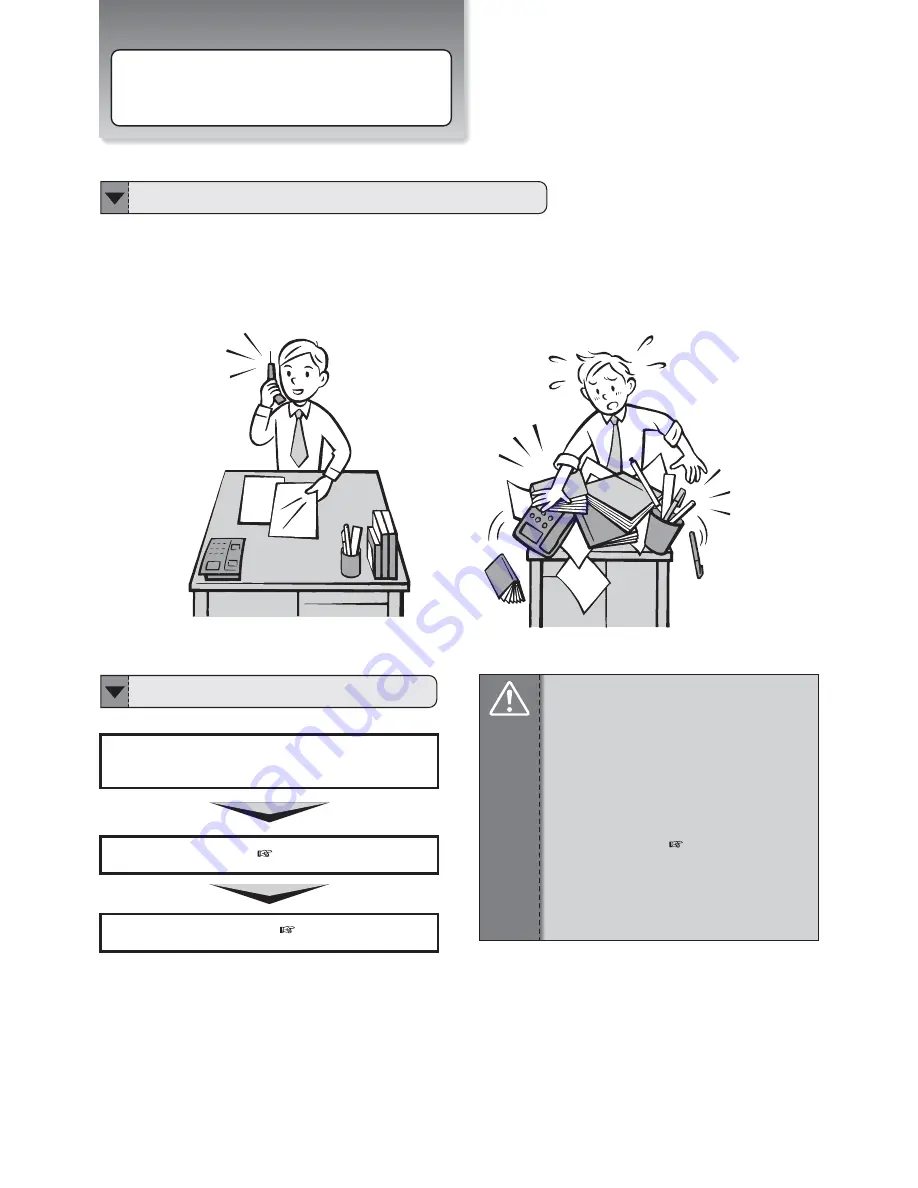
Memory, is something like the desk. When the top of the desk is wide, your job is easy to do. When entire capacity of
memory is large, the operation of application software becomes smooth.

Installing Memory Module

About Memory

When the memory is small

垸垸垸!

Attention

Pay attention when handling memory module

Before installation, please turn off the notebook

Before installation, please remove the battery
pack and AC adapter.

Memory is the extremely weak part in static
electricity. It is possible to damage it when people
or objects touch it with static electricity. Please
remove static electricity of the body before touch
the memory.

!!!!!!!!!!!!!!!!)

Page 35

*

DO NOT touch the pin of memory. It is possible
to cause memory broken by pin contact failure.

Memory is a extremely weak part, please keep
or remove it carefully.

Work Flow for Memory Installation

ϥ!

Turn off the notebook

ϥ!

Remove battery pack and AC adapter

ϥ!

Memory Installation

ΰ

Page 42

α

ϥ

Verify the memory installed

ΰ

Page 43

α

Содержание EcoBuddy10 E10V2

Страница 1: ...www earthwalk com 888 213 4900 E10V2 EcoBuddy10 ...

Страница 2: ...eripherals 34 Before Installing Peripherals 36 Connecting AV Equipments 38 Using USB Compatible Peripherals 39 Using Memory Cards 40 Installing Memory Module 42 Installing Other Modules 45 Connecting External Display 47 Please read the safety precautions mentioned on Page 3 before you operate the notebook User s Manual Windows XP Edition Set Up Your Notebook Before Operating Your Notebook Peripher...

Страница 3: ...p you note and avoid possible damage to your notebook s hardware or software or loss of your work Important notice for non operational actions or the points you must know for your operation Notice There may be differences between your notebook and the pictures shown in this manual Please accept your notebook as being correct Information in this manual is subject to change without notice Notice The...

Страница 4: ...is Manual Actual key Ξ Two methods are used to represent the window in Windows XP They are Classic View and Category View We use Category View to illustrate the operation under Windows XP Abbreviation for Windows XP or Windows In this manual Windows XP or Windows is abbreviated from Microsoft Windows XP Home Edition Rule of Presenting Windows XP Operation in This Manual How To Use This Manual Shif...

Страница 5: ...l storm ϥDO NOT use the AC adapter not included in the package Use of another type of adapter may risk fire or explosion ϥDO NOT attempt to service this product by yourself As opening or removing covers you will be exposed to the dangerous voltage or other risks ϥ When you fell the surface of the AC adapter is very hot or bad odor give off from it Please pull out the power plug immediately Continu...

Страница 6: ...ug part ϥWhen you carry the notebook please close the display lid It is possibe to break the dispplay panel by the unexpected force ϥIf an extension cord is used with this notebook make sure that the total ampere rating of the equipment plugged into the extension cord does not exceed the extension cord ampere rating ϥDO NOT place this notebook on an unstable cart stand or table DO NOT place heavy ...

Страница 7: ... specified charge time and the charge doesn t complete please stop the battery charge It may risk fire or explosion if you continue to charge the battery ϥIf the battery pack leaks gives off a bad odor generates heat becomes discolored or deformed or in any way appears abnormal during use recharging oT storage immediately remove it from the notebook and stop using it ϥDo not crush disassemble punc...

Страница 8: ...battery in fire LCD Panel and battery are consumable parts The LCD has effective pixels of 99 99 or more It may include blemishes of 0 01 or less such as a missing pixel or a pixel lit all of the time You may find slightly uneven brightness on the screen depending on Windows desktop pattern you use ϥLCD monitors are obviously more vulnerable to damage than the classic CRT Even the slightest contac...

Страница 9: ... for operating the notebook comfortably Avoid placing the notebook on a bed sofa rug or similar surface to prevent from blocking ventilations 2 2 3 4 3 4 This notebook should never be placed near or over a radiator or a heat register or under direct sunlight DO NOT operate this notebook near water for example near a sink bathtub or laundry tub DO NOT place this notebook on uneven or unstable work ...

Страница 10: ... NOT rest anything on the notebook or power cable DO NOT block or cover the opening provided for the ventilation on the notebook Correct Posture for Operating Your Notebook Please sit down before the notebook with correct posture Sit up straight in front of the notebook Adjust the display to a easy to see angle Armparallelwithfloor 8 ...

Страница 11: ...IN Jack Connect the DC plug to DC IN Jack Connect the AC power cord to the AC adapter Connect the AC power cord to an AC outlet 3 To install the battery pack Close the notebook lid and turn over it gently 1 Slide the battery pack into the slot 2 1 2 9 ...

Страница 12: ... appear Click Turn Off The notebook will be powered off later Turn off the power of peripherals connected if necessary Restart We suggest you to do Windows restart when new device driver installed or Windows is running unstably Click Start Turn off computer Restart If mouse cursor freeze or the operation is unable to continue during the process of application software please simultanely press Ctrl...

Страница 13: ...sidered to be two different letters The Windows XP desktop screen will appear later ϡ While the present user account uses the notebook also another user starts the use of the notebook simultaneously Click Start Log Off the Log Off Windows dialog box will appear Click Switch User the Welcome Screen with multiple user account icons will appear Click another user account icon Windows displays the new...

Страница 14: ...play Panel 5 Keyboard 6 Internal Microphone 4 Power Button 3 Wireless LAN Switch 8 Stereo Speaker 9 Touchpad right button 9 Touchpad left button 8 Stereo Speaker 10 Touchpad 7 Status LEDs Open the panel cover and adjust it to a easy to see angle Close the panel cover and make sure the notebook is closed well 12 ...

Страница 15: ... hands ΰ Page 23 26α 6 Internal Microphone It can be used for video conferencing voice narration audio recording and multimedia applications 7 Status LEDs Indicate the system status of the notebook ΰ Page 17α 8 Stereo Speaker The built in speaker allows you to hear audio without any additional attachment For Speaker volume down and up you can use the Fn key to increase decrease the volume 9 Touchp...

Страница 16: ...ds listed belowncan be used on this notebook ΰ Page 39 40α Memory Stick Memory Stick Pro SD MMC Attention To prevent damage to the notebook and battery pack always use the supplied power adapter May become warm to hot when in use Be sure not to cover the adapter and keep it away from your body Attention The cable which can be connected to the LAN port is the 10BASE T 100BASE X 1000BASE T standard ...

Страница 17: ...gle computer with some peripherals acting as additional plug in sites or hubs The USB also supports hot swapping function ΰ Page 38α 4 Microphone Jack It is designed to connect the microphone used for Skype voice narrations or simple voice recordings ΰ Page 37α 5 Headphone Output Jack It connects the notebook s audio out signal to amplified speakers or headphones Using this jack automatically disa...

Страница 18: ...tery Pack The notebook will be powered by the battery pack when the AC adapter is disconnected ΰ Page 18 21α 3 Battery Lock Switch The switch is used to keep the battery pack secured Move the lock to the unlocked position to insert or remove the battery pack Move the lock to the locked position after inserting the battery pack ΰ Page 21α 4 Memory Module Cover The memory module hard disk drive and ...

Страница 19: ...D The LED lights when the notebook is turned ON and blinks slowly when the notebook is in the Save to RAM Suspend mode The LED is off when the notebook is turned OFF ΰ Page 19α Wireless LAN LED When the built in WLAN is enabled the LED lights ΰ Page 29α Num LK LED Caps Lock LED HDD LED Battery LED Power LED Wireless LAN LED About Status LEDs Attention 垸When HDD LED light up please do not directly ...

Страница 20: ...e batery Connecting AC adapter and charging battery Connect the DC plug to DC IN Jack Connect the AC power cord to the AC adapter and connect the AC power cord to an AC outlet Battery LED ΰ αlights and the charge of battery starts 垸The notebook comes with a universal AC DC adapter for connecting to any 100V 240V outlets without setting switches or using power converters Different countries may req...

Страница 21: ...or and hard disk and then turns off the notebook When you restart the notebook your desktop is restored exactly as you left it It takes longer to bring your notebook out of hibernation than out of stand by Power and Battery Status LEDs Battery LEDΰΓΓα PowerLED ΰΓ α Content Battery charging Battery is fully charged Status ON OFF Battery LED Γ Content The notebook is powered on The notebook is in su...

Страница 22: ...ons that the notebook will do after the alarm Set Up Low Battery Alarm Action Click OK after complete the setting Notification Select the method of warning notification 垸It is possible also to select both notification methods 垸When you mute the speaker the sound alarm will not come out even the sound alarm is set Operation of the notebook after the alarm Decide how the notebook works after the war...

Страница 23: ...ock to switch back to the locked position Battery Lock Switch 6 Tip 5 Battery Release Latch 4 Battery Lock Switch 3 2 Removing and Installing the Battery Attention 垸DO NOT use the AC adapter not included in the package Use of another type of adapter may risk fire or explosion Do not connect the positive and negative terminals with a metal object such as wire Short circuiting may occur leading the ...

Страница 24: ...e right button When clicking the right button the shortcut menu is indicated Scroll Operation Using the fingertip to slide up or down on the grey area of the touchpad to scroll a window up or down Introducing the Touchpad Attention 垸DO NOT use something like the nib or pointed object to touch the touchpad It may cause touchpad damage 垸DO NOT operate the touchpad with wet finger Sometimes the touch...

Страница 25: ... Properties To open Search For Computers program Explanation of the Keys on a standard Windows keyboard Windows Logo Key Application Key Function Keys Application Key The Application Key functions as same as the right button on touchpad or mouse The Function Keys at the top of the keyboard provide shortcuts to do things in the Windows operating system If you are using a program such as a word proc...

Страница 26: ...s LAN Function Toggles the internal wireless LAN ON or OFF ΰ Page 29 31α LCD External Monitor Display Function Toggles between the notebook s LCD display and an external monitor in this sequence notebook LCD only CRT External Monitor only LCD CRT Clone LCD Brightness Adjust Function Decrease and Increase the display brightness Speaker Mute Function Mute the speaker Speaker Down Up Function Decreas...

Страница 27: ...rint Screen key to obtain Screen Captures Compiling Text 5 2 Insert Allows text to be inserted When insert is enabled the text inserted in a document will not overwrite any other text However when disabled text will be overwritten 6 Delete While working with text use this key to delete characters to the right of the insertion point This key can also be used to delete selected files 7 Backspace Whi...

Страница 28: ...keyboard shortcut key such as Ctrl Alt Del 14 Alt Alternate Alt is a key generally located by the space bar on keyboards This term may be used to describe a key combination such as Ctrl Alt Del The above combination means press and hold on the keyboard CTRL and ALT and DEL to perform the function in this case reboot the computer or open the close program window task manager window 15 1 Num LkΰNumb...

Страница 29: ...ed from the function key of the keyboard First pressing and holding the Fn key then pressing F8 and F9 key to decrease and increase the volume The notebook built in sound normally hear beep sound from the notebook The sound playback from the sound circuit using 16bit D A converter and the sound output from FM synthesis The sound is from the microphone connected to the microphone jack or the built ...

Страница 30: ...Slide the bar left and right selects the resolution of the screen 垸The default screen resolution of the notebook is 1024 x 600 Click the selection box to select the Color quality Click Apply Click OK 7 6 5 Tip 4 3 2 You can adjust screen resolution and color quality in Display Properties Changing Screen Resolution and Color Quality 28 ...

Страница 31: ...fect computer virus and destroy the system destruction It is customer s responsibility to do the setting of network security The customer has to sufficiently understand the result occured without setting network security The specification of Wireless LAN module ϡTransmission speed and communication range is changable They depend upon radio wave environment the connected equipment and the applicati...

Страница 32: ... Services you might be asked to download additional files that will allow your notebook to connect the network 垸If you connect to a unsecured wireless netwrok the warning message will appear Directly click Connect to connect or click Cancel to quit the dialog box After setting up the security connecting the wireless LAN again Type Network key and Confirm network key click Connect to connect wirele...

Страница 33: ... key click Next If you want to save network settings to your flash disk please choose Use a USB flash drive or Set up a network manually click Next Click Finish and the notebook will connect to a wireless LAN Sometimes setting up network is necessary Finish Setting Up Wireless LAN Press Fn F2 or push wireless LAN switch to turn off wireless LAN function and the wireless LAN LED will be off 2 Tip 8...

Страница 34: ...cables Using the Function key FN F11 refer to the key silk to turn on Bluetooth Right click or double click the Bluetooth icon on the taskbar and select the enable Bluetooth device option Tips For setting up and using the Bluetooth functionality see the help file on the Bluetooth utility software The availability of the functions depend on the configuration of notebook you bought see the Spec to s...

Страница 35: ...the user s registration picture appeared please register the prodcut You can also register the product later Click Initial webcam setup to set up YouCam CyberLink YouCam picture is appeared After setup finished when you double click CyberLink YouCam icon the CyberLink YouCam screen appears To finish YouCam operation please click the icon Look for Help The method of starting the help of YouCam is a...

Страница 36: ... External Displayΰ Page 46α Display Output Port USB2 0 Compatible Peripherals ΰ Page 38α 垸 Card Reader Writer 垸 USB Mouse 垸 CCD Camera 垸 USB Hub USB Port Memory Card ΰ Page 39 40α Memory Card Slot 垸 Memory Stick 垸 Memory Stick PRO 垸 SD Card 垸MMC ...

Страница 37: ...35 Left Side USB 2 0 compatible peripherals ΰ Page 38α USB Port Headphone ΰ Page 37α Headphone Jack Microphone ΰ Page 37α Microphone Jack ...

Страница 38: ...weak to the static electricity It is possible to damage the parts when your hands touch them Please touch the metal object such as knob of the door to remove the static electricity which has been electrified in the body before the peripheral installation Please Read the User s Guide If you install or remove the pheripherals in a wrong way it is possible to damage the peripheral Please read this ma...

Страница 39: ...ral device has already been built in Windows just install the peripheral device directly After installing the peripheral device turns its power ON In the task bar under the desktop Found New Hardware message pops up When Device Driver Is Not Built In Windows When the device driver is not built in Windows the specific driver has to be installed After installing the peripheral device turns its power...

Страница 40: ... away from the speaker or use Volume Control to reduce the level of system sound to prevent this phenomenon Connect the headphone plug to the headphone jack on the notebook The voice or sound will output from the headphone instead of speaker 垸Please purchasing the headphone with mini pin plug Connect the microphone plug to the microphone jack on the notebook This will make the notebook to record v...

Страница 41: ...instruction of the wizard until Finish button appears It means the USB connection setting is done Click Finish button Depends on what USB device you connect the software installation may be required later 4 3 USB Port ΰ α 2 Notice 垸If the wizard doesn t pop up please unplug the USB cable and plug it again after 3 seconds 垸The specific USB drivers is required if it is not built in this USB device N...

Страница 42: ... can use memory cards to store or read your files Memory Card SD SDHC MMC Memory Stick Memory Stick Pro Copyright Protection Yes Yes No Yes Yes Erasion Prevention Yes Yes No Yes Yes Memory card s insert direction SD Card MMC Memory Stick Memory Stick Pro Memory Card Slot Notice 垸The information disclosured in this manual is based on the data collected when compiled this manual Type of Memory Cards...

Страница 43: ...lease ensure the card operation is finished data reading and writing has been done 2 Tip 3 2 Inserting Memory Card 垸Each kind of card has its specific insert direction Ensure you insert the card in right direction 垸The miniSD card or the memory stick duo and so on which does not mentioned in the manual cannot be used with the notebook Before inserting the memory card please verify card types Notic...

Страница 44: ...lease remove the battery pack and AC adapter 垸Memory is the extremely weak part in static electricity It is possible to damage it when people or objects touch it with static electricity Please remove static electricity of the body before touch the memory Page 35 垸DO NOT touch the pin of memory It is possible to cause memory broken by pin contact failure 垸Memory is a extremely weak part please keep...

Страница 45: ...ick sounds ΰ α Install the memory module cover lock with the screw Install battery pack and connect AC adapter 8 7 6 5 4 3 2 Exchange Memory Notice 垸Please make sure not insert the memory in the wrong direction 垸Please make sure the notch on memory s lower part is agreeable to the convex section of the slot Notice Please do not break the nail on the right side of the memory module cover surface wh...

Страница 46: ... All Programs Accessories System Tools System Information Each system information item is showed in System Information window after click System Information Verify the value that indicates in the window 4 3 2 Confirm the Memory Installed Notice When the value of the memory indicated does not increase please verify whether memory is well installed ...

Страница 47: ...cover forward ΰ α Raise and remove the coverΰ α Remove the antenna line connected to the WLAN module Remove the screw which locks the WLAN module WLAN module is removed from the WLAN slot 7 6 Antenna Line WLAN Module 5 4 3 2 Exchange Wireless LAN Module Attention As in the same way mentioned for Installing Memory Module please handle the module gently ΰ Page 47α ...

Страница 48: ...e antenna line please connect it to the connector which MAIN is indicated in the side of the module Install the memory module cover and lock with the screw 21 Tip Antenna Line WLAN Module 9 8 Hard drive loaded with Operating system and recovery solution please contact your local reseller or customer service for Upgrade or hard drive replacement Note To remove Hard drive remove two screw and hold s...

Страница 49: ...ternal display Tip Display Output PortΰΓ α 2 Notice 垸When external display is connected Click Start click Control Panel and then pick Appearance and Themes category Click Display for the advanced setting 垸Simultaneous notebook LCD external display is only supported in the notebook LCD panel s default resolution The external display monitor LCD projector panel must be capable of displaying the same...

Отзывы: