H
OW
T
O
S
ET
U
P
I
NSTRUCTIONS
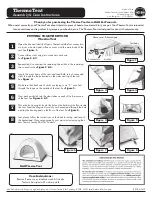
1.
With partner, slightly lift
up two adjacent outer legs 1",
depress snap button and
telescope inner legs into outer
legs. Repeat on the opposite
legs - making sure to do two
legs at a time.
9.
Lift two adjacent outer
legs up 1" and slide out the
inner legs until the snap button
locks. Repeat on the opposite
legs - make sure to do two legs
at a time.
3.
Grasp the top diamond on
opposite sides by “close“ sticker.
Lift the shelter up slightly and
shake it while stepping towards
your partner until the unit is
3/4 closed. With each partner
grasping two outer legs, push
frame together to fully close it -
Be careful not to pinch fingers.
Store shelter in cover bag.
7.
Engage the auto slider
®
at
each corner by pushing up with
one hand while holding down the
top of the leg with the other hand.
The quick pin will engage the hole.
Then pull down the hem of the top.
Repeat at all four corners.
8.
Adjust fabric tension to
desired tightness by turning center
peak poles. Twist clockwise to
lower center peak pole; twist
counter-clockwise to raise center
peak pole. Do not twist more than
three revolutions.
1.
Place your E-Z UP
®
frame
in the center of area to be shel-
tered. With partner on opposite
side, grasp two outer legs, slightly
lift off ground and step back-
wards, stopping at full arms'
length - approximately 3/4 it's
total size.
*2.
Gently unfold the fabric
top and place it over the open
frame.
*3.
Attach the top to the
E-Z UP
®
frame by matching hook
and loop strips on the top with the
hook and loop strips on the frame.
Pull the corners down fully. Push
the strips firmly together at each
corner.
*4.
To secure the top to
frame, line up grommet holes on
valance with the bolts on frame.
*5.
Unscrew top attachment
nut from bolt. Place grommeted
fabric top over the bolt, screw on
top attachment nut and tighten
until snug. Top should rotate easi-
ly - do not overtighten. Repeat
this procedure on the remaining
grommets.
*Note: First Time Attachment Is Required.
Top and frame are shipped separately to avoid damage. A first time set up
requires that top be bolted on to the frame. This first time set up takes
longer than future set ups. Once top is permanently attached to frame, set
up and take down are easily accomplished within seconds.
H
OW
T
O
T
AKE
D
OWN
6.
Grasp the bottom of the
diamond shaped area of trusses on
opposite sides. Lift up and step
backwards until shelter is fully
opened, being careful not to pinch
fingers.
2.
Release the auto slider
®
at each corner by first lifting
hem of top. With one hand, push
up on truss near slider, release
quick pin by pulling ring.
Note:
Once top is permanently attached, only perform steps 1
and 6 - 9 to set up.
Please read each step before you attempt to set up.
Save these instructions for future reference.
Lower
Raise
F
a
b
ri
c
To
p
To
p
A
tt
a
ch
m
e
n
t
N
u
t
C
o
in
S
p
a
ce
rs
Trusses


