background image

18 

  E-MU Systems

Foreign Language Warnings - French
Instructions de Maintenance

Instructions Concernant les Risques d’Incendie, 
d’Electrocution, ou de Blessures Corporelles.

ATTENTION: Lorsque vous utilisez des appareils électriques, 
certaines précautions élémentaires doivent toujours être prises, 
incluant les suivantes:

Ces instructions de dépanage sont destinées uniquement aux personnes 
qualifiées. Afin d’éviter les risques d’électrocution, n’effectuez que les opéra-
tions décrites dans ce manuel, à moins que vous ne soyez qualifiê pour cela. 
Faites effectuer toute r’eparation par une personne qualifié.

1.

Lisez bien toutes les instructions avant d’utiliser le Xtreme Lead.

2.

Afin de réduire les risques de blessures, une attention particulière est 
nécessaire en la présence d’enfants en bas âge.

3.

N’utilisez pas le Xtreme Lead dans ou près d’endroits humides - par 
exemple près d’une baignoire, d’un lavabo, dans les toilettes, dans une 
cave humide, sur un bar fréquenté, en présence d’un bull-dog en rut, ou 
dans une piscine pleine. Protégez cet appareil de tout liquide, 
éclaboussure ou fuite.

4.

Le Xtreme Lead doit être placé de façon à ce que sa position n’interfére 
pas avec sa propre ventilation.

5.

Le Xtreme Lead doit être placé loin de sources de chaleur telles que des 
radiateurs, cheminées, fours, ou groupies en chaleur.

6.

Le Xtreme Lead doit uniquement être connecté à une alimentation du 
type décrit dans les instructions d’opération et tel qu’indiqué sur 
l’appareil.

7.

Une attention particulière doit être observée quant aux objets pouvant 
tomber et aux liquides pouvant être versés sur et à l’intérieur de le 
Xtreme Lead.

8.

Le Xtreme Lead peut être équipé d’une fiche secteur polarisée (avec une 
broche plus large que l’autre). C’est une mesure de sécurité. Si vous ne 
pouvez pas brancher cette fiche dans une prise, ne neutralisez pas cette 
sécurité. Contactez plutôt un électricien pour remplacer la prise 
obsolète.

9.

Evitez de marcher sur le cordon d’alimentation ou de le coincer, parti-
culiêrement prês des prises de courant, des boitiers ‘electriques dt du 
point de sortie de l’appareil.

10.

Le cordon d’alimentation de le Xtreme Lead doit être débranché 
lorsque ce dernier n’est pas utilisé pendant une longue période.

11.

Cet appareil, combiné avec un amplificateur, des haut-parleurs, et/ou 
un casque, est capable de générer des niveaux sonores pouvant 
occasionner une perte de l’ouïe permanente. Ne travaillez pas trop 
longtemps à un volume trop élevé ou même inconfortable. Si vous 
observez une perte de l’audition ou un bourdonnement dans les 
oreilles, consultez un O.R.L.

12.

N’utilisez que les accessoires sp’ecifi’es par E-mu Systems.

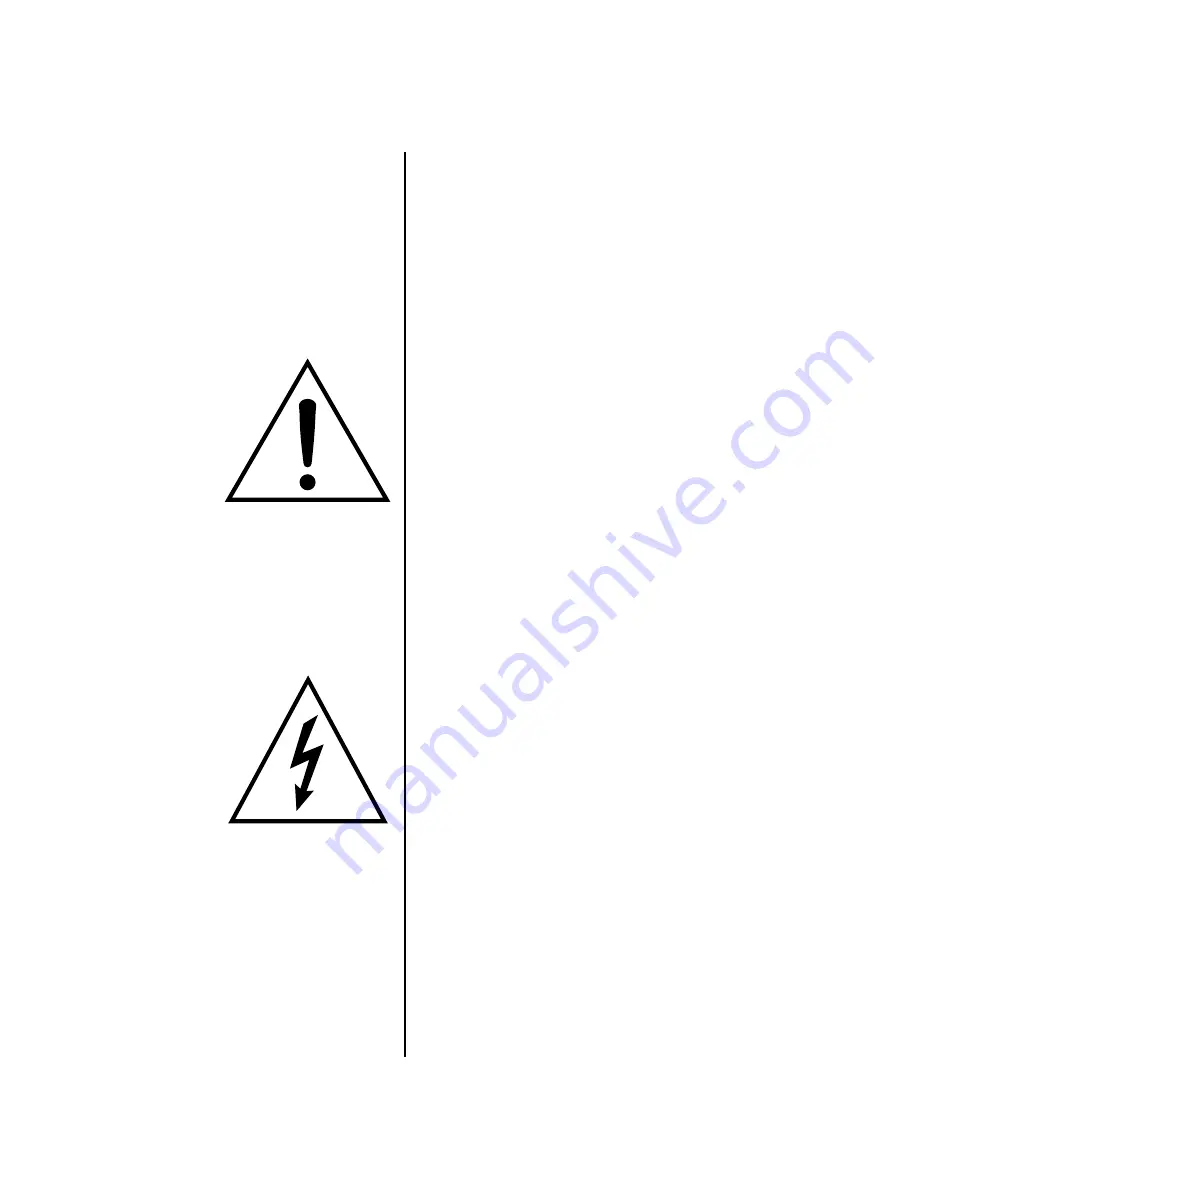
Ce symbole vous alerte de la 

présence d’instructions 

importantes d’opération et 

de maintenance dans la 

notice accompagnant 

l’appareil.

Ce symbole vous alerte de 

la présence d’un voltage 

non-isolé dangereux à 

l’intérieur de l’appareil, 

pouvant être d’une 

magnitude suffisante pour 

constituer un risque 

d’électrocution.

Содержание Xtreme Lead-1

Страница 1: ...onnection Instructions 22 Basic Setup 22 Studio Setup 23 Power Up 24 Instant Gratification 25 Playing Demo Sequences 25 Auditioning Presets 25 Selecting and Quick Editing Presets 26 Playing BEATS 28 Exploring the Master Arpeggiator 30 Multi Channel Arpeggiator 31 Basic Operations 33 Front Panel 33 Volume Control 33 Master Button 33 Edit Button 33 Control Button 33 Audition Button 34 Left Right Cur...

Страница 2: ...r Beats Menu 43 Base Tempo 44 SuperBEATS 44 BEATS Mode 46 BEATS Controllers 48 Beats Trigger Layout 50 Beats Trigger Offset 51 Beats Part Velocity 51 Beats Part Transpose 52 Beats Part Group 53 Master Riff 53 Riff Tempo 54 Riff Controllers 54 MIDI Song Start 55 Arp Riff MIDI Out 55 Arpeggiators 56 Arp Controllers 57 Master Arpeggiator Parameters 57 Status 58 Mode 58 Note Value 59 Arpeggiator Patte...

Страница 3: ...r Effects 77 Effects Mode 77 Effects Multi Mode Control 77 Master FXA Algorithm 78 FXA Parameters Decay HF Damping FxB FxA 79 FXA Send Amounts 79 Master FXB Algorithm 79 FXB Parameters Feedback LFO Rate Delay Time 80 FXB Send Amounts 80 MIDI Parameters 81 MIDI Mode 81 MIDI SysEx ID 81 MIDI Enable 82 MIDI Program Change Preset 82 Receive Program Change 83 Real time Controller Assignment 83 MIDI Foo...

Страница 4: ...ers 109 What is a Filter 110 Parametric Filters 113 The Z Plane Filter 114 Signal Flow 115 MIDI Channels Real time Controls 116 Bank Select Commands 118 Stereo Mix Outputs 119 Edit Menu 121 Preset Name 122 Four Layer Architecture 123 Selecting Layers 123 Defining Layer Parameters 124 Selecting an Instrument 124 Defining Key Range 125 Defining the Velocity Crossfade Range 128 Defining the Real time...

Страница 5: ...ters 158 FXB Send Amounts 158 Preset Patchcords 159 Initial Controller Amount 160 Keyboard Tuning 161 Preset Links 163 Preset Tempo Offset 164 Audition Riff Selection 164 Play Solo Layers 164 Programming Tutorial 165 Editing Presets 165 Changing the Instrument 165 Changing the Tuning of an Instrument 166 Chorus 167 Volume Envelope 167 Working with Filters 169 Practice Modulating 173 Troubleshootin...

Страница 6: ...tion 192 Copy Preset 192 Copy Layer 192 Copy PatchCords 193 Copy Preset PatchCords 194 Copy Arpeggiator Settings 194 Copy Arpeggiator Pattern 195 Copy Preset Bank 195 Multisetups 196 Restoring Multisetups 196 Multisetup Name 197 Saving Multisetups 197 Create Random Preset 198 Copy User Bank to Flash 199 Rename Flash SIMM 200 Duplicate Flash 201 Appendix 203 Front Panel Knob Functions 203 Presets 2...

Страница 7: ...rigger Layout 3 222 Trigger Layout 4 223 Velocity Curves 224 PatchCord Amount Chart 226 MIDI 227 Received Channel Commands 229 SysEx Specification 229 Technical Specifications 230 Warranty 231 Warranty 231 Warranty Restrictions 231 How To Obtain Warranty Service 231 Index 233 ...

Страница 8: ...viii E MU Systems Table of Contents ...

Страница 9: ...ind Samples are matched across the keyboard perfectly looped and rich in harmonic texture XL 1 contains 512 user presets and can hold literally thousands of factory presets ROM presets are automatically added when sound SIMMs are installed As an example a 32 MB SIMM may contain up to 1024 ROM presets Xtreme Lead s Sound Navigator makes it easy to find the exact sound you want It s powerful yet sim...

Страница 10: ...or by any internal or external control source The optional Turbo upgrade adds the following features to your XL 1 128 voice polyphony 4 submix analog outputs 32 MIDI channel operation 2 additional sound ROM slots S PDIF stereo digital output Once you have created your preset you can add richness to your sound using XL 1 s 24 bit stereo effects You can choose a different effects setup for each pres...

Страница 11: ...ic shock This product is equipped with a cord having an equipment grounding conductor and a grounding plug The plug must be plugged into an appropriate outlet properly installed and grounded in accordance with all local codes and ordinances Danger Improper connection of the equipment s grounding conductor can result in the risk of electric shock Check with a qualified electrician or service person...

Страница 12: ... 6 The Xtreme Lead should be connected only to a power supply of the type described in the operating instructions and marked on the product 7 Care should be taken so that objects do not fall and liquids are not spilled into the enclosure of Xtreme Lead through openings 8 This Xtreme Lead may be equipped with a polarized line plug one blade wider that the other This is a safety feature If you are u...

Страница 13: ... radio and television reception This equipment has been tested and complies with the limits for a Class B computing device in accordance with the specifications in Subpart J of Part 15 of the FCC rules These rules are designed to provide reasonable protection against such interference in a residential installation However there is no guarantee that the interference will not occur in a particular i...

Страница 14: ...ert das Risiko eines Schlages Dieses Gerät ist mit einem geerdeten Kabel und Stecker ausgerüstet Der Stecker muss in eine passende einwandfrei montierte und geerdete Steckdose in Übereinstimmung mit den örtlichen Vorschriften eingeführt werden Gefahr Unvorschriftsgemässer Anschluss des Gerätes kann zum Risiko eines elektrischen Schlages führen Im Zweifelsfalle über die ordnungsgemässe Erdung soll ...

Страница 15: ...ad nicht in der Nähe von Wasser in Betrieb nehmen z B in der Nähe von Badewannen Waschschüsseln auf nassen Gestellen oder am Swimmingpool 4 Xtreme Lead stets so aufstellen dass seine Belüftung nicht beein trächtigt wird 5 Xtreme Lead nicht in der Nähe von Hitze aufstellen wie Heizkörper offenem Feuer Öfen oder von Backöfen 6 Xtreme Lead ausschliesslich mit einem Netzgerät gemäss Bedienung sanleitu...

Страница 16: ...ierte Serviceleute gewartet werden falls A das Netzkabel beschädigt wurde oder B Gegenstände oder Flüssigkeit in das Gerät gelangten C das Gerät Regen ausgesetzt war oder D das Gerät nicht normal oder einwandfrei arbeitet oder E das Gerät stürzte oder sein Gehäuse beschädigt wurde 12 Servicearbeiten sollten nur qualifizierten Fachleuten anvertraut werden DIESE INSTRUKTIONEN AUFBEWAHREN ...

Страница 17: ...d un conducteur et d une fiche devant être branchée dans une prise appropriée et reliée à la terre en conformité avec les normes locales Danger Une connexion incorrecte peut résulter en des risques d électrocution Vérifiez avec un technicien qualifié si vous avez des doutes quant à la connexion Ne modifiez pas vous même le cordon d alimentation livré avec cet appareil s il ne rentre pas dans la pr...

Страница 18: ...mentation du type décrit dans les instructions d opération et tel qu indiqué sur l appareil 7 Une attention particulière doit être observée quant aux objets pouvant tomber et aux liquides pouvant être versés sur et à l intérieur de le Xtreme Lead 8 Le Xtreme Lead peut être équipé d une fiche secteur polarisée avec une broche plus large que l autre C est une mesure de sécurité Si vous ne pouvez pas...

Страница 19: ...ption d une radio ou d une télévision Cet appareil a été testé et est conforme aux normes de Classe A en accord avec les spécifications du paragraphe J de la section 15 des lois FCC Ces lois sont désignées pour fournir une protection raisonnable contre de telles interférences dans une installation résidentielle Toutefois il n est pas garanti qu aucune interférence n apparaisse dans des installatio...

Страница 20: ...72 23 EEC Trade Name Audio Sampler Emulator System Model Number Proteus 1000 CR Under 89 336 EEC as amended by 92 31 EEC and 72 23 EEC In accordance with EN 55103 1 1996 Emission Environments E1 E2 E3 In accordance with EN 55103 2 1996 Immunity Environments E1 E2 E3 Test information is contained in a report by Atlas Compliance and Engineering dated November 15 1999 Report No 9949EMU2KCR103 Under 7...

Страница 21: ... Lead 1 from the packaging material Take care to save the packing materials in case you need to transport the unit Check to make sure all components are included and in good condition If there are missing or damaged components contact E MU Systems immediately for replacement or repair The Xtreme Lead box should include the following components Xtreme Lead 1 rack unit Power cable Rack mounting ears...

Страница 22: ...rder to reproduce XL 1 s wide dynamic range and frequency response use a high quality amplification and speaker system such as a keyboard amplifier or home stereo system A stereo setup is highly desirable because of the added realism of stereophonic sound Headphones can be used if an amplifier and speaker system is not available Plug stereo headphones into the headphone jack located on the left si...

Страница 23: ... the headphone jack located on the left side of the front panel The Right Main output jack serves as a mono output when the Left Main plug is not plugged in The Left Main output jack is a stereo jack carrying both channels when the Right output jack is empty S C O T T S V S C O T T S V A L L E Y C A U S A A L L E Y C A U S A B B IN IN THRU THRU A A MIDI Out MIDI In MIDI Controller MIDI Keyboard Se...

Страница 24: ...anel You can turn on the XL 1 and its MIDI controller in any order When power is applied the liquid crystal display will light indicating that Xtreme Lead is operating You may have noticed that there is no 110 220 Volt power selector switch on XL 1 Xtreme Lead automatically switches itself to the proper line voltage ...

Страница 25: ...nce The screen shown below appears 4 Press the Enter button again to stop playing the sequence 5 When a demo sequence plays to the end the next demo will automati cally begin playing The screen will display the new demo name 6 With the sequence stopped press either the Master Edit or Multi button to Exit the demo sequence mode Auditioning Presets The front panel audition button allows you to hear ...

Страница 26: ... is select and play the factory provided presets Xtreme Lead comes standard with 8 banks containing 128 presets each The first four banks are USER locations that can be overwritten and used to store your own presets The presets that come stored in the USER presets are duplicated in banks 0 3 of the Xtreme Lead ROM bank so feel free to overwrite them with your own presets You won t be losing anythi...

Страница 27: ...a Entry Control knob on the front panel to select a new preset number If you turn the knob slowly the presets advance one number for each click of the knob If you spin the knob quickly the numbers advance much faster more than one number per click 3 Play the keyboard or press the Audition button and listen to the sounds made by your Xtreme Lead 4 TURN THE FOUR KNOBS on the front panel and note how...

Страница 28: ... first trigger key will work Riffs marked BTS have 16 tracks Riffs without BTS have only 1 track 3 Now try out the Wild 1 4 knobs and other bts presets If BEATS are not playing Go into the Arp Beats menu locate the screen shown below and set the parameters exactly as shown Main Groove Alt Groove HiHat 1 Kick 2 Kick 1 Snare 2 Perc 2 Perc 4 Fill 2 Perc 6 Fill 4 Inst 1 Wild 1 Inst 3 Wild 3 Group 1 Gr...

Страница 29: ...6 are latched 7 Now play the Trigger Keys and hear the results 8 Press the Clear Trigger Key to kill all latched Parts 9 Start up a few more triggers and play with the Mute key þ To play BEATS on a different MIDI channel You can have your cake and eat it too 1 Press the Arp Beats button and locate the screen shown above the 2nd screen from the beginning 1 Set your MIDI keyboard to transmit on chan...

Страница 30: ...to scroll to the screen shown below 4 Make sure the arpeggiator Status is on Play the keyboard to start arpeggiating O O O O Try using the control knobs to change the arpeggiator parameters 5 Press either cursor key repeatedly to move the cursor below the Status field 6 Turn the Data Entry Control clockwise one click The Mode screen appears 7 Use the cursor keys to move the cursor to the Mode fiel...

Страница 31: ...peg giator for each MIDI channel In order to arpeggiate on multiple channels you ll need a controller that can output multiple MIDI channels at once Connect a multi channel controller to XL 1 to unleash its true potential MASTER ARPEGGIATOR Pattern 380 Inversions EMULATOR P R E S E T S A M P L E S E Q U E N C E R P A G E L E V E L P R E S E T S E L E C T R E A L T I M E C O N T R O L L E R S A S S...

Страница 32: ...nges the sound but the arpeggiator as well O O O O Don t forget that you can adjust the volume and pan position for each channel Sometimes a simple volume change will bring out hidden rhythms and patterns 6 Press the Control Select button on the front panel so that the Arp Beats LED is illuminated Adjust the front panel control knobs Remember that the knobs are controlling the arpeggiator on the c...

Страница 33: ...LED to the right of the button indicates that you are in the Master menu Edit Button Use the Edit menu when you want to create or modify a preset An illumi nated LED to the right of the button indicates that you are in the Edit menu Control Button The Control button is used to change the function of the Controller knobs see the next section Each time you press the Control button the Control Mode t...

Страница 34: ...buttons have an auto repeat feature which advances the cursor when the button is held continuously The cursor can be moved bidirectionally using the Data Entry Control while either cursor select button is held down for example press and hold the right cursor button and turn the Data Entry Control Save Copy Button The Save Copy button is used to save or copy presets and to copy data Selected groups...

Страница 35: ... indicated by the illuminated LED to the right of the button The control knob functions are determined by the selected Control Row The three Control Rows generate MIDI data that can control the preset on the current MIDI channel the channel showing on the Preset and main screen The labels Filter Cutoff Filter Res Shape Image etc printed on these rows show how the factory ROM presets may be program...

Страница 36: ... mode must be enabled in the Master menu 1 Use the Control Knobs to change the sound of the current preset as desired 2 Press the Save Copy button The display reads Save Preset to 3 Press the right cursor button to select the bottom row 4 Optional Select a new preset location if you don t want to overwrite the current preset or if the current preset is a ROM preset 5 Press the Enter button to save...

Страница 37: ...zontally use the Data Entry Control the page s title field is the default cursor position To move through menus vertically preset layers press the left cursor to get to the layer field then change layers with the Data Entry Control Use the Data Entry Control to move through menus horizontally or layers vertically Use the Controller Knobs to change parameter values within each page L1 KEY LO FADE H...

Страница 38: ...ay changes to show the preset volume pan and preset location associated with the displayed channel Preset Selection þ To Change the Preset 1 Press either cursor key until the cursor is underneath the preset number The cursor is a little flashing line underneath one of the parameters in the display As you rotate the Data Entry Control the preset number and name changes 2 The displayed preset is ass...

Страница 39: ...nel Volume sets the volume of the selected MIDI channel in relation to the other channels This is the same parameter as MIDI volume control 7 and changes made over MIDI are shown in the display þ To Change the Channel Volume 1 Press either cursor key until the cursor is underneath the volume value 2 Rotate the Data Entry Control to select a volume level The Channel Volume range is 000 127 XTREME X...

Страница 40: ...there is no arpeggiation on that channel regardless of what is set up in the Master Arpeggiator or preset If the channel arpeggiator is On the preset s arpeggiator is used regardless of whether or not it is turned on in the Edit menu This lets you turn on arpeggiation from the main screen If the mode is set to P for preset the preset s arpeggiator settings and on off status is used If the mode is ...

Страница 41: ...Field will change to show the first preset in each category þ To Change the Preset Category 1 Press either cursor key repeatedly until the cursor is underneath the preset category field 2 Rotate the Data Entry Control to select one of the preset categories Preset Categories are displayed in alphabetical order þ To Select a Preset within a Category 1 After selecting a category move the cursor to th...

Страница 42: ...IDI Enable function in the Master menu 3 Select the desired preset for each of the MIDI channels you want the Xtreme Lead to receive using the MIDI Channel Preset selection screen see previous instructions O O O O Save the Multisetup using the instructions provided in Chapter 3 Multisetup 4 Xtreme Lead now responds multitimbrally on each of the MIDI channels you have specified The volume and pan p...

Страница 43: ...line one þ To select a new screen Press the Home Enter button or press the Cursor button repeatedly until the cursor is below the screen title heading on the top line of the display Rotate the Data Entry Control to select another screen þ To modify a parameter Press either Cursor button repeatedly or hold down the right cursor button while turning the Data Entry Control until the cursor is below t...

Страница 44: ...hen the cursor is on the top line of the display Keep tapping to continuously update the tempo on each tap The tap tempo range is 25 300 bpm The Base Tempo values range from 1 through 300 beats per minute BPM or you can select use MIDI to use an external MIDI clock source SuperBEATS SuperBEATS is a 16 track play only sequencer that is optimized for live performance and groove creation XL 1 contain...

Страница 45: ...from a single key The chart below shows the default assignment of each Part the 4 Groups and the Control Keys shown in bold These assignments can be modified to suit your personal preference Trigger layouts are saved with the Multisetup See Trigger Layouts on page 221 to examine several other factory BEATS trigger layouts Alt Groove 5 Kick2 6 Snare2 7 Hihat2 8 Perc2 Perc Fills 9 Perc3 Fill1 10 Per...

Страница 46: ...plays as long as any BEATS triggers are active BEATS Riffs can also be Restarted using a MIDI Song Start command even if the BEATS channel is not currently selected The Audition LED illuminates whenever the BEATS sequencer is running even if no Parts are playing Pressing the Audition button or starting a Demo causes the Beats sequencer to stop Pressing the Audition button plays Parts 1 4 16 on bts...

Страница 47: ...o B2 3 Refer to the Default Assignment diagram on page 45 and try out each of the keys 4 Try out the Wild 1 4 knobs and other bts presets Now check out the other cool BEATS controls explained in this chapter If BEATS are not playing Locate the screen at the top of this page in the Arp Beats menu and set the parameters exactly as shown þ To Play BEATS on a different MIDI channel This is just an exa...

Страница 48: ...ange Beat Xpose Group 1 4 BtsXpsG1 BtsXpsG4 Parts assigned to one of the four BEATS groups are transposed by the controller input Transpose works by shifting the keyboard position and not by changing the tuning of individual notes Therefore on a BEATS presets bts where different instruments are assigned to each key Transpose has the effect of changing the instrument used by a particular part This ...

Страница 49: ... Group Velocity can get complicated but works according to this rule WHICHEVER CONTROL WAS LAST CHANGED TAKES OVER When interacting with the Group Velocity scale control the Busy control ignores group velocity even when it is set to zero enabling and disabling parts as necessary If the Group Velocity is changed after the Busy control it takes control scaling parts as it deems necessary The Busy co...

Страница 50: ...ne bar then stops 1 Bar Trigger Option The 1 bar option requires a bit of explanation When a trigger key is pressed before the last beat of the measure the part will continue playing until the end of the measure If the Trigger Key is pressed after the last beat of the measure the part waits until the next measure before playing Then it plays for the entire measure and stops The time signature and ...

Страница 51: ...f a note s velocity is 80 scaling by 110 will increase the note s velocity to 88 This feature allows you to control the mix of the different parts in advance or on the fly as you play If a part s velocity is set to 0 that part will be removed from the mix þ To Set the Velocity for each Part 1 Press the left cursor button to move the cursor under the Part field 2 Select the Part number using the Da...

Страница 52: ...number using the Data Entry Control Parts 1 16 can be selected All parts shown as an A can be edited at once if Edit All Layers is enabled in the Master menu 3 Move the cursor to the bottom line using the cursor keys and adjust the Transposition in semitones using the Data Entry Control 4 Repeat steps 1 through 3 for all the Parts you wish to adjust 5 Press the Enter Home button or use the cursor ...

Страница 53: ...line using the cursor keys and select the Group 1 4 or none using the Data Entry Control 4 Repeat steps 1 through 3 for all the Parts you wish to assign 5 Press the Enter Home button or use the cursor keys to move the cursor back to the screen heading Master Riff The Master Riff is selected from this screen The Master Riff is used when Master M is selected for BEATS in Beats mode enable screen þ T...

Страница 54: ... the Data Entry Control 3 Press the Enter Home button or use the cursor keys to move the cursor back to the screen heading Riff Controllers Riffs contain real time control information This function allows you to turn these controllers On or Off for the Riffs This control affects Audition Riffs as well as BEATS Riffs þ To Turn Riff Controllers On or Off 1 Use the cursor buttons to move the cursor t...

Страница 55: ...to or playing along with a sequencer You can choose to resync Arp Riff both Arp and Riff or disable MIDI Song Start Arp Riff MIDI Out This parameter selects whether or not the Arpeggiator and or Riff BEATS note data is sent to the MIDI out port This feature lets you use XL 1 as an arpeggiator or sequencer for your other MIDI instruments It also lets you record the arpeggios and Riffs into a MIDI s...

Страница 56: ...whether or not it is turned on in the Edit menu and Off turns off the arpeggiator regardless of the settings and status specified in either menu _ _ _ _ SAVE your Arp setups and name them using the Save Setup function located in the Save Copy menu See Saving Multisetups on page 197 All arpeggiators share XL 1 s master clock and its current setting The master clock can be XL 1 s internal clock or a...

Страница 57: ...alue It scales the velocity value set in the Arpeggiator Note Value screen See Velocity on page 60 Arpeggiator Gate ArpGate This control changes the Arpeggiator Gate Time It adds to the gate time set in the Arpeggiator Gate Time screen See Gate Time on page 60 Arpeggiator Interval ArpIntvl This control modulates the Arpeggiator Extension Interval It adds to the extension programmed in the Arpeggia...

Страница 58: ...iate continuously from highest to lowest pitch Up Down Held notes arpeggiate continuously from lowest to highest pitch then from highest to lowest then repeat this cycle Fwd Assign Held notes arpeggiate continuously in the order in which the keys were pressed Bkwd Assign Held notes arpeggiate continuously in the reverse order in which the keys were pressed Fwd Bkwd Held notes arpeggiate continuous...

Страница 59: ...48 Dotted Quarter Note 36 Half Note Triplet 32 Quarter Note 24 Dotted Eighth Note 18 Quarter Note Triplet 16 8th Note 12 Dotted 16th Note 9 8th Note Triplet 8 16th Note 6 Dotted 32nd Note 4 5 16th Note Triplet 4 32nd Note 3 Arpeggiator Pattern Speed The Arpeggiator Pattern Speed parameter lets you change the playback rate of Patterns by 1 4x 1 2x 1x normal 2x or 4x normal speed Pattern This field ...

Страница 60: ...e percentage of the Note Value time played This can have a dramatic effect on the sound depending on how the envelope generators are programmed The note on time is used for the start of time when calculating note durations See Duration on page 63 With a Gate Time setting of 100 the note is held on until the next note starts The envelope generators never advance to the Release stages With a Gate Ti...

Страница 61: ... and an Extension Count of 2 and with the Arpeggiator Mode set to Fwd Assign if you played E2 then C2 then G2 the arpeggiated sequence would consist of E2 C2 G2 then E3 C3 G3 and then E4 C4 G4 The Extension Count values range from 0 through 15 Refer to the following illustration Extension Interval The Extension Interval specifies the additional intervals played when you press a key For example sup...

Страница 62: ... if the arpeggiator was off After the pre delay period has elapsed the arpeggiator kicks in Once you release all the keys on the controller the pre delay starts over with the next note on In combi nation with the Duration parameter Pre Delay lets you change the arpeggio patterns to create many more variations You can play the preset normally as long as you don t hold the notes longer than the Pre ...

Страница 63: ... repeat continuously using the Recycle function described below Post Delay This parameter is only relevant when both the Duration and Recycle parameters are not in the Off state The Post Delay value determines how long the arpeggiator is delayed after the Duration period Please refer to the diagram on the following page During the post delay period notes are played normally as if the arpeggiator w...

Страница 64: ...er option called on No PreDelay bypasses the predelay period Keyboard Thru When enabled Keyboard Thru merges the notes not arpeggiated with the arpeggiated notes This gives the effect of two parts playing at once Latch With Latch mode On any notes you play remain on until you press them again Latched notes can be halted by turning Latch off in this screen or by turning off the Arpeggiator for the ...

Страница 65: ...and use the Data Entry Control to define the highest key to be arpeggiated Send MIDI System Exclusive Data Transmits the Arpeggiator Patterns via the MIDI out port as MIDI System Exclusive data to another Xtreme Lead or to a computer sequencer for backup Using the cursor key and the Data Entry Control select the MIDI data you want to transmit See Send MIDI System Exclusive Data in the Master chapt...

Страница 66: ... 1 Factory Patterns Bank 2 Factory Patterns þ To Select the Pattern to Edit O O O O Before editing a Pattern select Master Arpeggiator M in the main screen and set the Arpeggiator to the Pattern you are editing This lets you hear the Pattern as you edit it 1 From the Edit User Pattern screen shown above move the cursor to the bottom line and select the pattern you want to edit The Enter LED begins...

Страница 67: ... _ _ _ _ IMPORTANT The Gate function in the arpeggiator MUST be set to 100 when using the tie function otherwise the tied note is retriggered instead of extended Rest Instead of playing a note you can define the step as a Rest The Duration parameter specifies the length of the rest Rests can be tied together to form longer rests Skip This command simply removes the step from the pattern The Skip f...

Страница 68: ...e played one time not repeated one time or played twice þ To Edit a User Pattern 1 The first field in the Edit User Pattern field defines the pattern s step number Start with the pattern Step 01 2 Define the Key Offset Velocity Duration and Repeat values 3 Repeat steps 1 and 2 until you have setup the desired number of steps in the pattern 4 Set the Key Offset to End on the last step in the patter...

Страница 69: ...Control clockwise The following screen appears 3 Move the cursor to the bottom line and edit the Pattern name using the Data Entry Control and Cursor keys 4 Move the cursor to the Home position shown above by pressing the Home Enter button then turn the Data Entry Control counter clockwise one click to return to the Pattern Edit screen 5 Turn the Data Entry Control counterclockwise multiple clicks...

Страница 70: ... located in the Master menu MIDI Mode page 3 On the main screen turn the arpeggiator on for MIDI channels 1 and 2 We re only using two channels for now to keep it simple Select a different preset for each MIDI channel while you re at it 4 Start playing You should be hearing two arpeggiators playing at once EMULATOR P R E S E T S A M P L E S E Q U E N C E R P A G E L E V E L P R E S E T S E L E C T...

Страница 71: ...awesome Using a MIDI Interface to Channelize Data Not all keyboards or controllers can transmit on multiple MIDI channels at once If your MIDI controller only transmits on a single MIDI channel there are other ways to use the multi channel arpeggiators A MIDI interface such as Mark of the Unicorn s MIDI Time Piece or a MIDI router box will convert data on one channel to any other channel or channe...

Страница 72: ...72 E MU Systems Arpeggiator Beats Menu Using a MIDI Interface to Channelize Data ...

Страница 73: ...ine one _ _ _ _ Warning Master Menu changes are automatically saved when you exit the menu If the power is turned off before you exit the menu any changes you have made will be lost þ To select a new screen Press the Home Enter button or press the Cursor button repeatedly until the cursor is below the screen title heading Rotate the Data Entry Control to select another screen þ To modify a paramet...

Страница 74: ...fine tuning of all presets so that you can tune Xtreme Lead to other instruments The master tuning range is 1 semitone in 1 64th semitone increments 1 56 cents A master tune setting of 00 indicates that Xtreme Lead is perfectly tuned to concert pitch A 440 Hz Bend Range The Bend Range parameter sets the range of the pitch wheel This affects only presets that have their individual Pitch Bend range ...

Страница 75: ...ndix Mix Output The Mix Output parameter allows you to override the routing assignments made in each preset and instead assign the outputs according to MIDI channel For each of the 16 MIDI channels you can select Send 1 4 or Preset When Preset is selected the output assignment defined in the Preset Edit menu is used MASTER VELOCITY CURVE 13 Linear 0 20 40 60 80 100 120 0 20 40 60 80 100 Played Vel...

Страница 76: ...r MIDI channel could be routed to Send 4 with an effect amount of only 5 This is almost like having two different effects channel 16 use preset MIX OUTPUT channel 15 Send 1 MIX OUTPUT S E N D 1 M A I N OUTPUT SECTION EFFECTS PROCESSORS MIDI Channel 1 MIDI Channel 2 MIDI Channel 3 MIDI Channel 4 MIDI Channel 5 MIDI Channel 6 MIDI Channel 16 MIDI CHANNEL Hall 1 Effect A Chorus Effect B B A Preset Pr...

Страница 77: ... is set to bypass the effects are turned off on a global scale This includes Effects programmed in the preset Effects Multi Mode Control The routing scheme for the two stereo effects processors provides a lot of versatility When in multi mode you can use master settings which applies the Master menu effects settings to all 16 MIDI channels If you want more control you can use the channel setting w...

Страница 78: ...itap Pan 11 3 Tap 12 3 Tap Pan 13 Soft Room 14 Warm Room 15 Perfect Room 16 Tiled Room 17 Hard Plate 18 Warm Hall 19 Spacious Hall 20 Bright Hall 21 Bright Hall Pan 22 Bright Plate 23 BBall Court 24 Gymnasium 25 Cavern 26 Concert 9 27 Concert 10 Pan 28 Reverse Gate 29 Gate 2 30 Gate Pan 31 Concert 11 32 Medium Concert 33 Large Concert 34 Large Concert Pan 35 Canyon 36 DelayVerb 1 37 DelayVerb 2 38...

Страница 79: ...fects through the A effects See Effect Parameters on page 179 for more details FXA Send Amounts These parameters set the effects amounts for each of the four stereo effects busses See Master Effects on page 182 for detailed information Master FXB Algorithm This parameter selects the type of effect used for the B effect The following effect types are available FXA DECAY HFDAMP FxB FxA 040 096 001 F...

Страница 80: ...tereo effects busses See the Effects chapter for detailed information 1 Chorus 1 2 Chorus 2 3 Chorus 3 4 Chorus 4 5 Chorus 5 6 Doubling 7 Slapback 8 Flange 1 9 Flange 2 10 Flange 3 11 Flange 4 12 Flange 5 13 Flange 6 14 Flange 7 15 Big Chorus 16 Symphonic 17 Ensemble 18 Delay 19 Delay Stereo 20 Delay Stereo 2 21 Panning Delay 22 Delay Chorus 23 Pan Delay Chorus 1 24 Pan Delay Chorus 2 25 Dual Tap ...

Страница 81: ...eived on the currently selected MIDI channel on the preset selection screen and plays that channel s associated preset Multi Responds to data on any combination of MIDI channels and plays the specific preset associated with each of the MIDI channels You must select multi mode for multitimbral operation MIDI SysEx ID This page defines the MIDI system exclusive SysEx device ID number The SysEx ID le...

Страница 82: ...lso remap incoming MIDI program changes to a different numbered preset This is a handy feature when your master keyboard cannot send a bank change or you want to reorder preset numbers Any preset can be mapped to any incoming MIDI program change number For example you could set up the Program Preset map to call up preset 12 whenever Xtreme Lead receives MIDI program change 26 The four fields shown...

Страница 83: ...ollers numbers will be received from 1 to 31 and from 64 to 119 and which controller numbers will be transmitted over MIDI if the front panel controls are turned The PatchCord routing and amount in the Edit menu determine what effect the controller has on each preset Real time controllers are shown in the PatchCord menu as MIDI A through MIDI L Selected Program Mapped Program 0 1 2 3 4 5 6 7 8 9 1...

Страница 84: ...nts Following are a few of the standardized MIDI Controller numbers as defined by the MIDI manufacturers association The controllers shown in Bold are automatically routed to the destination volume pan or have their own PatchCord source Others such as Portamento Time can be routed using a PatchCord to have the desired effect MIDI Footswitch Assign Like the MIDI Controllers you can assign three MID...

Страница 85: ...wn parameters Xtreme Lead redefines the center of the controller s range as zero so it acts like a pitch wheel MIDI Controller values are added to the Base Tempo with a range of 64 When the controller is set to off the tempo returns to its original setting This control has no effect when using an external clock Knob Preset Quick Edit Quick Edit changes the initial controller setting in the preset ...

Страница 86: ... defined by the Real time Controller Assign parameter see page 83 This function also enables or disables trans mission of Riff note data over MIDI when the Audition button is pressed If Deep Edit is enabled Knobs MIDI Out does not work while in any of the editing menus Master Edit Save Copy Preset Edit All Layers Enable This function allows you to turn the Edit All Layers feature on or off Edit Al...

Страница 87: ...e front panel controls þ To Calibrate the Front Panel Control Knobs 1 Press the Master menu button and advance to the Calibrate Knobs page 2 Press the Enter button to begin the calibration process The following screen appears 3 Turn all knobs to their minimum value which is pegged in the counter clockwise direction then press the Enter button The screen briefly flashes Reading Values then displays...

Страница 88: ...ata between two Xtreme Leads be sure both units have the same SysEx ID number See MIDI SysEx ID on page 81 to learn how to change the SysEx ID Using the cursor key and the Data Entry Control select the type of MIDI data you want to transmit Following are descriptions of the types of MIDI data that can be transmitted Current Multisetup Transmits all parameters in the Master menu except Tuning Table...

Страница 89: ... the selected preset All User Arp Patterns Transmits all user arpeggiator patterns All User Data Transmits ALL user presets user tuning tables user arp patterns and user multisetups The Enter LED will be flashing Press the Enter button to confirm the operation To receive MIDI data simply send the MIDI data into Xtreme Lead from another Proteus or from a computer sequencer þ To Record MIDI SysEx Da...

Страница 90: ...e from 0 to 127 semitones The fine tuning is variable from 00 to 63 in increments of 1 64 of a semitone approx 1 56 cents For each preset the specific tuning table is selected in the Edit menu O O O O The user key tuning can be used to tune individual percussion instruments Screen Viewing Angle This function changes the viewing angle of the display so that you can read it easily from either above ...

Страница 91: ... just waiting to be discovered Each preset can consist of up to four instrument layers Each of the four layers can be placed anywhere on the keyboard and can be crossfaded or switched according to key position velocity or by using a real time control such as a wheel slider pedal LFO or envelope generator A preset can also be linked with up to 2 more presets creating additional layering or splits X...

Страница 92: ...ers such as the volume has an initial setting which is changed by a modulation source Therefore in the case of volume we have an initial volume that we can change or modulate with a modulation source Two main kinds of modulation sources on Xtreme Lead are Envelope Gener ators and Low Frequency Oscillators In the example above an envelope generator could be routed to automatically turn the volume c...

Страница 93: ...ilter Frequency if you want the filter to smoothly follow pitch in solo mode Routing Key Glide to Pan creates another interesting effect Key Glide A smoothly changing control source based on the Glide Rate and the interval between the last two notes played Pitch and Mod Wheels Synthesizer pitch bend and modulation wheels Keyboard Pressure mono aftertouch Key Pressure applied after the key is initi...

Страница 94: ...the XL 1 you define a modulation source and a modulation destination Then you connect the source to the destination using PatchCords XL 1 s PatchCords are connected in the software Xtreme Lead has 24 general purpose PatchCords for each layer The controller Knobs assignments printed on the front panel are the system defaults You can change any of these assignments using the Real time Controller Ass...

Страница 95: ... must have different levels for the rate control to work All three envelope generators have the six stages described above The Volume Envelope generator controls the volume of the voice over time The Filter Envelope generator is a general purpose envelope most often used to control the filter frequency Unlike the Volume Envelope however the Filter Envelope can have a negative level value as well a...

Страница 96: ...ld As soon as the key is released the envelope continues through its normal Release stages 1 2 Only the Filter and Auxiliary Envelopes have the repeating feature The diagram above show how the looping envelopes work When the key is pressed the envelope goes through its regular Attack 1 Attack 2 Decay 1 and Decay 2 stages In non looping mode the envelope would hold at the end of the Decay 2 stage u...

Страница 97: ...s Like the Auxiliary Envelope LFOs can be routed to control any real time function such as Pitch Filter Panning or Volume A common use for the LFO is to control the pitch of the sound LFO Pitch This effect is called vibrato and is an important performance effect Many presets use this routing with the modulation wheel controlling how much LFO modulation is applied Another common effect Tremolo is c...

Страница 98: ...o sonic rhythm patterns You can also use a MIDI Clock as the Master Clock to synchronize to an external MIDI device such as a drum machine or sequencer See Master Tempo in the Master menu Envelopes are triggered on the positive going edge of the clock LFOs are triggered on the negative going edge of the clock Clocks are routed exactly like the other modulations sources using the PatchCords The Pat...

Страница 99: ...w other possibilities are listed below Turn different voice layers on and off using different clock divisors Switch between Auxiliary and Filter Envelope retriggering using a slider or footswitch Retrigger LFOs or Envelopes using noise or other LFOs to create random or semi random effects Alter the LFO waveform by modulating the rate of a triggered LFO Route multiple clocks with different divisors...

Страница 100: ... Modulation sources are simply added algebraically connecting two sources one with a value of 100 and the other with a value of 100 yields a net value of zero Note on modulation sources such as key velocity and gate output a single value at note on time Realtime modulation sources such as LFOs envelope generators and modulation wheels output continuously changing values The possible modulation rou...

Страница 101: ...tch Outputs a digital 1 when the input is greater than 0 Summing Amp Lets you add several modulation signals together before applying them to a destination This processor can save PatchCords when routing the output to multiple destinations Lag Processors Slows down rapid changes in the input signal The output lags behind the input at a pre programmed rate There are two lag processors Lag 0 and Lag...

Страница 102: ...s The value of the input PatchCord controls the number of steps The value of the output PatchCord controls the size of the steps 4x Gain This processor amplifies the modulation source by a factor of 4 Lag Inputs O O O O Summing Amps can be useful in complicated patches where you want to control a combination of modulation signals with a single patchcord The Lag processors can be used as 2 addition...

Страница 103: ...elected In contrast the layer level lag processors begin acting only after a keyboard key has been depressed The Preset Lag also has a Lag Amount input which controls the lag time Positive lag amounts increase the lag time A MIDI controller front panel knob is commonly used to control lag amount The preset lag is often used to spin up and spin down an LFO which controls some other effect perhaps l...

Страница 104: ...tch LFO Speed or any other destination you can think of Study this patch if you want to learn a few new tricks using the patchcords 1 DC Sets initial ramp Fast Positive 100 2 Decay Knob Inverted value slows ramp as the knob value is increased O O O O The combination of the DC Perc Decay Time Cords has the effect of reversing the Percussion Decay Time knob The decay time increases as the knob is tu...

Страница 105: ...a perfect fifth The Velocity source scales the played velocity around zero In other words low velocities below 64 will have negative values and high velocities 64 and above will be positive A velocity of 64 would be zero The Switch module only outputs a 1 if the input value is greater than zero This digital 1 value can be scaled through the attenuator on the PatchCord to raise or lower the pitch b...

Страница 106: ...alue based on the PatchCord Amount setting If applied to the switch along with the velocity it changes the velocity value required to trip the switch By setting the DC amount to a negative amount higher velocity values are required to trip the switch Setting the DC value to a positive value would bring the velocity switch point down The PatchCord screens for this patch are shown below Switch Veloc...

Страница 107: ... generators or LFOs are routed to the input The quantizer turns a smoothly changing input signal into a series of steps By routing the output of the quantizer to Pitch and adjusting the PatchCord amounts you can control both the number of steps and the pitch interval of each step The input PatchCord amount controls how many steps will be generated With a sawtooth wave LFO feeding the input and the...

Страница 108: ...pt for the DC offset which was added to bring the pitch down into tune Sometimes you have to fix a problem but using the mod processors there s usually a way around it to achieve the desired result You can start to see some of the possibilities and there are many Whenever you find yourself wishing for some esoteric type of control take a minute to think and see if there is a way to achieve the des...

Страница 109: ...t a sine wave can be analyzed as a mix of sine waves at specific frequencies and amplitudes Any waveform can be analyzed as a mixture of sine waves One way to represent complex waveforms is to use a chart with frequency on one axis and amplitude on the other Each vertical line of the chart represents one sine wave at a specific amplitude and frequency Instrument Amp L R Freq Vol Q Retrigger Pitch ...

Страница 110: ...mple a low pass filter lets the low frequencies pass and removes only the high frequencies as illustrated in the following diagram A filter that lets only the high frequencies pass is called a high pass filter as illustrated in the following diagram 20 40 60 80 100 40 80 160 360 720 1440 2880 Frequency Amplitude Output of Filter Low Pass Filter Cutoff Frequency 20 40 60 80 100 40 80 160 360 720 14...

Страница 111: ...e frequencies around the cutoff frequency The following chart shows how different amounts of Q affect the low pass filter response In terms of sound frequencies around the cutoff tend to ring with high Q settings If a filter with high Q is slowly swept back and forth various overtones are picked out of the sound and amplified as the resonant peak sweeps over them Bells and gongs are real world exa...

Страница 112: ...sizers were famous for their 2 pole filter sound Using a filter we have a way to control the harmonic content of a sound As it turns out even a simple low pass filter can simulate the response of many natural sounds For example when a piano string is struck by its hammer there are initially a lot of high frequencies present If the same note is played softer there are fewer high frequencies generat...

Страница 113: ...left unaltered This is different from a band pass filter which attenuates reduces frequencies outside the selected band The parametric filter is quite flexible Any range of frequencies can be either amplified or attenuated Several parametric sections are often cascaded in order to create complex filter response curves If four parametric filter sections were cascaded it would be possible to create ...

Страница 114: ...zens of different muscles controlling the shape of the vocal tract When speaking however we don t think of the muscles we just remember how it feels to form the vowels A vowel is really a configuration of many muscles but we consider it a single object In changing from one vowel to another we don t need to consider the frequencies of the resonant peaks You remember the shape of your mouth for each...

Страница 115: ...ime but the filter frequency can be modulated by any source The Q parameter can be modulated only at note on time There are 50 types of filters available See Xtreme Lead Filter Types on page 141 for a complete list of the filters Digitally Controlled Amplifier DCA Together with the Volume Envelope the DCA is used to shape the volume contour of a sound The DCA can be controlled by any modulation so...

Страница 116: ...be programmed to control the Xtreme Lead The following MIDI controls are automatically routed in Xtreme Lead Pitch Wheel pwh Modulation Wheel 01 Old DX7 Aftertouch 03 Pedal 04 Volume 07 Pan 10 Any MIDI controller can be routed to any modulation destination First you have to know which controller numbers your keyboard transmits Most modern MIDI keyboards let you select a controller number for each ...

Страница 117: ...he control button adjacent to the row of knobs selects A D E H or I L functions for the knobs The front panel knob A L and incoming MIDI controller messages assigned to that letter both control the same parameter that you select in the PatchCord screen 0 1 2 3 31 MIDI Controller C Patchcord Destinations Control Knobs Master Menu Edit Menu A B C L 0 1 2 3 31 MIDI Controller A 0 1 2 3 31 MIDI Contro...

Страница 118: ...esets in the bank Of course no synthesizer has 16 384 banks yet but hey it s nice to know it s possible for that really BIG project Continuous Controller CC 0 is the MSB most significant byte and CC 32 is the LSB least significant byte Normally you send both the MSB and LSB controllers to implement a bank change When you press the Audition button the Bank Select MSB and LSB are displayed on the to...

Страница 119: ...the Master menu and set the MIDI channel to Preset Next set the Mix Output routing in the preset to the desired output for each layer Yes you can send each layer to a different send if you want By sending different amounts of presets to the effects subtle or striking effects can be achieved using the two effect processors This feature allows you to get the most out of two effects since you can hav...

Страница 120: ...Master Mix Output is set to Preset Otherwise the Edit menu Mix Output settings are ignored PRESET Mix Output Mix Output Send 1 MASTER MENU PRESET EDIT MENU Ch 1 SEND 2 Ch 2 SEND 3 Ch 3 SEND 4 Ch 16 S E N D 1 M A I N OUTPUT SECTION EFFECTS PROCESSORS Hall 1 Effect A Chorus Effect B B A FX Sends Send 2 10 Send 3 0 Send 4 0 Send 1 15 FX Sends Send 1 0 Send 4 15 Send 3 20 Send 2 0 S E N D 3 S E N D 4 ...

Страница 121: ...e layer field Rotate the Data Entry Control to select a layer 1 4 _ _ _ _ If there is no A option in the Layer field you must enable the Edit All Layers function in the Master Menu You can also select All Layers by choosing A in the layer field When All Layers is selected the existing parameter value for any field will be displayed if the values of all four layers are equal If the values of all fo...

Страница 122: ...er Creating categories makes it easier to find specific sounds when you need them For more information on Sound Navigator see Sound Navigator in Chapter 2 Operations The keyboard can also be used to select character The charts below show the keyboard character assignments PRESET NAME 0001 syn VOSIM Voc 0 2 3 5 7 8 A C D F H J K M O P R T V W Y b c e g h j l n o q s t v x z b l a n k 4 6 9 B E G I ...

Страница 123: ...splay Layers 1 4 or All can be selected by positioning the cursor on this field and using the Data Entry Control to change the layer In the screen shown below Layer 1 is selected When All Layers A is selected the existing parameter value for any field will be displayed if all layers are equal If the layer parameter values are NOT equal the value of Layer 1 will be displayed with flashing character...

Страница 124: ...t for the selected layer s move the cursor to the bottom line of the display and change the instrument using the Data Entry Control Sound Navigator Sound Navigator also works to help select Instruments although the category names are predefined When the cursor is on the Instrument Category field turning the Data Entry Control selects different instrument categories The Name Field will change to sh...

Страница 125: ...ding to key position by adjusting the Low and High Fade parameters The first Fade field determines how many semitones it takes the layer to Fade In from the low key The second Fade field determines how many semitones it takes the layer to Fade Out to the high key The screen shot above and the diagram below show Layer 1 being faded out over a one octave range With a High Fade value of zero as in la...

Страница 126: ...ith Fade set to zero Set the Low and High Keys so they don t overlap other layers You can select key numbers by simply pressing the desired keyboard key when the cursor is positioned on the low or high key field n the display If two layers do overlap both will play as shown in the next example C0 C1 C2 C3 C4 C5 C6 Layer 1 Layer 2 Layer 3 Layer 4 Switch Switch Switch L1 KEY LO FADE HIGH FADE C0 000...

Страница 127: ...t is called stacking layers All Layers assigned to a key sound when the key is played This is shown in the following diagram It s very easy to stack layers Simply duplicate the key ranges for any layers you want to stack C0 C1 C2 C3 C4 C5 C6 Layer 1 Layer 2 L1 KEY LO FADE HIGH FADE C0 000 C6 000 L2 KEY LO FADE HIGH FADE C0 000 C6 000 ...

Страница 128: ... by defining the high and low velocity values Values range from 0 off to 127 hardest The Fade fields define the velocity crossfade range for the currently selected layer The first Fade field defines the Fade In range for the low velocity value The second defines the Fade Out range for the high velocity value With soft playing Layer 1 sounds As you play harder Layer 1 gradually fades out and Layer ...

Страница 129: ...higher key velocity while layer 2 fades in At a velocity of 64 the two sounds are equal volume You may want to adjust the fade in and fade out points to achieve a natural sounding crossfade These parameters vary depending on the sounds Increasing Velocity 0 127 Layer 2 Layer 1 Layer 2 Layer 1 L1 VEL LO FADE HIGH FADE 000 000 127 127 L2 VEL LO FADE HIGH FADE 000 127 127 000 ...

Страница 130: ...ade value range is from 0 to 127 After the Ranges and Fades have been adjusted for each layer in the Real time Crossfade screen you must assign a real time controller to RTXfade Real time Crossfade on each Layer in the PatchCord screen Set the PatchCord Amounts to 100 þ To Set Up a Real time Crossfade Between Two Layers As the real time control knob pedal LFO etc is increased Layer 1 fades out as ...

Страница 131: ...ossfade and set the Cord Amount to 127 10 Play the keyboard while adjusting the real time controller Go back to the Real time Crossfade screens to fine tune the crossfade if necessary Decreasing the fade size will narrow the region where both layers are sounding þ To Randomly Cross Switch Between Four Layers In certain situations you may want to switch between several layers randomly Crossfade Ran...

Страница 132: ... 4 Define the High and Low range of each Layer as shown above 5 Press Home Enter and use the Data Entry Control to advance to the PatchCord page Select Layer 1 6 Select XfdRnd as the modulation source and RTXfade as the desti nation Set the Cord Amount to 100 7 Repeat step 6 for the remaining three layers L1 RT LO FADE HIGH FADE 000 000 031 000 L2 RT LO FADE HIGH FADE 032 000 063 000 L3 RT LO FADE...

Страница 133: ...lay at once Transposing the Instrument The Transpose parameter lets you transpose the key of the current layer s Instrument Transpose works by shifting the keyboard position in semitone intervals relative to middle C Use this parameter to transpose different layers apart by semitone intervals For example by transposing one layer by 7 semitones it will track other layers at a perfect fifth interval...

Страница 134: ...slightly change the timbre of the instrument Amplifier This parameter sets the initial volume and pan position of the current layer These values can be changed using any Real time Controller set up in the PatchCords The value range for the volume is from 96 dB to 10 dB 0 dB is the default setting Routinely turning the volume up to 10 dB is not recommended because it doesn t allow other modulation ...

Страница 135: ...d in each instrument If you select the Factory mode the Volume Envelope parameters are disabled and the factory defined settings are used instead _ _ _ _ If two adjacent segments have the same level in a time based envelope the segment will be skipped Adjacent segments must have different levels for the rate control to work Time based Defines the Volume Envelope rates from 0 to 127 approxi mately ...

Страница 136: ... is reached the Attack 2 phase begins When the Attack 2 Level is reached the Decay 1 phase begins When the key is released the envelope immediately jumps to the Release 1 stage then the Release 2 stage finally ending at the Release 2 level If you have selected the factory mode the Volume Envelope parameter screen looks like the following illustration _ _ _ _ If the Release 2 level is set at a valu...

Страница 137: ...key Setting the Start Offset amount to 0 plays the sample from the beginning Higher values move the Sample Start Point further into the sample toward the end There is also a PatchCord source which can be used to change the Sound Start point at note on time Controlling the Sound Start using Key Velocity Amt brings in the attack of the wave only when you play hard This is especially effective with p...

Страница 138: ...igger Last note priority No key up action Retriggers envelopes and samples when a key is pressed Melody last Last note priority No key up action First solo note Envelopes start at Attack segment from zero Samples start at the beginning If previous note is releasing Envelopes start at Attack segment but from current level Samples start at the beginning When playing Legato Envelopes continue from cu...

Страница 139: ...oice such as an open high hat to a mono channel so it is cancelled by a closed high hat on the same mono channel Layers rotate within their assigned bin of channels not interfering with other bins The modes are Poly All Notes are played polyphonically with dynamic channel assignment using all 64 channels Poly 16 A B Two bins of 16 channels each Notes are played polyphoni cally with dynamic channel...

Страница 140: ...of the state of Solo Mode Z Plane Filters A filter is a device which changes the output of a signal sound by removing certain elements of the signal based on the frequency and amplitude The Order of a filter defines the number of filter elements it contains The more elements the more complex the filter Xtreme Lead contains 50 different types of E mu s celebrated Z plane filters In addition to the ...

Страница 141: ...ide spectrum of Q sounds BassBox 303 12 LPF Pumped up lows with TB like squelchy Q factor Shallow 02 HPF 2 pole high pass filter 12 dB octave slope Deeper 04 HPF Classic 4 pole high pass filter Cutoff sweep progressively cuts 4th Order High pass Band pass1 02 BPF Band pass filter with 6 dB octave rolloff on either side of the passband and Q control Band pass2 04 BPF Band pass filter with 12 dB oct...

Страница 142: ... Ay sound to Ee sound at maximum frequency setting Q varies the apparent size of the mouth cav ity Ooh To Aah 06 VOW Vowel formant filter which sweeps from Oo sound through Oh sound to Ah sound at maximum frequency setting Q varies the apparent size of mouth cavity MultiQVox 12 VOW Multi Formant Map Q To velocity Ooh To Eee 12 VOW Oooh to Eeee formant morph TalkingHedz 12 VOW Oui morphing filter Q...

Страница 143: ... increases flanging depth AngelzHairz 12 FLG Smooth sweep flanger Good with vox waves eg I094 Q 60 DreamWeava 12 FLG Directional Flanger Poles shift down at low Q and up at high Q MeatyGizmo 12 REZ Filter inverts at mid Q DeadRinger 12 REZ Permanent Ringy Q response Many Q variations ZoomPeaks 12 REZ High resonance nasal filter AcidRavage 12 REZ Great analog Q response Wide tonal range Try with a ...

Страница 144: ...s in sync with the music See the illustration on page 96 Envelope Repeat The Envelope Generators can also be made to repeat When the envelope repeat function is On the Attack 1 2 and Decay 1 2 stages will continue to repeat as long as the key is held As soon as the key is released the envelope continues through its normal Release stages 1 2 For more information see Envelope Repeat on page 96 þ To ...

Страница 145: ... be routed to any real time control destination in the PatchCords It is identical to the filter envelope generator See Filter Envelope on page 143 for full details Low Frequency Oscillators LFOs A Low Frequency Oscillator or LFO is simply a wave that repeats at a slow speed Xtreme Lead has two LFOs per layer identified on the display as LFO1 and LFO2 An LFO can be routed to any real time control d...

Страница 146: ...smoothly then abruptly changes back down The available waveforms are shown below Triangle Square Sine 1 2 Sine 1 3 5 Sine Sawtooth 25 Pulse 33 Pulse 12 Pulse 16 Pulse Random Pat Fifth Octave C C G Pat Octaves Octave Octave C F G Pat Sus4 trip C G A Pat Neener Hemi quaver Sine Noise LFO Tricks Tips The Random LFO wave is truly random and is different for each voice and layer The Pattern Pat wavefor...

Страница 147: ...om 0 08 Hz to 18 14 Hz Values less than zero specify tempo based rates If you modulate the rate of a tempo based LFO the rates will jump between the tempo based note values with each PatchCord increment of 1 As an example if the LFO rate was set to 8 1 and you patched the Mod Wheel to control rate with a PatchCord amount of 1 turning the Mod Wheel to maximum would change the LFO rate to 4 1d Refer...

Страница 148: ...ll Delay values equal to or greater than zero specify absolute time rates from 0 to 127 Values less than zero specify Tempo based mode Refer to the previous table for times and tempo based rates double note triplet 2 1t whole note 1 1 dotted half note 1 2d whole note triplet 1 1t half note 1 2 dotted quarter note 1 4d half note triplet 1 2t quarter note 1 4 dotted 8th note 1 8d quarter note triple...

Страница 149: ... controller This creates a chorus or ensemble effect since each note played has a slightly different modulation rate The higher the value entered the greater the note to note variation in the LFO The Variation value range is from 0 through 100 _ _ _ _ Variation is disabled when a Tempo Based LFO is selected LFO variation changes the rate of each note to create an ensemble effect ...

Страница 150: ...ontrol routings volume envelope to amplifier pitch wheel to pitch and key to pitch All other connections must be made using the PatchCords Each patch has an amount field which determines how much modulation is applied to the destination The modulation amount can be positive or negative Negative values invert the input The amount value range is from 100 to 100 Modulation Source LFO 1 Destination Am...

Страница 151: ...city the Filter frequency is approximately where you set it at 100 An LFO works the same way on the positive half of the cycle it increases the initial amount and on the negative half of the cycle it decreases the initial amount With a modulation source a value of 64 equals 0 Modulation Uses only the negative half of the range subtracting from the current value For example if the Amplifier Volume ...

Страница 152: ...ller 10 VEnvAtk Volume Envelope Attack KeyGlide VEnvDcy Volume Envelope Decay VolEnv Volume Envelope VEnvRls Volume Envelope Release FilEnv Filter Envelope FEnvRts Filter Envelope Rates all AuxEnv Auxiliary Envelope FEnvAtk Filter Envelope Attack LFO 1 2 FEnvDcy Filter Envelope Decay White White Noise FEnvRls Filter Envelope Release Pink Pink Noise FEnvTrig Filter Envelope Trigger XfdRand Crossfad...

Страница 153: ...er menu MUST be set to Preset on the selected MIDI channel If you want to define output routing by MIDI channel set it up using the Mix Output page in the Master menu See Mix Output on page 75 for more information The Sends function as effect processor inputs effect sends The Output Routing field shows the true routing of the Sends to the Main output The Output Routing never changes þ To Control t...

Страница 154: ... two processors can be programmed as part of the preset The diagram below shows how the effects are integrated into the signal path using a parallel effects send return model similar to a mixing console Refer to the Effects chapter for additional information and instructions for setting up both the Preset Effects and the Master Effects Effect A Sum Sum Main Outs Effect B FX Send Amount FX Send Amo...

Страница 155: ...e programmed by either MIDI Channel or by Preset whichever you prefer PRESET Mix Output Mix Output Send 1 MASTER MENU PRESET EDIT MENU Ch 1 SEND 2 Ch 2 SEND 3 Ch 3 SEND 4 Ch 16 S E N D 1 M A I N OUTPUT SECTION EFFECTS PROCESSORS Hall 1 Effect A Chorus Effect B B A FX Sends Send 2 10 Send 3 0 Send 4 0 Send 1 15 FX Sends Send 1 0 Send 4 15 Send 3 20 Send 2 0 S E N D 3 S E N D 4 S E N D 2 ...

Страница 156: ...te 7 Delay 8 Panning Delay 9 Multitap 1 10 Multitap Pan 11 3 Tap 12 3 Tap Pan 13 Soft Room 14 Warm Room 15 Perfect Room 16 Tiled Room 17 Hard Plate 18 Warm Hall 19 Spacious Hall 20 Bright Hall 21 Bright Hall Pan 22 Bright Plate 23 BBall Court 24 Gymnasium 25 Cavern 26 Concert 9 27 Concert 10 Pan 28 Reverse Gate 29 Gate 2 30 Gate Pan 31 Concert 11 32 Medium Concert 33 Large Concert 34 Large Concert...

Страница 157: ...meters set the effects amounts for each of the four stereo effects busses FXB Algorithm This screen selects the effect type for Effect Processor A Move the cursor to the lower line of the display and select the effect you want B Effect Types FXA DECAY HFDAMP FxB FxA 048 064 000 FXA SEND AMOUNTS 1 100 2 50 3 10 4 0 FXB ALGORITHM Panning Delay 1 Chorus 1 2 Chorus 2 3 Chorus 3 4 Chorus 4 5 Chorus 5 6...

Страница 158: ...and intensifies a chorus or flange effect LFO Rate allows you to change the speed of the modulation oscillator for flange and chorus effects Delay sets the length of the delay line This affects the time between echoes or the tone of flange effects FXB Send Amounts These parameters set the effects amounts for the four stereo effects busses FXB FEEDBK LFORATE DELAY 032 003 200ms FXB SEND AMOUNTS 1 1...

Страница 159: ...e set from 100 to 100 The Preset PatchCord controls are added to the FX Send Amounts set in the Master or Edit menus In other words multiple sources connected to destinations are summed O O O O To crossfade between effects 1 Set FXA Send 1 to 100 2 Set FXB Send 1 to 0 3 Set FX Cord 1 to FXA Send 1 at 100 4 Set FX Cord 2 to FXB Send 1 at 100 Increasing the controller amount will crossfade from FXA ...

Страница 160: ...they can be turned Off If set to Off the current controller value is used when the preset is first selected Setting the Initial Amount to off uses the values from the previously selected preset 0 1 2 3 31 MIDI Controller C Patchcord Destinations Control Knobs Master Menu Edit Menu A B C L 0 1 2 3 31 MIDI Controller A 0 1 2 3 31 MIDI Controller B 0 1 2 3 31 MIDI Controller L MIDI Amount Key Sustain...

Страница 161: ...9 tone equal temperament 19 notes per octave Difficult to play but works well with a sequencer Gamelan 5 tone Slendro and 7 tone Pelog Javanese Pelog are white keys Slendro are black keys Exotic tunings of Gamelan flavor Just C2 Allows you to play the following chords in the key of C C E F G A B C m D m Em F m G m Am Bm Just C minor Allows you to play the following chords in the key of C C E F G A...

Страница 162: ... explaining the mysteries of just intonation is beyond the scope of this manual but the subject is covered exhaustively in Hermann Helmholtz s On the Sensations of Tone available at most libraries and bookstores The new tables are called Just C2 Just C3 and Just C Minor Try playing in the key of C Cm using each table You ll quickly discover both the wonders and the frustrations of just intonation ...

Страница 163: ...m stacked presets with up to 12 layers We re talking LARGE sounds here Of course Links can also be used when you just want to stack up two sounds As an example let s stack two presets to create a big sound Start with a preset you like then go into the Links screen and start scrolling through the preset list while you play to hear both presets together When you find a winner simply Save the preset ...

Страница 164: ... selection screen O O O O Listening to the Riffs is a quick way to learn the sounds in Xtreme Lead If a preset has hidden tricks or controllers these will be shown off in the Riff The Riffs themselves cannot be modified Play Solo Layers When constructing multilayer sounds it is often useful to turn off one or more of the layers so you can hear what you re doing This feature allows you to temporari...

Страница 165: ...l sound Changes are not permanent until you Save them see Saving a Preset on page 191 Let s experiment and modify a few parameters of an existing preset We ll start with functions that have an obvious effect on the sound Instrument Select Tuning and Chorus Changing the Instrument Changing the instrument is the easiest and most dramatic way to modify an existing preset þ To Change the Instrument fo...

Страница 166: ...esents whole semitone intervals The Fine tuning value shifts the pitch in 1 64 semitones or 1 56 cents þ To Tune the Instrument of the Current Layer 1 Scroll through the Edit menu until you come to the Tuning page 2 Move the cursor to the Coarse field using the cursor button 3 Set the value to 12 to shift the pitch up a whole octave To shift the pitch in smaller units than a semitone use the Fine ...

Страница 167: ...ts of chorusing for each of the instruments just play around with the Chorus and Width parameter until you like what you hear Volume Envelope Every sound you hear whether it s a piano note a drum or a bell has a characteristic volume curve or envelope This Volume Envelope shapes the volume of the sound which grows louder or softer in various ways during the course of the sound The volume envelope ...

Страница 168: ...preparation for this experiment choose almost any of the standard organ presets which continues to sustain when the key is held down Go to the Instrument page and set it to None on all layers except Layer 1 Now you re ready to play with the Volume Envelope þ To Setup the Volume Envelope 1 Go to the Volume Envelope mode screen and set the Volume Envelope mode to time based 2 Now move on to the next...

Страница 169: ...in the Data Entry Control all the way to the left 1 Go to the Instrument screen Edit menu and select Instrument 140 Looped 1 This is a harmonically rich sound Since filters work by removing or accentuating certain frequencies we want to make sure that we have a lot of frequencies to start with 1 Advance to the Filter Type screen using the Data Entry Control Select the Classic 4th order filter 2 Go...

Страница 170: ...nvelope is a device that can automatically change the filter frequency during the course of the note Before we define the Filter Envelope we need to patch the Filter Envelope to the Filter Frequency þ To Setup the Filter Envelope 1 Go to the PatchCord screen 2 Move the cursor below the first field in the bottom line of the display This is the Source field Use the Data Entry Control to change the S...

Страница 171: ...rator to the Filter Cutoff as shown in the following diagram 5 Now return to the Filter Envelope Mode screen Set the Mode to time based 6 Advance to the Filter Envelope parameter page 7 Move the cursor underneath the time field and change the value to about 50 Now when you press a key the filter slowly sweeps up L1 PATCHCORD 01 FiltEnv FiltFreq 100 R L Pan Instrument Tone Filter DCA Filter Env Fc ...

Страница 172: ...ve the cursor down the lower line of the display Change the filter type while playing the keyboard There are 50 different filter types These filters are extremely powerful and have been carefully crafted to offer maximum flexibility and musical control You may want to change the Envelope PatchCord Amount Q and or the Filter Frequency to get the right sound for each filter and instrument These thre...

Страница 173: ... to the envelope parameter page and adjust the Attack 1 2 and Decay 1 2 parameters The repeating envelope cycles through these four stages as long as the key is held Practice Modulating Try modulating the pitch with the Filter Envelope generator Use Velocity to modulate the Filter Envelope PatchCord or the Filter Frequency This brightens the sound as you play harder Program the LFO to modulate Fil...

Страница 174: ... takes a little patience and practice Referring to the diagram below which shows the Xtreme Lead signal flow notice that the DCA comes after the Filter The DCA controls the final volume of the sound so if the filter s release is longer than the release for the DCA you won t hear it because the DCA has already shut off the sound You re getting the general idea by now Remember not to select a new pr...

Страница 175: ...he preset you want to link with the preset you selected in step 1 Play the keyboard as you scroll through the various presets to hear the results 4 If you want the link to be a permanent part of the preset be sure to save the preset Otherwise simply change the preset to erase your work þ To Create a Split Keyboard Using Links 1 Follow steps 1 through 4 above 2 Press Enter and use the Data Entry Co...

Страница 176: ...176 E MU Systems Programming Tutorial Linking Presets ...

Страница 177: ...l each channel Sends to the effect bus This allows each channel to be placed in a slightly different sonic space which creates an airy open sound Xtreme Lead uses this basic concept but works in a slightly different manner There are four effects busses Send1 Send4 Each preset or each MIDI channel you determine which can be directed to one of the four busses Each effect processor has four Send Amou...

Страница 178: ...o algorithm you could route one MIDI channel to Send 3 and set the effect amount to 80 Another MIDI channel could be routed to Send 4 with an effect amount of only 5 This is almost like having two different effects The Mix Output function is also useful when sequencing since it lets you route specific MIDI channels and thus sequencer tracks to specific Sub outputs on the back panel where there the...

Страница 179: ...es Room 1 3 Hall 1 2 Plate Delay Panning Delay Multitap 1 Multitap Pan 3 Tap 3 Tap Pan Soft Room Warm Room Perfect Room Tiled Room Hard Plate Warm Hall Spacious Hall Bright Hall Bright Hall Pan Bright Plate BBall Court Gymnasium Cavern Concert 9 Concert 10 Pan Reverse Gate Gate 2 Gate Pan Concert 11 Medium Concert Large Concert Large Concert Pan Canyon DelayVerb 1 3 DelayVerb 4 5 Pan DelayVerb 6 9...

Страница 180: ...e have more high frequency damping The value range for High Frequency Damping is from 0 through 127 Feedback The Feedback parameter is used when setting B type effects The Chorus and Flange effects have a controllable feedback loop after the delay element Feeding back a small amount of the signal intensifies the effect by creating multiple cancellations or images Higher feedback values increase th...

Страница 181: ...he Master menu will be used instead of the Preset Effect settings 4 Use the Data Entry Control to select the FXA parameter screen The FxB FxA parameter lets you route the B effect through the A effect See Effect B Into Effect A on page 186 5 Set the other effect parameters to your preference Refer to the infor mation in the last section for detailed descriptions of these parameters 6 Use the Data ...

Страница 182: ... When playing single presets the effects are normally programmed as part of the preset In Multimode the Master effects are used since there are only two effect processors to serve 16 MIDI channels þ To Program the Master Effects 1 Press the Master menu button The LED illuminates and the Master screen appears 2 Use the Data Entry Control to select the FXA Algorithm screen 3 Select an Effect 4 Use t...

Страница 183: ...r to the infor mation in the last section for detailed descriptions of these parameters 10 Press the Edit menu button The LED illuminates and the Edit menu displays the last screen used 11 Use the Data Entry Control to access the FXA Algorithm page and select Master Effect A _ _ _ _ The MIDI mode Master Menu must be set to Omni or Poly mode in order to select the effects in the preset 12 Repeat st...

Страница 184: ...s Control The effects processor controls are very flexible The effects can be controlled in three different ways to suit your personal preference and to adapt to different situations When in Omni or Poly mode effects are normally programmed as part of the preset In Multi mode the two effects processors can be controlled using the Master settings or by using the effects settings of a preset on a sp...

Страница 185: ...lluminates and the Master menu screen appears 2 Use the Data Entry Control to select the MIDI mode page Choose multi for the mode Preset FX Master FX Effects are part of the Preset 1 Omni or Poly Mode Master FX Preset Ch 16 Master Effects Preset FX Ch 1 2 Multi mode Preset FX Preset FX FX Master Ch 16 Ch 1 Selected FX Control Channel One Channel s Preset determines the Effect Settings 3 Multi mode...

Страница 186: ...the Data Entry Control to select the MIDI mode page Choose multi for the mode 3 Move the cursor to the Multi mode Effects Control field using the Data Entry Control 4 Set the Effect Control to preset on Channel where is replaced by the actual channel number from 1 through 16 using the Data Entry Control 5 Press Enter to save the settings and return to the main screen Effect B Into Effect A The out...

Страница 187: ... Main send amount to any amount other than zero 6 Press the cursor button again to return the cursor to the FXA title Use the Data Entry Control to advance to the FXB Algorithm page 7 Select an effect 8 Advance to the FXB submix routing page and set the Main FXB send percentage to zero 9 Play the keyboard and you should hear the B Effect running through Effect A This patch is shown below FXA DECAY...

Страница 188: ...ording to the time set by the Decay Time parameter High frequency energy tends to fade away first as a sound is dissipated in a room The High Frequency Damping parameter allows you adjust the amount of high frequency damping and thus change the characteristics of the room Rooms with smooth hard surfaces are more reflective and have less high frequency damping Rooms filled with sound absorbing mate...

Страница 189: ... realistic effect with faster LFO rates generally requiring less LFO amount and vice versa Doubling When a copy of a sound delayed by about 26 milliseconds is added back to the original two audio images are perceived by your brain When the delayed image is slightly varied or modulated the illusion of two voices is created Slapback Slapback is a single short echo in the range of 50 60 milliseconds ...

Страница 190: ... two output signals are a few milliseconds apart to create a stereo image The delay times are variable from 0 635 mS Panning Delay A panning delay is similar to the normal delay lines except that the echoes bounce back and forth between the two stereo speakers Dual Tap These are delay lines where the signal is tapped off at two unevenly spaced locations When feedback is used multiple complex echoe...

Страница 191: ...by changing the Controller Knobs in Quick Edit mode you must save the preset in order for the change to become permanent When you save a preset it erases any existing preset information in that location Make sure that the destination location does not contain preset information you want to keep Each time you change a preset parameter the Save Copy button LED illuminates reminding you to save your ...

Страница 192: ...ied to the destination location þ To Copy a Preset All the Sound Navigator features work when using the Copy functions 1 Select the Preset you want to copy information into 2 Press the Save Copy menu button 3 Select Copy Preset from using the Data Entry Control 4 Select the preset you want to copy using the Data Entry Control The ROM Bank Preset Number Bank Number Category and Preset Name fields a...

Страница 193: ... patchcord settings from one layer of the preset location into the current layer of the current preset location The preset information in the source location the preset location from which you want to copy is not deleted from the original location just copied to the destination location þ To Copy a PatchCord 1 Select the Preset and Layer you want to copy information into 2 Press the Save Copy menu...

Страница 194: ...taining the information you want to copy 5 Press the Enter Home button Copy Arpeggiator Settings This function lets you copy the Arpeggiator settings from any ROM or RAM preset location into the current RAM User preset þ To Copy the Arpeggiator Settings 1 From the main display select the User Preset you want to copy the Arp setting into 2 Press the Save Copy menu button 3 Move the cursor to any of...

Страница 195: ...The Copy Preset Bank command lets you copy an entire bank from any ROM or RAM bank location to any RAM user bank This function can be especially useful after installing a new sound SIMM þ To Copy a Preset Bank 1 Press the Save Copy menu button 2 Move the cursor to the From field on the bottom line on the display 3 Use the Data Entry Control to select the preset bank you want to copy from 4 Move th...

Страница 196: ...locations These are all User locations which you can use to store your own Multisetups Multisetups can also be restored using a MIDI Bank Select command Select cc00 80 cc32 00 dec then send a Program Change command corresponding to the Multisetup you wish to select þ To Restore Select a Multisetup 1 From the Save Copy menu scroll to the Restore Multisetup screen using the data entry control The me...

Страница 197: ...e top line when you re finished naming the multisetup Saving Multisetups þ To Save a Multisetup 1 Set the Preset Volume Pan Arp and Beats settings the way you want them for all channels Set the Master menu parameters the way you want them 2 Press the Save Copy button then scroll to the Save Setup screen shown below using the Data Entry Control 3 Press either cursor button to move the cursor to the...

Страница 198: ...e Use this feature to generate wild new sounds get new programming ideas or just for fun þ To Create a Random Preset Examine interesting presets to learn how they work using the Edit menu 1 Press the Save Copy menu button 2 Move the cursor to the bottom line on the display and press Enter 3 A new random preset will be created 4 Don t like the sound Press Enter again and a new random sound will be ...

Страница 199: ...r knobs on the circuit board The destination Flash SIMM must be placed in SIMM socket 1 þ To Copy a User Bank to Flash 1 Make sure a Flash SIMM is inserted into the extra Xtreme Lead SIMM socket _ _ _ _ If there is no Flash SIMM in the unit the error message Requires Flash SIMM will be displayed 2 Press the Save Copy menu button 3 Rotate the Data Entry Control to select the Copy User Bank function...

Страница 200: ...s the Save Copy menu button 3 Rotate the Data Entry Control to select the Rename Flash SIMM function shown above 4 Move the cursor to the New Name field and rename the SIMM using the Data Entry Control to select the letter and the cursor keys to select the position 5 Set the Sound ID number for the SIMM It doesn t matter which number you choose as long as the same number isn t used in another SIMM...

Страница 201: ...Socket 0 The destination Flash SIMM must be placed in SIMM socket 1 1 Make sure the two Flash SIMM are located in the required Xtreme Lead SIMM sockets _ _ _ _ If there are no Flash SIMMs in the unit or if the SIMMs are in the wrong slots an error message will be displayed 2 Press the Save Copy menu button 3 Rotate the Data Entry Control to select the Duplicate Flash SIMM screen shown above 4 Move...

Страница 202: ...202 E MU Systems Save Copy Menu Multisetups ...

Страница 203: ...tored in any of the User Presets The functions shown here are the factory programmed settings Filter Cutoff Filter Frequency Filter Res Filter Resonance Shape Volume or Filter Envelope Attack Image Pitch Glide Chorus Amount Layer Volume Attack Volume Envelope Attack Rate Decay Release Volume Envelope Decay or Release Rate Movement LFO Amount Rate LFO Rate Wild 1 BEATS Busy Non BEATS Filt Env Attac...

Страница 204: ...d their three letter prefixes arp Arpeggiated air Wind noise instrument bas Basses bel Bells bpm Synchro sonic clocks bts BEATS presets edg Edgy cutting hit Shorter key Keyboard instrument organ kit Drum kit led Leads nse Noises pad Sustained pad like prc Percussion raw Playable vanilla sfx Sound Effects syn Complex harmonically rich vox Vocals wal Dense harmonically complex ...

Страница 205: ... syn Grindin Me 58 syn Calmer 59 syn Zionate 60 syn Synterval 61 syn ObieLand 62 syn SWELL 63 syn Air Age 64 syn SMAK 65 syn Tink 66 syn FizzeeString 67 bas P dg mono 68 bas Ring Bassox 69 bas Saws Normal 70 bas T Dance mono 71 bas Bongo B 72 bas Top Tri mono 73 bas Hard X 74 bas Hupper mono 75 bas POLY 76 bas 2000 mono 77 bas F16 mono 78 bas Bounce 79 bas FATSO mono 80 bas H20 mono 81 bas SuB DuH...

Страница 206: ...ku High 58 pad Symphonix 59 pad Softaflange 60 pad Lifedream 61 edg Spawn mono 62 edg HlywdINative 63 edg PUNISH mono 64 edg Prephad 65 edg SCRAPE mono 66 edg REZANATOR 67 edg ACiDOP mono 68 edg Ringer mono 69 edg FuzzGrinder 70 edg BAD A mono 71 edg B CUDA mono 72 edg Swervy 73 edg Love All 74 edg Space Komper 75 edg SynkerSteppr 76 edg SQUEAKE mono 77 edg Syncked 78 edg 2Flange mono 79 edg Listo...

Страница 207: ...rp CricketGruve 58 arp Whisper 59 arp Gut P mono 60 arp MooGie D 61 arp No Lo 62 arp Trip Hard 63 arp Sanctuary 64 arp LITTLE Guy 65 arp Kosy Love 66 arp Bust In 67 arp Uroboros 68 arp Mighty Pulse 69 arp JUNOsis 70 arp C2 Play me 71 arp C2 Play me2 72 arp T 2000 73 arp HardNormlMom 74 arp On The Run 75 arp Pissto Hi 76 arp Byg Stryngs 77 arp Space Coast 78 arp Futura 79 wal Ripped 80 wal Balls2Th...

Страница 208: ...truction 61 prc Scratchin 62 prc Scratchin 2 63 prc Mixed Bag 64 prc Cooleo 65 bel Modular Ring 66 bel Efemm Bellsa 67 bel Mult A Metal 68 bel Mystery Bell 69 bel NordicCalm 70 bel Rainbellz 71 bel Agualla Bell 72 bel Encapsulate 73 nse REZAWRECKT 74 nse UNDERTAKER 75 nse Coyote 76 nse Turbonic 77 nse Heavy Mental 78 nse GrainyPixel 79 nse Faucet Drip 80 nse DarkForest 81 nse PsychicSea 82 nse Aar...

Страница 209: ...0 BTS L 101 1 61 BTS Light R 1 smf 62 BTS Lo Z 1 63 BTS LoFi 1 64 BTS Logic1 65 BTS Mind Game 2 66 BTS Mind Game 3 67 BTS Peak777 1 68 BTS Perception 1 69 BTS RollerGirl 1 mid 70 BTS Rush 1 71 BTS Semi Time 2 72 BTS System X 1 73 BTS TeknoTribe 1 74 BTS The Beast 1 mid 75 BTS Trancer 1 76 BTS TranzAmbient 77 BTS Unhooked 1 78 BTS X Mox 1 smf 79 BTS Xie racy 1 80 BTS HI NRG 81 BTS Trance Date 1 82 ...

Страница 210: ...4 SYN Nordica 135 SYN Octivate 136 SYN Orion 137 SYN Quadra 138 SYN Saint 139 SYN Sinner 140 SYN South E2 141 SYN Tran 3track 142 SYN Tripper 143 VOX Bliss 144 VOX Zephr 145 WAL Abyss 146 WAL CRide 147 WAL Love 2bee 148 WAL Mammoth 149 WAL Raverot 150 XTR Booty Q 151 BTS C Man 152 BTS Humana ...

Страница 211: ...h 9 49 Audity Synth 10 50 Audity Synth 11 51 Audity Synth 12 52 Audity Synth 13 53 Audity Synth 14 54 Audity Bass 1 55 Audity Bass 2 56 Audity Bass 3 57 Acid Bass 1 58 Acid Bass 2 59 Acid Bass 3 60 Acid Bass 4 61 Acid Bass 5 62 Acid Bass 6 63 Acid Bass 7 64 Acid Bass 8 65 Acid Bass 9 66 Acid Bass 10 67 Hybrid Bass 1 68 Hybrid Bass 2 69 Hybrid Bass 2b 70 Dance Bass 1 71 Dance Bass 2 72 Mikro Bass 7...

Страница 212: ...ed Perc 44 184 Looped Perc 45 185 Looped Perc 46 186 Looped Perc 47 187 Looped Perc 48 188 Looped Perc 49 189 Looped Perc 50 190 Looped Perc 51 191 Looped Perc 52 192 1 Shot Perc 1 193 1 Shot Perc 2 194 1 Shot Perc 3 195 1 Shot Perc 4 196 1 Shot Perc 5 197 1 Shot Perc 6 198 1 Shot Perc 7 199 1 Shot Perc 8 200 1 Shot Perc 9 201 1 Shot Perc 10 202 1 Shot Perc 11 203 1 Shot Perc 12 204 1 Shot Perc 13...

Страница 213: ...i 305 Moog Sub 306 Moogy 307 Fat Sun 308 Analog 309 Q 1 310 Q 2 311 Q 3 312 Planet 313 2600 314 Synth 1 315 Synth 2 316 Synth 3 317 Synth 4 318 Synth 5 319 Synth 6 320 Synth 7 321 Synth 8 322 Synth 9 323 Synth 10 324 TB 1 325 TB 2 326 TB 3 327 TB 4 328 CZ101 329 PPG 330 Mini 1 331 Mini 2 332 Mini 3 333 Mini 4 334 Saw 335 Ultimate 1 336 Ultimate 2 337 Micro Moog 338 DB9 1 339 DB9 2 340 Phlappy 341 ...

Страница 214: ...Lead 450 Sawtooth 451 M12 Lead 452 Sync Wave 1 453 Sync Wave 2 454 Sync Wave 3 455 Sync Wave 4 456 Sync Wave 5 457 Sync Wave 6 458 Pop Square 459 Juno Square 460 SquareAttack 461 Square Lead 462 SquareChorus 463 Sinusoid 464 Worm Lead 1 465 Worm Lead 2 466 Worm Lead 3 467 Worm Lead 4 468 Worm Lead 5 469 Worm Lead 6 470 Harmonica 471 Synth Flute 472 Soft Synth 473 Hi String 474 OBX Saws 475 Big Pla...

Страница 215: ... 584 kit 9 585 kit 10 586 kit 11 587 kit 12 588 kit 13 589 kit 14 590 kit 15 591 kit 16 592 GM Dance 593 Dance 1 594 Dance 2 595 Dance 3 596 Dance 4 597 Dance 5 598 Dance 6 599 Dance 7 600 Dance 8 601 Dance 9 602 Dance 10 603 Dance 11 604 Dance 12 605 Dance 13 606 Dance 14 607 Dance 15 608 Dance 16 609 Dance 17 610 Dance 18 611 Dance 19 612 Dance 20 613 Dance 21 614 Dance 22 615 Dance 23 616 Dance...

Страница 216: ... HeavyGtrDive 711 Drum Stab 712 Guit On It 713 Jazz Short 714 Blamp 715 Bass Slide 716 Hip Hop 717 Drum Stall 718 Stalled 719 Wind Down 1 720 Wind Down 2 721 Ripped 722 Space Wiggle 723 Sqweal Rev 724 Draggit 725 MC 726 Fun 727 SSSSystem 1 728 SSSSystem 2 729 Here 730 On It 731 Diss 732 Bow Wow 733 Diva Scratch 734 Organ Blip 735 Classic Tape 736 Out 737 Punch It 738 Ork 739 Tape Stop 740 Zip 741 ...

Страница 217: ...Snare 39 851 Snare 40 852 Snare 41 853 Snare 42 854 Snare 43 855 Snare 44 856 Snare 45 857 Snare 46 858 Snare 47 859 Snare 48 860 Snare 49 861 Snare 50 862 Snare 51 863 Snare 52 864 Snare 53 865 Snare 54 866 Snare 55 867 Snare 56 868 Snare 57 869 Snare 58 870 Snare 59 871 Snare 60 872 Snare 61 873 Snare 62 874 Snare 63 875 Snare 64 876 Snare 65 877 Snare 66 878 Snare 67 879 Snare 68 880 Snare 69 8...

Страница 218: ...7 984 Hat 18 985 Hat 19 986 Hat 20 987 Hat 21 988 Hat 22 989 Hat 23 990 Hat 24 991 Hat 25 992 Hat 26 993 Hat 27 994 Hat 28 995 Hat 29 996 Hat 30 997 Hat 31 998 Hat 32 999 Hat 33 1000 Hat 34 1001 Hat 35 1002 Hat 36 1003 Hat 37 1004 Hat 38 1005 Hat 39 1006 Hat 40 1007 Hat 41 1008 Hat 42 1009 Hat 43 1010 Hat 44 1011 Hat 45 1012 Hat 46 1013 Hat 47 1014 Hat 48 1015 Hat 49 1016 Hat 50 1017 Hat 51 1018 H...

Страница 219: ...112 Bell 19 1113 Bell 20 1114 Bell 21 1115 Bell 22 1116 Bell 23 1117 Bell 24 1118 Bell 25 1119 Bell 26 1120 Bell 27 1121 Bell 28 1122 Bell 29 1123 Bell 30 1124 Bell 31 1125 Block 1 1126 Block 2 1127 Block 3 1128 Block 4 1129 Block 5 1130 Block 6 1131 Block 7 1132 Block 8 1133 Block 9 1134 Block 10 1135 Block 11 1136 Block 12 1137 Tam 1 1138 Tam 2 1139 Tam 3 1140 Tam 4 1141 Tam 5 1142 Tam 6 1143 Ta...

Страница 220: ...ing Instrument Listing 1194 Misc 27 1195 Misc 28 1196 Misc 29 1197 Misc 30 1198 Misc 31 1199 Misc 32 1200 Misc 33 1201 Misc 34 1202 Misc 35 1203 Misc 36 1204 Misc 37 1205 Misc 38 1206 Misc 39 1207 Misc 40 1208 Misc 41 1209 Misc 42 1210 Misc 43 ...

Страница 221: ... none of these are write protected like the factory multisetup They are initialized with these layouts but you are free to overwrite them at will Trigger Layout 1 Setup 59 Parts 1 8 are set to C 2 effectively off Group 1 2 are latched and Start Stop Clear Parts are on the same trigger so that starting and stopping the sequencer also clears active parts Part 10 Part 11 Part 9 Part 12 Part 13 Part 1...

Страница 222: ...ers consecutively on the white keys Groups and functions are put up on the black keys Clear Parts Trigger Hold Start Stop Group 2 Group 4 Part 1 Part 3 Part 5 Mute Trigger Hold Group 2 Part 6 Part 8 Part 10 Part 12 Part 13 Part 15 Part 2 Part 4 Part 7 Part 9 Part 11 Part 16 Part 14 E0 F0 G0 B0 C1 D1 C2 D2 E1 F1 G1 A1 B1 A0 Multisetup 60 Trigger Layout 2 Part 2 Part 3 Part 1 Part 4 Part 5 Part 6 Pa...

Страница 223: ...ps are on the white keys under parts 14 16 and the Control Functions are on the remaining keys Part 2 Part 3 Part 1 Part 4 Part 5 Part 6 Part 7 Part 8 Part 10 Part 9 Part 11 Part 12 Part 13 Group 1 Group 2 Group 3 Group 4 Clear Parts Trigger Hold Part 15 Part 14 Part 16 Start Stop Mute C1 D1 E1 F1 G1 B1 C2 D2 E2 F2 G2 A2 B2 A1 Multisetup 62 Trigger Layout 4 ...

Страница 224: ...rve 2 0 20 40 60 80 100 120 0 20 40 60 80 100 Played Velocity 120 Result Velocity Expands dynamics in low range emphasizing medium velocity values and compressing high velocity values 0 20 40 60 80 100 120 0 20 40 60 80 100 Played Velocity 120 Result Velocity Curve 3 Expands velocity range Soft Loud 0 20 40 60 80 100 120 0 20 40 60 80 100 Played Velocity 120 Result Velocity Curve 4 Expands velocit...

Страница 225: ...0 40 60 80 100 120 0 20 40 60 80 100 Played Velocity 120 y Curve 8 Similar to Curve 6 with more emphasis on the middle range 0 20 40 60 80 100 120 0 20 40 60 80 100 Played Velocity 120 Result Velocity Curve 9 Extreme dynamic range compression 0 20 40 60 80 100 120 0 20 40 60 80 100 Played Velocity 120 y Curve 10 Extreme dynamic range compression Outputs low values 0 20 40 60 80 100 120 0 20 40 60 ...

Страница 226: ...ult Velocity Curve 12 Less severe version of Curve 11 0 20 40 60 80 100 120 0 20 40 60 80 100 Played Velocity 120 Result Velocity Curve 13 Extreme expansion of velocity range Semitone PatchCord Amount Semitone PatchCord Amount 1 3 21 66 2 6 22 69 3 approx 9 23 approx 72 5 4 approx 12 24 approx 76 5 16 25 79 6 19 26 82 7 22 27 88 8 25 28 91 9 28 29 approx 95 10 approx 31 30 98 11 35 31 12 38 32 13 ...

Страница 227: ...end No Yes Active Sensing No No System Reset No No Tune Request No No System Exclusive Sample Dump Standard File Dump MIDI Tuning Master Volume Master Balance Notation Information Turn GM1 System On Turn GM2 System On Turn GM1 System Off Other See Remarks Yes No No Yes No No No No No No No Yes No No Yes Yes No No No No No No NRPNs No No RPN 00 Pitch Bend Sensi RPN 01 Chan Fine Tune RPN 02 Chan Coa...

Страница 228: ...a time via SysEx commands although these presets can be edited independently of the current preset edited using the Front Panel Remote Preset selection is independent of the edit buffer Changing the current preset erases the edit buffer MIDI Time Code No No MIDI Machine Control No No MIDI Show Control No No Extension Capability General MIDI Compat Is GM default mode No No No No DLS compatible Impo...

Страница 229: ...al The complete SysEx specification for XL 1 is available on the official E mu Systems Inc web site www emu com Command Message Comments Note Off 8n kk vv Note On 9n kk vv velocity 0 note off Key Aftertouch An kk vv kk 0 127 vv 0 127 Program Change Cn vv 0 127 Channel Aftertouch Dn vv 0 127 Pitch Bend En ll mm l lsb m msb Real time Controller Bn cc vv cc 00 31 64 95 Footswitch Bn cc vv cc 64 79 vv...

Страница 230: ...20 bit DACs Max Output Level 4 dB Output Impedance 1000 Ohms Sound Memory 32 MB expandable to 64 MB Data Encoding 16 bit linear data Effects Engine 24 bit internal processing Sample Playback Rate 44 1 kHz Signal to Noise 92 dB Dynamic Range 90 dB Frequency Response 20 Hz 20 kHz 2 1 dB THD Noise 0 02 1kHz sine wave A weighting IMD 0 05 Stereo Phase Phase Coherent 1º at 1 kHz Power Consumption 15 Wa...

Страница 231: ...cifically disclaims any implied warranty of merchantability satisfactory quality and fitness for a particular purpose EMU s liability under warranty is limited to repair or replacement of the unit or refund at EMU s option In no event will EMU be liable for loss of revenue or savings loss of time interruption of use or any other consequential indirect incidental special or exemplary damages The fo...

Страница 232: ...dence with this number EMU suggests you carefully and securely pack your unit for return to the factory Do not send the power cord or operation manual Send the unit to E mu Systems Inc 1600 Green Hills Road Scotts Valley CA 95066 You must pre pay shipping charges to EMU EMU will pay return shipping charges You will be responsible for any damage or loss sustained during shipment in any direction 3 ...

Страница 233: ...d thru 64 latch mode 64 master parameters 57 MIDI out 55 MIDI song start 55 65 mode 58 note value 59 63 pattern 56 59 pattern naming 69 pattern speed 59 recycle 64 status 58 sync 62 user patterns 66 velocity 60 arpeggiator modes 56 assign group 139 attack envelope 136 145 152 172 audition beats 46 Audition Button 34 Audition preset 25 audition riff 164 auxiliary envelope 95 145 B B effect types 17...

Страница 234: ... 33 35 only mode 35 standardized MIDI numbers 84 copy preset patchcords 194 copying layers 192 patchcords 193 preset banks 195 presets 192 create random preset 198 crossfade random 94 crossfade ranges 130 current tempo 44 offset 164 cursor buttons 34 curve velocity 75 volume 167 curve glide 140 cutoff frequency 111 169 D damping high frequency 180 188 data entry control 35 DC offset example 108 DC...

Страница 235: ...b 188 send amounts 177 sends 177 slapback 189 stereo delay 190 submix routing A 79 157 158 type A 78 156 179 180 type B 80 157 179 180 vibrato 190 enabling MIDI channels 82 enter button 34 envelope attack 136 145 152 auxiliary 145 decay 167 filter 143 170 171 173 generator 93 95 mode factory 168 mode filter 171 release 167 repeating 96 reverberation 188 volume 135 136 167 168 envelope generator ex...

Страница 236: ...ves beat 45 group assigning channels to a 139 groups beats 45 H headphones 22 HF Damping 79 high frequency damping 180 188 high pass filter 110 169 home position 27 home enter button 34 43 73 I ID number sysex 81 implementation chart MIDI 227 initial pan position 134 initial volume 134 instrument 115 165 category 41 listing 211 selecting 124 inverting LFO waves 98 J just C tuning 161 description 1...

Страница 237: ...8 master effect 185 master menu 73 Master Riff 46 master riff 53 master tempo 85 offset 164 master tuning 74 melody solo mode high 138 last 138 low 138 menu master 73 save copy 191 MIDI 85 A H messages 35 bank select display 25 34 channel 38 channel selection 38 clock 44 continuous controllers 83 93 116 controller 7 39 device ID 81 enable 82 external clock 98 footswitches 84 implementation chart 2...

Страница 238: ... generator 93 non transpose mode 138 notch filter 111 note value arpeggiator 59 63 note on modulation 100 O offset arpeggiator key 67 omni mode 81 184 229 output headphones 22 jack 22 23 mix 153 178 mono 22 23 routing 153 overall tuning adjusting 74 P packet delay MIDI sysex 88 pan 115 channel 40 initial 134 preset link 163 pan control 40 panning delay effect 190 panning L R 40 parameters effects ...

Страница 239: ...or key 65 extension count 61 key 125 126 keyboard 125 pitchbend 153 velocity 128 rate effect LFO 80 180 glide 140 LFO 147 rate master FXB LFO 80 rate level envelopes 95 real time control of arps 57 real time controller assignment 83 crossfading 130 mode quick edit and 36 real time controllers 33 35 116 real time crossfade 130 receive program change 83 received channel commands MIDI 229 receiving M...

Страница 240: ... 102 mod processor 101 summing amp processor 101 summing nodes 92 superBEATS 44 superbeats 43 superbeats definition 44 swept EQ filter 113 switch mod processor 101 switch processor 101 105 sync arpeggiator 62 key 62 LFO 145 147 MIDI song start 55 synth solo mode high 139 last 138 low 139 system exclusive device ID 81 ID 81 packet delay 88 send data 89 T tap tempo 44 technical specifications 230 te...

Страница 241: ...release 93 user pattern 68 vibrato effect processor 190 viewing angle 90 viewing angle screen 90 voices changing 165 voices stolen 139 voltage setting 24 volume control 33 control 7 39 curve 167 envelope 115 135 136 167 168 preset link 163 volume envelope 95 volume channel 39 volume initial 134 W waveform inverting 98 waveforms LFO 97 weight 230 Werkmeister tuning 161 wheel modulation 84 93 pitch ...

Отзывы: