


4
EN
1.
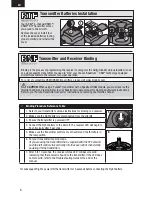
Charge fl ight battery.
2.
Install fl ight battery in aircraft (once it
has been fully charged).
3.
Bind aircraft to transmitter. (BNF only)
4.
Make sure linkages move freely.
5.
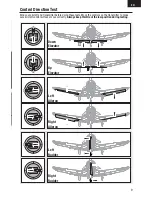
Perform Control Direction Test with
transmitter.
6.
Set dual rates and expos.
7.
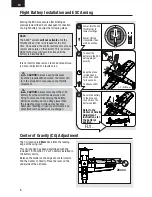
Adjust center of gravity.
8.
Perform a radio system Range Check.
9.
Find a safe and open area.
10. Plan fl ight for fl ying fi eld conditions.
Horizon Hobby has always made RC sport, scale
and unique aircraft with the kind of performance
experts appreciate. Now the exclusive Artificial
Stability – 3 aXis (AS3X) system helps take
performance expectations in ultra micro aircraft a
quantum leap higher.
Based on the successful use of MEMS sensor
technology within the AS3X Stabilization System
essential to Blade
®
ultra micro flybarless
helicopters, the specifically tuned AS3X System
for airplanes helps invisibly correct for turbulence,
torque and tip stalls when encountered.
Furthermore, the outstanding control agility delivers
an ultra smooth, locked-in feel that obeys your
every command with performance that’s natural
feeling. It’s so gratifying, in fact, that it’s as though
you’re the RC pilot of an expertly tuned, giant-scale
model.
AS3X will change the way you’ll want to fly now and
in the future. To see what we mean, go to
www.E-fliteRC.com/AS3X.
Prefl ight Checklist
AS3X Stabilization Delivers Breakthrough Performance
l
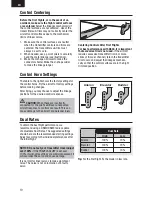
Charging Warnings
The Battery Charger (EFLC1000) included with your
aircraft has been designed to safely charge the Li-Po
battery.
CAUTION:
All instructions and warnings must
be followed exactly. Mishandling of Li-Po batteries
can result in a fi re, personal injury and/or property
damage.
• By handling, charging or using the included
Li-Po battery, you assume all risks associated
with lithium batteries.
• If at any time the battery begins to balloon or
swell, discontinue use immediately. If charging
or discharging, discontinue and disconnect.
Continuing to use, charge or discharge a battery
that is ballooning or swelling can result in fi re.
• Always store the battery at room temperature
in a dry area for best results.
• Always transport or temporarily store the
battery in a temperature range of 40–120º F
(5–49° C). Do not store the battery or model in a
car or direct sunlight. If stored in a hot car, the
battery can be damaged or even catch fi re.
• Always charge batteries away from fl ammable
materials.
• Always inspect the battery before charging.
• Always disconnect the battery after charging,
and let the charger cool between charges.
• Always constantly monitor the temperature
of the battery pack while charging.
• ONLY USE A CHARGER SPECIFICALLY DESIGNED
TO CHARGE LI-PO BATTERIES. Failure to charge
the battery with a compatible charger may cause
a fi re resulting in personal injury and/or property
damage.
• Never discharge Li-Po cells to below 3V
under load.
• Never cover warning labels with hook and
loop strips.
• Never leave charging batteries unattended.
• Never charge batteries outside
recommended levels.
• Never charge damaged batteries.
• Never attempt to dismantle or alter the charger.
• Never allow minors to charge battery packs.
• Never charge batteries in extremely hot or
cold places (recommended between 40–120° F
or (5–49° C) or place in direct sunlight.


