


• After confirming that the transmitter has been turned on and that the LED
is glowing solid red, it is now safe to connect the flight battery to the
5-in-1 unit.
Note: It is extremely important that you do not move or sway the
helicopter once you connect the flight battery. If you do move the
helicopter while the 5-in-1 is initializing, disconnect the flight battery from
the 5-in-1 unit and repeat the initialization process.
• When the status LED becomes solid red, the 5-in-1 unit is initialized and
ready for flight. Also, as long as you had the throttle stick and trim set the
correct positions during the initialization process, the ESCs/motors will
now be armed. Use caution as both rotor blades will now spin with throttle
stick input.
Note: If the status LED does not become solid red, please review the
following:
• If after blinking red the status LED becomes solid red, but you have
no control of the motors, you have a positive Radio Frequency (RF) link
between the transmitter and receiver, but the throttle stick and throttle
trim may not be set to the correct positions. Check to be sure that the
throttle stick is in the lowest possible position, and that the throttle trim
is set to the middle position or lower than the middle position. If you now
have control of the motors, proceed to the next step of the checklist.
• If the blinking red status LED keeps flashing, you do not have a positive
RF link between the transmitter and receiver. Check to be sure that
the transmitter has been powered on and that the LED indicator on the
transmitter is glowing solid red. If the transmitter is powered on and
functioning properly, disconnect the flight battery from the 5-in-1 unit, then
reconnect it. Now the 5-in-1 unit should initialize and arm properly.
Note: In the event you inadvertently enter Bind Mode, the LED will
be flashing red continuously. If this occurs, cycle flight battery while
the transmitter is on (If previously bound).
If your 5-in-1 unit will not initialize and arm after following the guidelines as
listed above, call the Horizon Support Team at 1-877-504-0233.
5-in-1 Control Unit Description, Arming and
Motor Control Test
The unique 5-in-1 Control Unit installed on your Blade mCX is a lightweight
combination of main motor electronic speed controls, mixer, gyro, servos
and Spektrum DSM2 compatible receiver. The 5-in-1 unit is also equipped
with a status indicator LED.
The following checklist contains the steps you must follow to ensure proper
arming and operation of the 5-in-1 unit, as well as proper motor response:
• Each time before you fly you should ALWAYS turn the transmitter on
before connecting the flight battery to the 5-in-1 unit. After each flight,
be sure that you always disconnect the flight battery from the 5-in-1
unit before powering the transmitter off.
Note: The only time you should connect the flight battery to the
5-in-1 unit before powering the transmitter on is when you are
binding the receiver of the 5-in-1 unit to the transmitter. Please
see the Transmitter and Receiver Binding section of this manual for
more information.
• The throttle stick MUST be set in the lowest possible position, and the
throttle trim must be set to the middle or a lower than middle position
(the middle position is indicated by a longer than usual beep/tone), in
order for the 5-in-1 unit to arm.
If this is the first test flight, or a test flight following repairs, you should also
center the rudder, aileron and elevator trims.
16
17
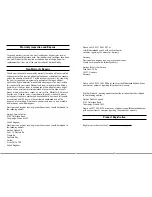
Set throttle
stick at lowest
possible position.
Set throttle
stick at lowest
possible position.
Mode 2
Mode 1
Содержание EFLH2200
Страница 19: ......


