


OSD -
CAMERA SETUP > WB SETUP
45
WB SETUP - DAY
DAY/NIGHT
The day/night mode can be set independently.
Night mode will only be deactivated if “AGC” in “CAMERA SETUP”
is set to “OFF” or “FIX.”
WB MODE
- ATW1:
The color temperature is adjusted automatically between
2500K and 9300K.
- ATW2:
The color temperature is adjusted automatically between
2000K and 10000K.
- AWC:
The color temperature is adjusted automatically once, then
adjusted value of “R-GAIN, B-GAIN” are maintained. Gain value can
be adjusted manually by the user. It can be fixed as 3200K or 5600K.
- OFF:
Only activated when “NIGHT” is selected. At night, the setting
will be same as day’s setting.
RED/BLUE ADJUST
In every mode except “OFF,” users can adjust the red/blue adjust
value to have the image they want.
R/B - GAIN
If AWC is on, the adjusted value will be marked. Also, the user can
adjust the values after it was adjusted automatically.
DAY / NIGHT
ATW1 / ATW2 / AWC / 3200K / 5600K / OFF
-32 ~ +32
0 ~ 1023
>
WB SETUP
- - - - - - - - - - - - - - - - - - - - - - - - - - -
DAY/NIGHT
- WB MODE
- RED ADJUST
- BLUE ADJUST
BACK
EXIT
DAY
ATW2
0
0
Press
Near/Enter
Key
>
>
2
WB SETUP - NIGHT
6
BRIGHTNESS
When “NIGHT” is selected, it sets the criterion of the automatic
day/night selection.
If set to “LOW,” the image has to be very dark to be recognized as
night among 3 settings. If set to “HIGH,” the image will be recognized
as night even though it is a little dark.
LOW / MIDDLE / HIGH
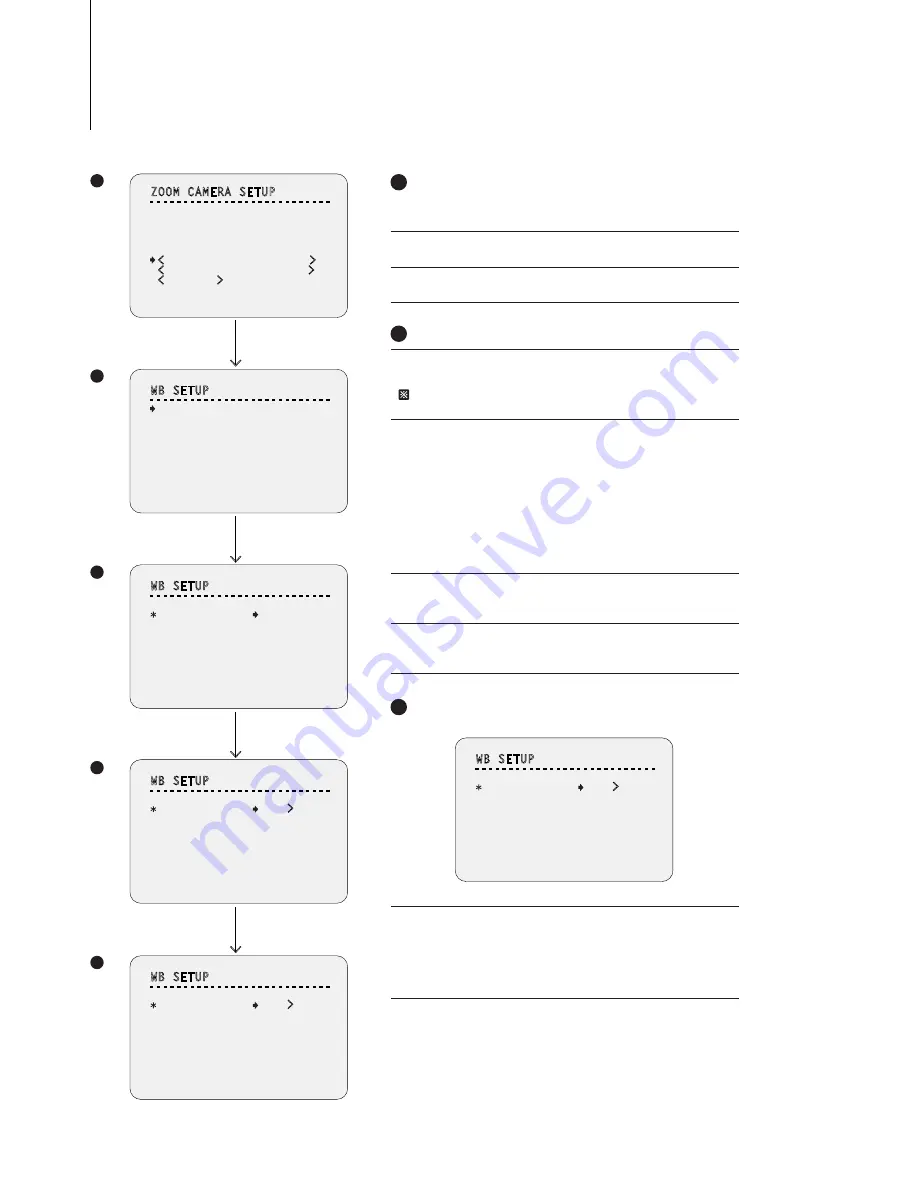
ZOOM CAMERA SETUP
- - - - - - - - - - - - - - - - - - - - - - - - - - -
FOCUS MODE
DIGITAL ZOOM
IMAGE FLIP
FLICKERLESS
DIS MODE
<
WHITE BALANCE SETUP
>
<
AUTO EXPOSURE SETUP
>
<
SPECIAL
>
BACK
EXIT
SEMIAUTO
ON
OFF
OFF
OFF
WB SETUP
- - - - - - - - - - - - - - - - - - - - - - - - - - -
DAY/NIGHT
- WB MODE
- RED ADJUST
- BLUE ADJUST
BACK
EXIT
DAY
ATW2
0
0
WB SETUP
- - - - - - - - - - - - - - - - - - - - - - - - - - -
DAY/NIGHT
- WB MODE
- RED ADJUST
- BLUE ADJUST
- R-GAIN
- B-GAIN
BACK
EXIT
DAY
AWC
>
0
0
0
0
WB SETUP
- - - - - - - - - - - - - - - - - - - - - - - - - - -
DAY/NIGHT
- WB MODE
- RED ADJUST
- BLUE ADJUST
- R-GAIN
- B-GAIN
BACK
EXIT
DAY
AWC
>
0
0
74
5
2
WB SETUP
- - - - - - - - - - - - - - - - - - - - - - - - - - -
DAY/NIGHT
- WB MODE
- BRIGHTNESS
- RED ADJUST
- BLUE ADJUST
- R-GAIN
- B-GAIN
BACK
EXIT
NIGHT
AWC
>
MIDDLE
0
0
74
5
2
>
Joystick Down,
Press Near Key
Joystick Down
Joystick Right
5
1
2
4
3
1
DIS MODE
Sets the digital image stablization mode.
<SPECIAL>
Goes to “SPECIAL SETUP” screen.
ON / OFF
ZOOM CAMERA SETUP
Basically the camera setup is same as x27, x33, x36, x37 except
for “DIS MODE,” “<SPECIAL>.”