5 3
WEBVIEWER*
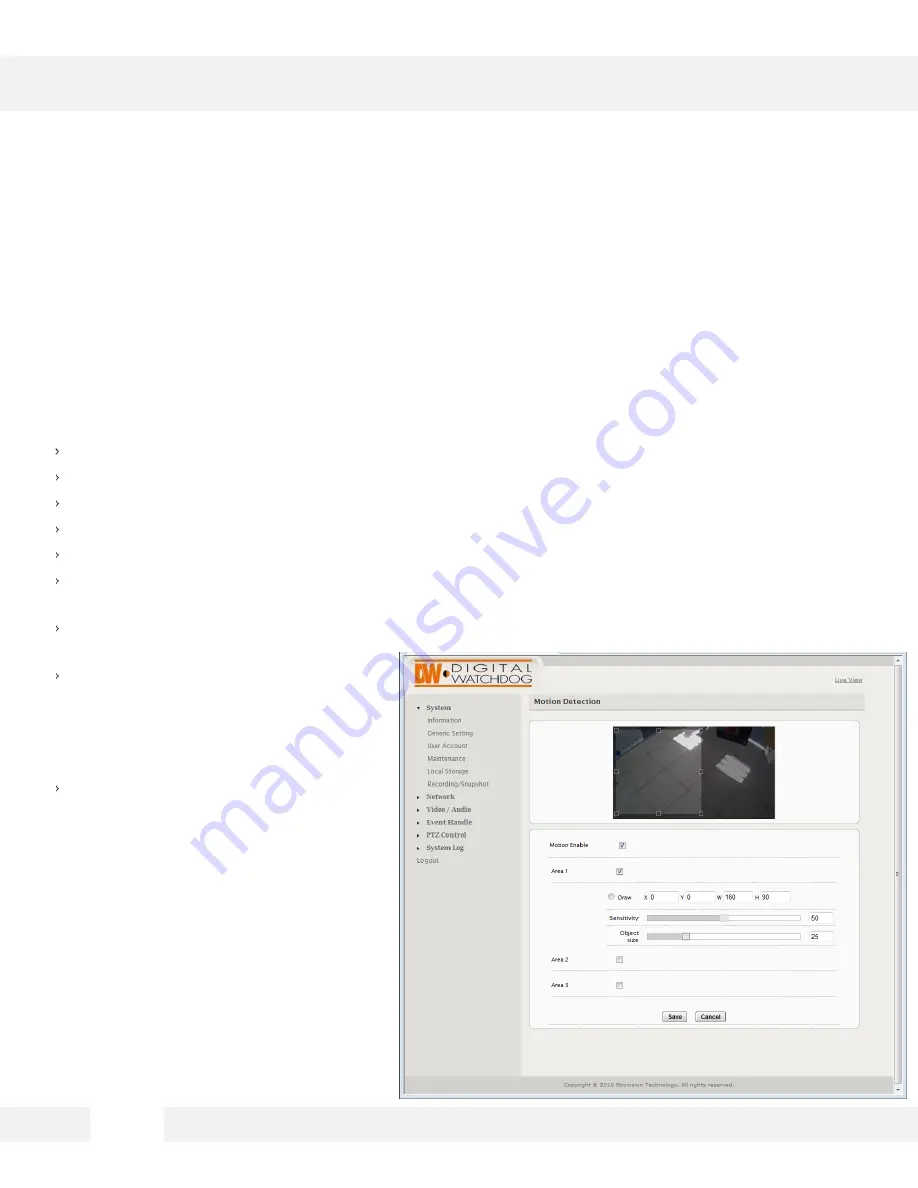
S e t u p > E v e n t H a n d l e > M o t i o n D e t e c t i o n
T o u s e m o t i o n d e t e c t i o n , m o t i o n d e t e c t i o n s h o u l d b e e n a b l e d a n d a t l e a s t
o n e m o t i o n d e t e c t i o n a r e a e n a b l e d . C h e c k i n g t h e b o x f o r a n A r e a ( e . g .
A r e a 1 ) e n a b l e s i t .
Make sure “Motion Enable” is checked.
The camera supports up to three (3) different motion detection areas. To set them up:
Select an area by checking the box next to it.
Click on the ‘Draw’ button.
Using your mouse, draw the zone
on the camera’s display window.
Use the block’s handles to adjust the size or move the mouse over the area and click/drag to move
the motion zone.
You can also use the X=horizontal, Y=vertical, W=width, H=height values to manually adjust the
position and size of the motion zone.
Set the camera’s sensitivity to the
motions. Select from a scale of 0 to 100;
default is 50. The lower the number the
less sensitive the camera will be to
motion.
Object size determines the size of an
area that will trigger motion detection.
The value represents percentage of the
motion detection area which will result in
motion detection. Select from a scale of
0 to 100; default is 25.
Содержание megaPix DWC-MV950TIR
Страница 5: ...1 Camera Housing 2 Lens 3 IR LEDs 4 Camera Module PARTS DESCRIPTIONS 5...
Страница 6: ...6 DIMENSIONS...
Страница 7: ...The following items are included with the MEGAPIX camera 7 INSIDE THE BOX MV950TIR...
Страница 16: ...1 6 WEBVIEWER GUI Description...
Страница 69: ...6 9...


