5-3
Maintenance
2
1
3
4
I
5
A
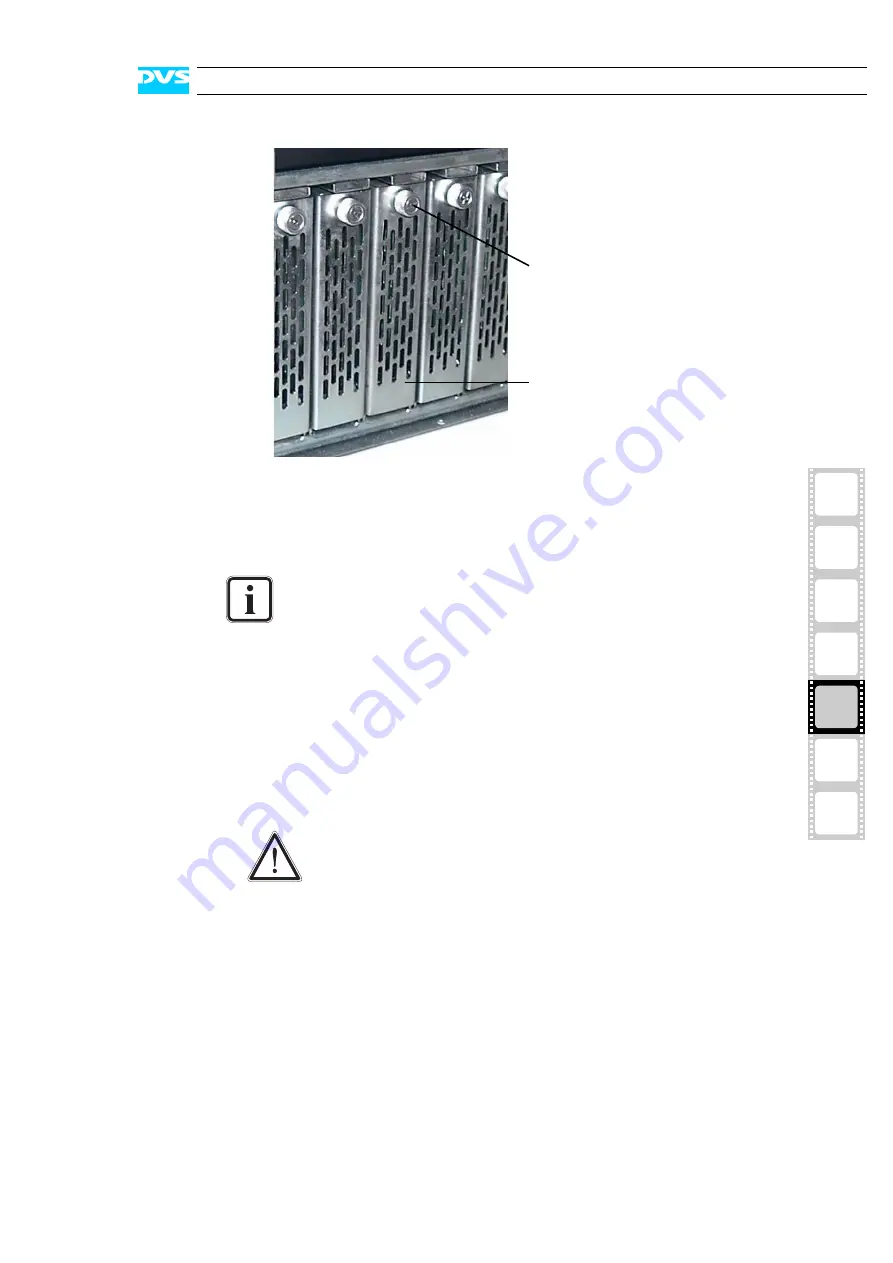
Figure 5-1: Hard disk carrier overview
To remove a video disk from the system perform the following:
!
If appropriate, stop the operation of your video system.
!
Remove the faceplate of the video system (see section “Face-
plate” on page 4-5).
!
Unscrew the mounting screw of the disk carrier of the defective
hard disk. The front of the disk carrier then drops down.
!
Lower the front of the disk carrier more until the hard disk comes
out of its interface inside the video system.
!
Pull the disk carrier carefully out of the video system.
Now the video hard disk is removed from the video system and has
to be replaced.
Step 2: Replacing the Video Hard Disk
To replace the video hard disk do the following:
!
Unscrew the screws that fix the hard disk to the disk carrier.
Although you can change the video disks with the power
turned on (on-the-fly), it is recommended to shut down the
system for this procedure.
Significant environmental changes, for example, altitude,
voltage, temperature, shock, vibration, etc., can damage
the hard disks. Therefore, handle the hard disks with
great care.
disk carrier
mounting screw
Содержание Pronto2K
Страница 1: ...Home Start Digital Disk Recorder Pronto2K ProntoHD Hardware Guide ...
Страница 2: ......
Страница 6: ......
Страница 8: ......
Страница 54: ...5 8 Pronto2K ProntoHD Hardware Guide ...
Страница 70: ...A 16 Pronto2K ProntoHD Hardware Guide Figure 3 Figure 4 Figure 5 a b c Box A Box B Box B Box B Box B Box B ...


