background image

9                                                     


DVDO-Xtend-RX100_V1 0.0 

DVDO

    DVDO-Xtend-RX100 HDBaseT 2.0 Receiver with USB and Audio De-embedding User Manual   


ID 

Name 

Description 

AUDIO OUT 

Unbalanced stereo audio output. 


De-embed (left)

: For audio de-embedding 

from the HDMI output. 


Pass  Through  (right)

:  For audio 

pass-through from Audio IN port on the 
transmitter to this port. 

USB DEVICE 

Connect to USB devices (e.g. keyboard, 
mouse, USB camera, USB flash drive, etc.). 


Содержание DVDO-Xtend-RX100

Страница 1: ......

Страница 2: ......

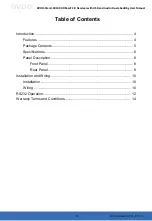
Страница 3: ...h USB and Audio De embedding User Manual Table of Contents Introduction 4 Features 4 Package Contents 5 Specifications 6 Panel Description 8 Front Panel 8 Rear Panel 8 Installation and Wiring 10 Insta...

Страница 4: ...le via a single power supply Features Simple ultra slim and cost effective HDBT 2 0 receiver HDBT input and HDMI output support resolutions up to 4K 60Hz YUV 4 2 0 and HDCP 2 2 HDBT transmission up to...

Страница 5: ...l Built in PSE to power remote HDBT transmitter Package Contents Before you start the installation of the product please check the package contents as below DVDO Xtend RX100 Receiver x 1 DC 12V Power...

Страница 6: ...at 50Hz 7 at 59 94Hz 8 60Hz Note 4096x2160 3840x2160 50 60Hz is based on chroma sub sampling 4 2 0 8 bit only Input Video Level 0 5 1 0V p p Maximum Pixel Clock 297MHz Output 1 x HDMI OUT Output Signa...

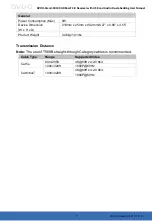
Страница 7: ...Max 8W Device Dimension W x H x D 210mm x 25mm x 90 2mm 8 27 x 0 98 x 3 55 Product Weight 0 46kg 1 01lbs Transmission Distance Note The use of T568B straight through Category cables is recommended Cab...

Страница 8: ......

Страница 9: ...Manual ID Name Description 5 AUDIO OUT Unbalanced stereo audio output De embed left For audio de embedding from the HDMI output Pass Through right For audio pass through from Audio IN port on the tran...

Страница 10: ......

Страница 11: ......

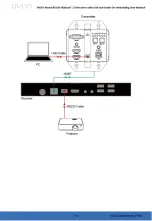
Страница 12: ...nabled device connected to receiver at transmitter side Steps to control the RS232 device at transmitter side 1 Connect RS232 Connect a RS232 enabled device e g a projector to RS232 port of the receiv...

Страница 13: ......

Страница 14: ...warranty has expired 3 The defects are caused by the fact that the product is repaired dismantled or altered by anyone that is not from an authorized service partner The defects are caused by the fac...

Страница 15: ......

Страница 16: ......

Отзывы: