


Table of Contents
Additional Instructions H-TYPE - 00.0 - 09/2017
1
General information ................................................................... 3
Disassembling the old tensioning plate ................................... 5
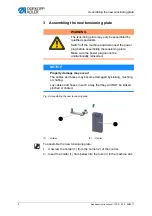
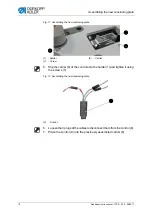
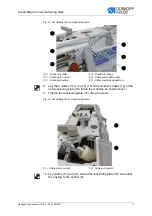
Assembling the new tensioning plate ...................................... 8
Содержание H-TYPE CLASSIC
Страница 1: ...H TYPE Additional Instructions Replacing the winder ...
Страница 4: ...Table of Contents 2 Additional Instructions H TYPE 00 0 09 2017 ...
Страница 17: ......