


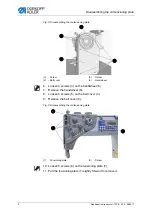

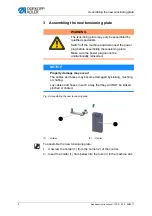


Assembling the new tensioning plate
8
Additional Instructions H-TYPE - 00.0 - 09/2017
3
Assembling the new tensioning plate
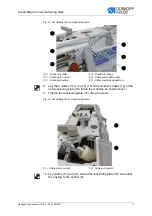
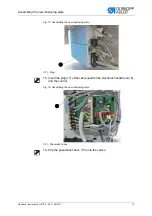
Fig. 8: Assembling the new tensioning plate
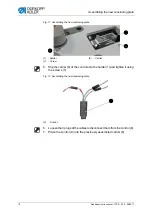
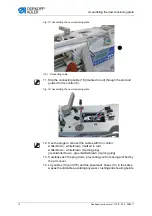
To assemble the new tensioning plate:
1.
Unscrew the holder (1) from the carrier (2) of the control.
2.
Insert the holder (1) from below into the hole (3) in the machine arm.
WARNING
The tensioning plate may only be assembled by
qualified specialists.
Switch off the machine and disconnect the power
plug before assembling the tensioning plate.
Make sure the power plug cannot be
unintentionally reinserted.
NOTICE
Property damage may occur!
The cables and hoses may become damaged by kinking, crushing
or chafing.
Lay cables and hoses in such a way that they will NOT be kinked,
pinched or chafed.
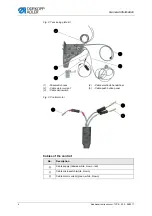
(1)
- Holder
(2)
- Carrier
①
②
Содержание H-TYPE CLASSIC
Страница 1: ...H TYPE Additional Instructions Replacing the winder ...
Страница 4: ...Table of Contents 2 Additional Instructions H TYPE 00 0 09 2017 ...
Страница 17: ......