background image

Durios A7 Ultimate Tablet PC


User Guide


19 


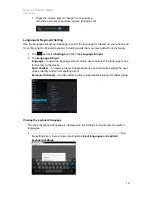
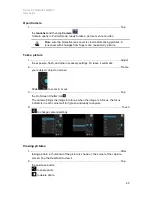
1.   Press the volume keys to change the ring volume 

(On Home screen) or earpiece volume (during a call) 


Language & Keyboard Setting


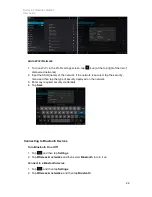
Use the Language & keyboard settings to select the language for the text on your phone and 
for configuring On-Screen Keyboard, including words that you have added to its dictionary 


1.   Tap 


and select 

Settings 

and then tap 

Language & input


2.   Tap 

Language & Input


language 

– to open the language screen, where user can select the language to use 

for the text on the device. 

Spell checker 

– to improve the text-input experience on Android by helping the user 

quickly identify and correct spelling errors 

Personal dictionary 

– to add custom words to a personal dictionary for faster typing 


Change the keyboard language


The current keyboard language is displayed on the Settings icon and user can switch 
languages. 


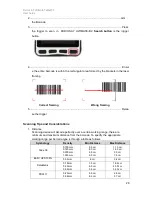
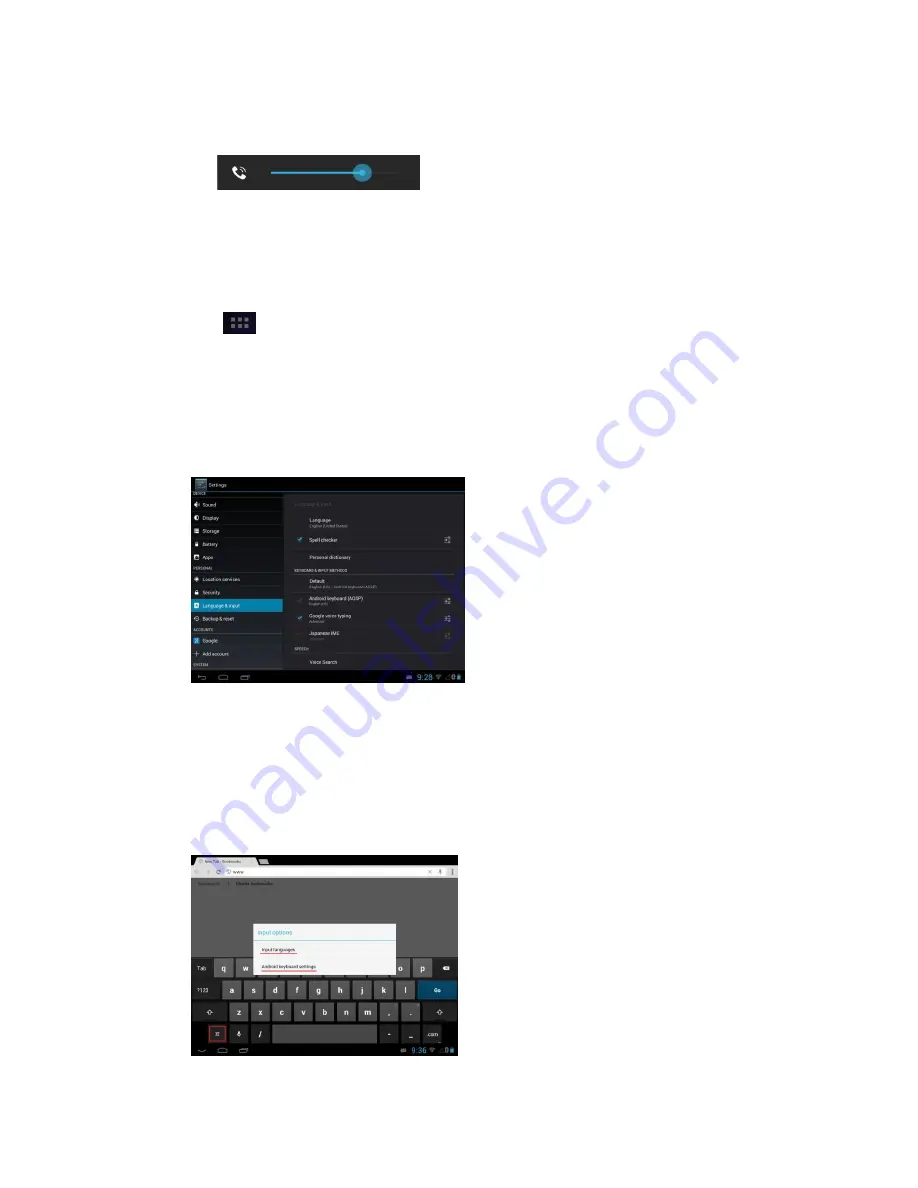
1.............................................................................................................................. Tap 

the settings icon, there are two input options 

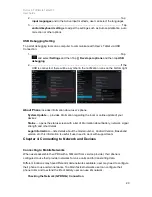
input languages 

and 

android 

keyboard settings


Содержание A7 ULTIMATE

Страница 1: ...DURIOS A7 ULTIMATE Tablet PC Android 4 2 User Guide Version 1 00 Revision A August 2013 ...

Страница 2: ...llation 8 User Replaceable Battery Installation 8 Battery Charging 9 Turning On and Off the Device 9 Turning the DURIOS A7 ULTIMATE On 9 Turning the DURIOS A7 ULTIMATE Off 10 Resetting to Factory Defaults 10 Chapter 3 Using Android 4 2 Operating System Wake Up the Phone 11 Using the Touch Screen 11 Using the Home Screen 12 Personalizing Home Screen 12 View other parts of the Home Screen 13 Status ...

Страница 3: ...Durios A7 Ultimate Tablet PC User Guide 2 Sounds Setting 18 ...

Страница 4: ... Fi and Connect to a Wi Fi Network 20 Add a Wi Fi Networks 21 Connecting to Bluetooth Devices 22 Turn Bluetooth On or Off 22 Connect to a Bluetooth Device 22 Disconnect from a Bluetooth Device 22 Connecting to Computer via USB 22 Chapter 5 Using the Camera Open Camera 24 Take a Picture 24 Switch between Front and Back Cameras 24 Shoot a Video 25 Opening a Gallery 25 Chapter 6 Data Capture Scanning...

Страница 5: ...splay the Phone Options menu for 3 sec then tap Airplane mode To turn off communication options e g Bluetooth Wi Fi Cellular modem radio Select Settings tap Wireless Networks if Wi Fi is set to ON Touch to turn it OFF RF Exposure Information This Tablet PC meets the government s requirement for exposure to radio waves This Tablet PC is designed and manufactured not to exceed the emission limits fo...

Страница 6: ...e to static electric charges Always ground yourself to remove any static charge before touching the CPU Card Battery Safety Information Do not use other battery which is not intended for the product Use only the battery compatible for the device and follow battery usage storage and charging guidelines in this user guide A damage rechargeable Lithium ion polymer battery can cause explosion or fire ...

Страница 7: ...tatic discharge precaution to prevent static damage that can harm electronic components inside your device Driving Using mobile device or accessory while driving may cause distraction and maybe illegal in some areas where you drive Please obey the laws and regulations on the use of mobile device ...

Страница 8: ...his device is capable of running Android 4 2 and has 7 inch capacitive multi touch display offers 1024 x 600 pixel TFT LCD display resolution Other new era tech includes Built in WLAN 802 11 a b g n Bluetooth 4 0 built in 3G Module or optional Neo 6 GPS module Features This section provides the features of the DURIOS A7 ULTIMATE and describes how to set this device for the first time ...

Страница 9: ...Durios A7 Ultimate Tablet PC User Guide 8 Features ...

Страница 10: ...atus Green light Indicates the device is charging Red light Indicates low battery 10 Power Mode Status Blue light indicates the Power On No light indicates no Power 11 Volume Up Increase the volume of music or radio 12 Volume Down Decrease the volume of music or radio 13 DC Jack 5 V DC In 14 Audio Jack To connect a set of headphones external speakers or an audio device 15 USB Ports To connect USB ...

Страница 11: ...follows 4 Insert the SIM card with the gold parts facing up and cut off corner facing out and push it in the direction of the arrow as shown in the figure 5 Push the SD card holder in the direction of the arrow to insert it User Replaceable Battery Installation DURIOS A7 ULTIMATE is equipped with user replaceable battery to replace the battery 1 Switch off the device place the device down and then...

Страница 12: ...Durios A7 Ultimate Tablet PC User Guide 1 1 2 Press the battery locker and pull it out marked in blue ready to replace with the fully charged battery ...

Страница 13: ...e rubbed bumper on the side of the device 2 Locate the DC Jack 3 Connect the power supply output connector to the input power port on the Device 4 The battery charge LED indicates the battery charging status LED Status Indication OFF DURIOS A7 ULTIMATE is not charging or not properly connected Solid Red Low battery 20 11 Flash Red Low battery 10 5 Solid Orange Charging Solid Green Charging is comp...

Страница 14: ...tions menu to put the device into silent or airplane mode see features table Resetting to Factory Defaults To reset the device to factory defaults 1 Tap than tap Settings 2 Locate Backup reset and then tap it 3 Tap Factory data reset user can select to back up application data Wi Fi passwords and other settings to Google servers by tapping Back up my data 4 Read all the available information and t...

Страница 15: ...hile the screen dims and then darkens to conserve the battery To wake up the phone 1 Press the Power button on the top of the PDA 2 Drag the lock icon to the right 3 There are several options to choose the screen lock method such as Slide Pattern PIN or Password 4 To select the screen lock method Tap select Settings and then select Security ...

Страница 16: ...rs on the screen at once and pinching them together to zoom out and spreading them apart to zoom in Rotate the screen Orientation of the screens rotates with the phone as user turn it from upright to its side and back again Using the Home Screen Home screen is the starting point to access all the features on your PDA Device It displays application icons widgets shortcuts and other features User ca...

Страница 17: ...finger To remove an item from the Home screen 1 Tap and hold the item you want to remove The launcher icon will change into a Remove icon 2 Drag the item you want to remove to the Remove icon on the top of the screen 3 When the icon turns red release your finger View other parts of the Home Screen 1 Slide your finger left or right across the Home screen Extensions to the Home screen provide extra ...

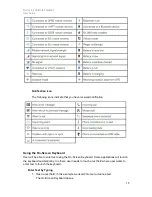
Страница 18: ... the home screen user can t go back any further in user history Home Opens Home If you are viewing a left or right Home screen opens the central home screen Opens a list of thumbnail images of apps user have worked with recently To open an app tap it To remove a thumbnail from the list swipe it left or right Status Icon The following icons indicate the status of your PDA for example if users are c...

Страница 19: ...en Keyboard User will be able to enter text using the On Screen Keyboard Some applications will launch the keyboard automatically In others user needs to touch a text field where user wants to enter text to launch the keyboard Enter Text by Typing 1 Open a text field in this example we used Chrome to create a text The On Screen Keyboard opens ...

Страница 20: ...lect a word to copy cut and paste it See Editing Text 2 Tap the delete key to erase characters to the left of the cursor 3 Tap to enter numbers Tap to return to letters 4 To enter symbols and other characters tap and hold one of the top row keys and slide your finger up to the list of the options Lift your finger when you find your selection 5 To view additional symbols tap on the numeric keyboard...

Страница 21: ...erent text field To Paste Text 1 After Cut or Copy the text see To Cut or Copy Text 2 Place the cursor in the text field where you want to paste the text user can paste text that you copied from one application into a text field in any application 3 Tap and hold into the location that you want to paste Tap Paste in the menu that opens to replace the existing text with copied text Display Setting U...

Страница 22: ...ofile Setting Use the sound settings to configure how and at what volume the phone rings vibrates or alerts user in other ways when user receive a call receive a notification or an alarm sounds Sounds Setting 1 Tap and select Settings and then tap Sound 2 Tap Volumes and then user can select to disable or adjust the Music video games other media as well as notifications and Alarms Adjust Volume ...

Страница 23: ...en tap Language input 2 Tap Language Input language to open the language screen where user can select the language to use for the text on the device Spell checker to improve the text input experience on Android by helping the user quickly identify and correct spelling errors Personal dictionary to add custom words to a personal dictionary for faster typing Change the keyboard language The current ...

Страница 24: ...ocal or online update of your devices Status opens the status screen with a list of information about battery network signal strength and other details Legal Information lists details about the model number Android Version Baseband version etc this information is useful if user need to work with support team Chapter 4 Connecting to Network and Devices Connecting to Mobile Networks When users assem...

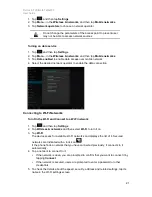
Страница 25: ...ction Connecting to Wi Fi Networks Turn On the Wi Fi and Connect to a Wi Fi network 1 Tap and then tap Settings 2 Tap Wireless networks and then select Wi Fi to turn it on 3 Tap Wi Fi The device scans for available Wi Fi networks and displays the list of it Secured networks are indicated with a lock icon If the phone finds a network that you have connected previously it connects to it automaticall...

Страница 26: ... the network is secured tap the security menu and then tap the type of security deployed on the network 3 Enter any required security credentials 4 Tap Save Connecting to Bluetooth Devices Turn Bluetooth On or Off 1 Tap and then tap Settings 2 Tap Wireless networks and then select Bluetooth to turn it on Connect to a Bluetooth device 1 Tap and then tap Settings 2 Tap Wireless networks and then tap...

Страница 27: ...omputer When connecting your Tablet PC to a computer and mounting its USB storage or SD card user must follow the computer s instructions for connecting and disconnecting USB device to avoid damaging or corrupting files To connect your Tablet PC to a computer via USB 1 Use the USB cable that came with your Tablet PC to connect the device to a USB port on your computer 2 After received a notificati...

Страница 28: ... Carefully follow your computer s instructions to un mount the USB storage or SD card Disconnect USB device not properly can cause a loss of important data or information When user finished simply disconnect the tablet by unplugging the USB cable Chapter 5 Using the Camera DURIOS A7 ULTIMATE equipped with 5 MP on the rear side which user can use to capture photos or video ...

Страница 29: ...posure flash and other necessary settings Or leave it automatic 2 Frame your subject object on screen Slide to zoom in or out 3 Tap the On Screen Shutter icon The camera brings the image into focus when the image is in focus the focus indicators in each corner will turn green and ready to capture 4 Touch to change camera settings Viewing pictures 1 After taking a photo a thumbnail of the picture i...

Страница 30: ...ne where you want to start 3 Tap the On Screen Start Video icon The time remaining to shoot counts down at the left when less than a minute is left the countdown turns red 4 Tap the icon again to stop shooting Opening the Gallery 1 Tap the launcher and then tap Gallery 2 Tap a folder to view the pictures or video inside in full screen mode 3 Flick the pictures left or right to view the previous or...

Страница 31: ... data by scanning one or two dimensional barcodes With an integrated laser scanner user will be able to have easy point aim and shoot operation Our DURIOS A7 ULTIMATE B2 scan engine comes in compact size that attached on the top right of the devices Scanning Barcodes 1 Ensur e that Data Capture scan enabled application is installed on the Tablet PC ...

Страница 32: ...rations 1 Distance Scanning device will decode perfectly over a certain working range there are minimum and maximum distance from the barcode To specify the appropriate working range per barcode type is through a table as follows Symbology Density Min Distance Max Distance Code 39 0 100 mm 0 125 mm 0 500 mm 1 000 mm 9 5 cm 8 0 cm 6 5 cm 9 5 cm 11 5 cm 14 5 cm 50 cm 75 cm EAN UPS 100 0 33 mm 6 cm 3...

Страница 33: ...dard Power Cord Euro US standard type 1 8 m Input AC 100 240V 50 60 Hz Output 5V DC DURIOS A7 ULTIMATE Manual Driver CD Allows user to make an update Recovery CD Allows users to make a recovery DURIOS A7 ULTIMATE Optional Accessories Optional Accesso ry Details Docking ocking cradle for DURIOS A7 ULTIMATE old the tablet tightly on the moving vehicle upport both terminal block 2 5Ψ Power jack input...

Страница 34: ... PC User Guide 30 Capacitive Touch Stylus to use it as a mouse or as a finger to perform regular touch functions and to write in application where applicable Vehicle Adapter Input 5V DC cigarette lighter socket USB car charger ...

Отзывы: