Duplo DBM-120 Скачать руководство пользователя страница 12

9

A3

2. INSTALLING PROCEDURE

Turn on the power supply of the DBM-120, and set to the A3 size.
Refer to “6-1. Basic Operation” in the instruction manual of the DBM-120 for details on
setting the paper size.

6

Adjust the A3 mark on the
indication label to this face

LU-HM exit
jam sensor

Indication label of DBM-120

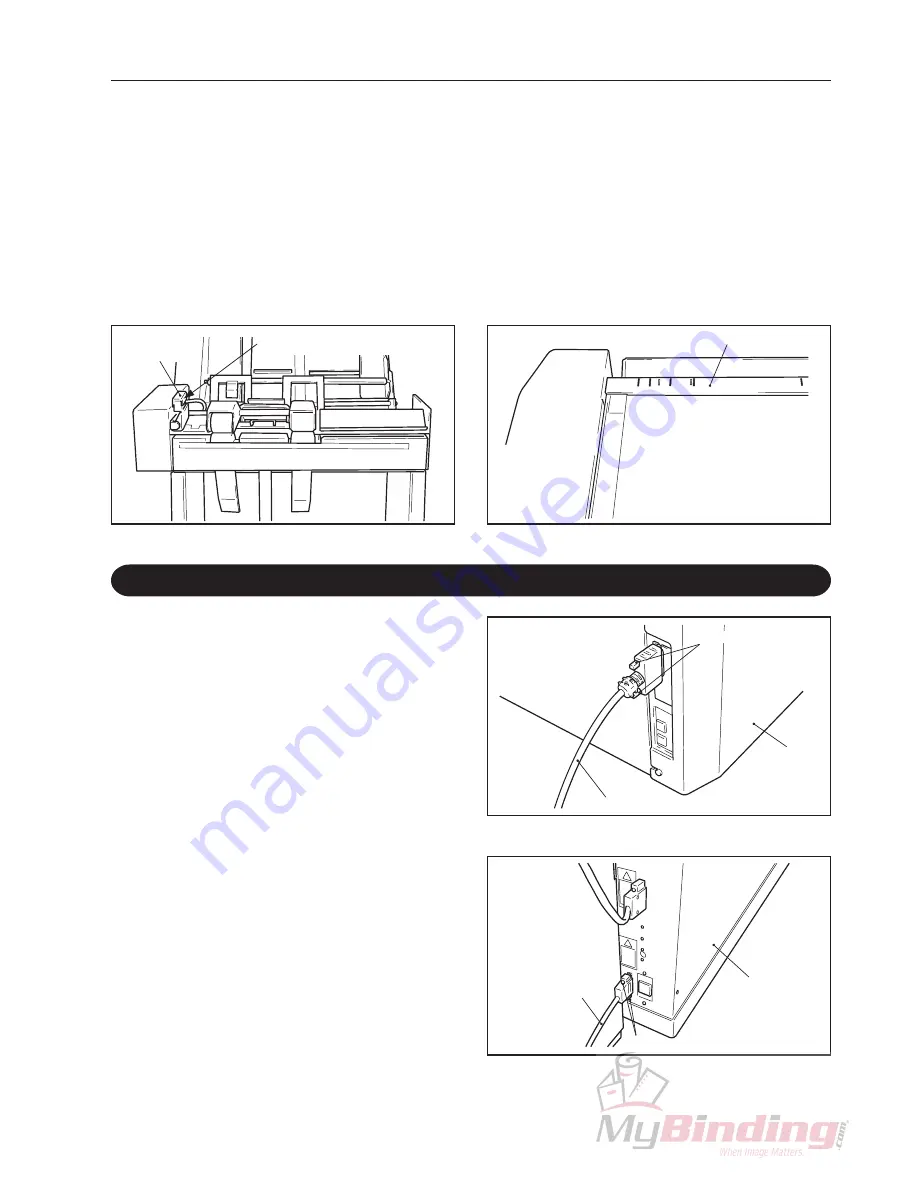
2-7. Connecting the Communication Cable

Connect the communication cable
provided to the connector of the DBM-120.
After connecting, be sure to tighten the
screws.

<< Parts to be used >>
Communication cable 

q

.................................... 1

1

Connect the other connector of the
communication cable to the connector (at
the bottom) for connecting the peripheral
devices of the suction collator.
After connecting, be sure to tighten the
screws.

2

Communication cable

Suction collator

Screws

DBM-120

Communication cable

Screws

Adjust at the long holes of the connecting plate so that the A3 mark on the indication label of
the DBM-120 faces the LU-HM exit jam sensor side facing up, and tighten the screws
temporarily secured in step 2 to secure the connecting plate and LU-HM.

7

Содержание DBM-120

Страница 1: ...Provided By http www MyBinding com http www MyBindingBlog com Duplo DBM 120 DC 6000S 8000S 2 10000S Connecting Kit Installation Manual...

Страница 2: ...Specialized person only INSTALLATION MANUAL DBM 120 CONNECTING KIT MODEL DC 6000S 8000S 2 10000S...

Страница 3: ...s it will be needed for subsequent maintenance such as relocation TO SERVICING PERSONNEL TABLE OF CONTENTS 1 Standard Accessories 1 2 Installing Procedure 2 2 1 Releasing the DBM 120 Lock 2 2 2 Checki...

Страница 4: ...ginning installation 1 STANDARD ACCESSORIES No q w e Qty Name No Qty r t y Cable clamp 2 Screw MSKW4 8 2 Installation manual 1 Communication cable 1 Connecting plate 1 Screw MSKW5 10 4 DBM 120 CONNECT...

Страница 5: ...e unit may damage 1 Fixing plate Movable unit DBM 120 2 2 Checking the DBM 120 EPROM Enter the maintenance menu qPress the Escape button once at the initial screen of the display on the control panel...

Страница 6: ...f the jog dial again The illustration on the right shows the display for the ROM version 11C 80033 Select M Mode ROM Version MC ROM Version 11C8OO33 Check the EPROM version displayed in the display If...

Страница 7: ...ial by three clicks towards the right to display Number of Sheets in the display Number of Sheets 2 ePress the Clear button once A beep will be sounded rTurn the jog dial by 5 clicks towards the left...

Страница 8: ...ifts to the beginning of the line and starts blinking The collator displayed in the second line is currently selected Select Collator DC 1O DC 6 8 Su Select Collator Suction Collator Suction qPress th...

Страница 9: ...Press the STOP key d Display the ROM number of Tower D Press the STOP key E Display the ROM number of Tower E Press the STOP key F Display the ROM number of Tower F Release the check mode using the ST...

Страница 10: ...r Temporarily secure the connecting plate provided to the DBM 120 cabinet Parts to be used Connecting plate w 1 Screw MSKW5 10 e 2 1 DBM 120 DBM 120 cabinet Connecting plate Screws Connecting plate Sc...

Страница 11: ...n rollers Adjust the height of the LU HM exit so that the paper in feed slot of the DBM 120 is 3 to 7 mm 0 12 to 0 28 lower than the LU HM exit 5 qLoosen the top two screws of the pillars of both the...

Страница 12: ...After connecting be sure to tighten the screws Parts to be used Communication cable q 1 1 Connect the other connector of the communication cable to the connector at the bottom for connecting the peri...

Страница 13: ...on cable to connecting plate of LU HM Parts to be used Cable clamp r 2 Screw MSKW4 8 t 2 3 Cable clamps Connecting plate Suction collator NOTE Move the DBM 120 unit to and fro when changing the paper...

Отзывы: