6
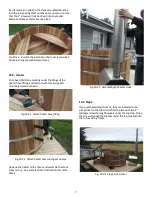
Turn your attention to the tops of the staves. They should
be lined up nicely giving a smooth interior. If any need
alignment, use the mallet to hit them inward or outward
to bring them into adjustment. Do another revolution of
hitting each stave a little harder now as the bottom strap is
tightened. Don’t be afraid to hit hard. Continue
tightening. The tub will come together and gaps will be
getting smaller.
Now do a final tightening - but don’t over-do it. The
bottom strap is pressing against the floor on the inside, so
it will reach a point where you can tell it is tight - don’t
force it beyond that. Use vise grip pliers to clamp onto
the aluminum block that the bolt passes through to keep
it from twisting as you do the final tightening.
Stop when
you see noticeable deflection of the aluminum blocks.
This indicates bottom strap is tight enough.
The upper
straps don’t need to be as tight as the bottom. If it feels
tight, it is. Do a final adjustment on the top of the staves
at this time. Remember - the wood will swell to tighten
all joints once water is introduced.
TIP: If you happen to have a torque wrench – the bottom
strap should be tightened to about 40 lbs of torque, the
upper ones to about 25 lbs of torque.
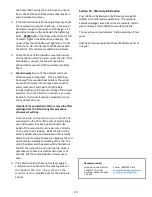
Next climb inside the tub and remove the temporary floor
braces. With a tube of clear silicone caulk, place a very
small ( ¼” ) neat bead all around the inside corner where
the floor and the staves meet. Use your finger or a
rounded piece of wood like a tongue depressor to smooth
the bead. Also put a very small bead on the top of the
floor seam. The purpose of the silicone is to slow the
initial seepage from the dry tub - allowing the wood to
absorb more water and swell more quickly. Your tub will
hold water as a result of the expansion of the wood,
causing the joints to compress.
Your tub is now ready for installation of the heating
system and any other accessories.
Section 10: Accessories
1.
Install any accessories
in this order
:
2.
Heating system - see separate instructions for your
type of heater
3.
Benches - see below
4.
Access Steps - see below
5.
Cover - see below
10.1: Benches
The bench system is simple. They each sit on two end
brackets attached to the walls, and once support in the
middle attached to the floor.
Fig. 10.1.1 Rest the benches on top of the tub to attach the
bench-end supports
Start the 2” screws into the brackets and attach the centre
support to the bottom of the bench (Fig. 10.1.3).
Fig. 10.1.2 Attach bench brackets with supplied 2” screws.
Make sure that the bench brackets are flush with the ends,
and about ¾” back from the front edge of the benches.
Fig. 10.1.3 Bench Brackets Flush with ends of benches, ¾”
from wall.
Содержание Cedar Hot Tub
Страница 11: ...11...


