4
positioned. The other place that needs special attention is
the opposite end of the floor seam. It must be straddled
by a stave. You must avoid having the floor seam line up
directly with a seam between staves. Make sure that the
floor seam is no closer than about one inch to the seam
between the stave that straddles it and its neighboring
stave.
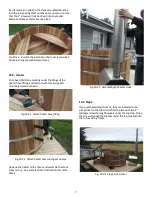
Insert the final stave. It will be somewhat tight. You might
have to tap the surrounding few staves outward and apart
slightly to make enough room to slide the final stave down
into place and get it’s dado over the edge of the floor (Fig
7.2 - 7.4).
Fig. 7.2
Fig. 7.3
Fig. 7.4
Section 8: Compression Straps
Time needed: approximately 15 minutes
Once all the staves are in place you are ready for the
bottom compression strap. Locate the aluminum alloy
compression straps. They supply the external force
needed to bind the staves and floor together into a rigid
water-tight tub.
Locate the three sets of 12”x ½” stainless steel threaded
rods and nuts for tightening the straps. Assemble the
strap, threaded rod and nuts off the tub, and slip the
assembly over the top. Rotate it around the tub until the
tightening hardware is where you want it to be when
finished. Measure 2” from the bottom of the staves to the
bottom of the strap (it is important to position the centre
of the strap directly over the centre of the dado), and turn
the nuts with a ¾” wrench until the strap is just snug
enough so that it will stay in place.
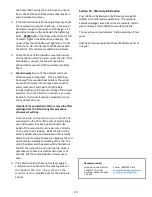
Assemble the other straps, and slip them into place with
their tightening hardware rotated so that it is offset from
the one below as shown in Fig. 8.1. Snug them up as
before just enough so that they won’t slide out of position.
Fig. 8.1 Proper placements of straps and bolts. Note how
bolts straddle a seam between staves and are staggered.
As with the bottom band, measure 2” from the edge of the
staves to the edge of the band. This is not as crucial as the
precise positioning of the bottom band, but for symmetry,
make it the same distance from the ends of the staves.
Содержание Cedar Hot Tub
Страница 11: ...11...


