27
2. Projecting an Image (Basic Operation)
❻
Optimizing Computer Signal Automatically
Adjusting the Image Using Auto Adjust
When projecting a signal from the computer video input terminal, HDMI 1 IN terminal, HDMI 2 IN terminal, DisplayPort
IN terminal, HDBaseT IN/Ethernet port, adjust the picture quality with a single touch of the button if the edges of the
screen are cut off or if the projection quality is bad.
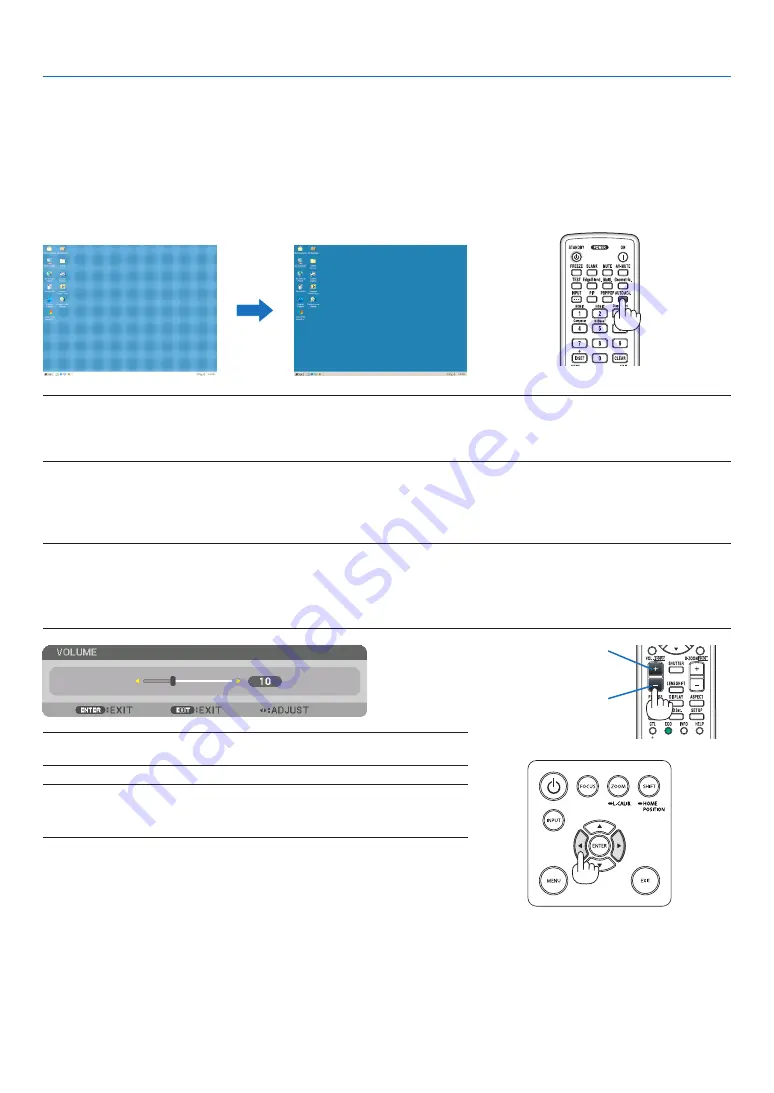
Press the AUTO ADJ. button to optimize a computer image automatically.
This adjustment may be necessary when you connect your computer for the first time.
[Poor picture]
[Normal picture]
NOTE:
Some signals may take time to display or may not be displayed correctly.
• If the Auto Adjust operation cannot optimize the computer signal, try to adjust [HORIZONTAL], [VERTICAL], [CLOCK], and [PHASE]
manually. (
→
)
❼
Turning Up or Down Volume
Sound level from the AUDIO OUT terminal can be adjusted.
Important:
• Do not turn up the volume to the maximum level on the external speaker system connected to the AUDIO OUT of the projector.
Doing so may produce an unexpected, loud sound at the time of turning on or off the projector, causing damage to your hearing.
When adjusting the volume on the external speaker system, set volume level of the speaker system to less than half its rating and
adjust the volume on the projector to get appropriate sound level.
TIP: When no menus appear, the
◀
and
▶
buttons on the projector cabinet work
as a volume control.
NOTE:
• Volume control is not available with the
◀
or
▶
button when an image is enlarged
by using the D-ZOOM (+) button or when the menu is displayed.
Increase volume
Decrease volume
Содержание 6765WUSS
Страница 72: ......


