Domino
WEBS
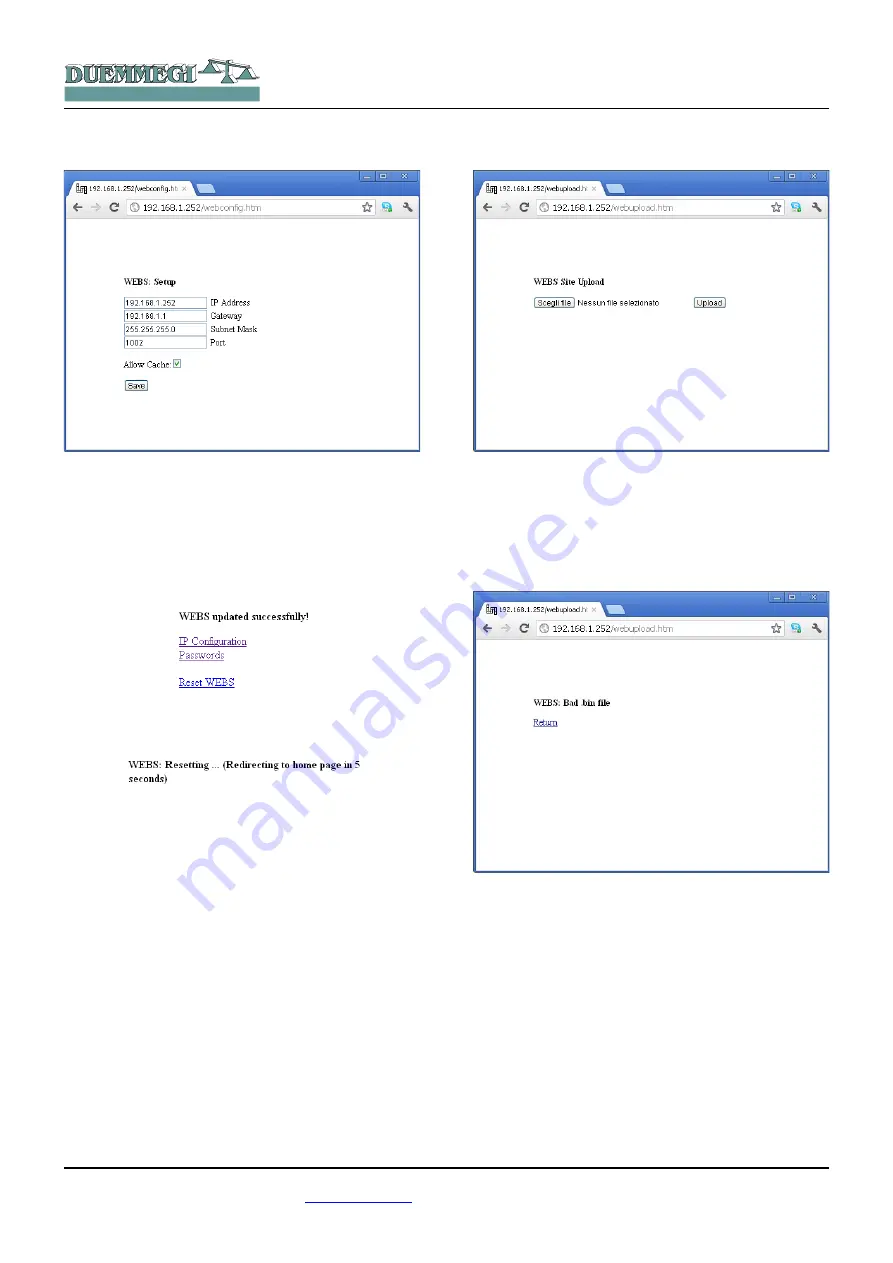
The configuration page looks like the following:
It is possible, in this configuration page, to set the wanted
parameters for IP address, Gateway, Subnet Mask, and the
Bridge Port. The shown values in the previous picture are
the default ones. The configuration dialog allows to enable
browser's cache, this option speeds up the response time
of the module itself.
Change these parameters as required and then press the
Save button; in this way will appear the following page:
Select Reset WEBS to make operating the new settings;
will appear the next message:
A new login request will appear after 5 seconds.
Step 3: uploading of html pages
For the uploading of html pages (the user Web site), as
mentioned in the Graphical Maps manual, it is necessary to
enter in the address bar of the browser the following (as-
suming to have assigned the IP address 192.168.1.253 to
WEBS module):
http://192.168.1.253/webupload.htm
The upload page looks like the following:
To upload the user's Web pages, push the button “Browse”
and select the .BIN file previously created on your comput-
er (see Graphical Maps manual); at this time push the “Up-
load” button.
If an error occurs during the upload, the following message
will be shown:
Information Pages
Entering the following address (the WEBS IP address
192.168.1.253 is supposed):
http://192.168.1.253/webinfo.htm
it is possible to show any parameters of WEBS module, as
shown in the following picture:
WARNING: the access to information page of WEBS mod-
ule is granted only to Administrator.
DUEMMEGI
s.r.l. - Via Longhena, 4 - 20139 MILANO
Tel. 02/57300377 - Fax 02/55213686 –
www.duemmegi.it
Rel.: 2.2 October 2012
Page 4 of 7
HOME AND BUILDING AUTOMATION


