Configuring the Rugged Laptop
The LT320 may be configured using the utilities and methods dictated by the
software operating system. The LT320 should be configurable for various properties
such as user profiles, network features, and several system elements.
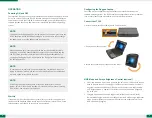
1. Unlock the latch to release the keyboard from the screen
3. Rotate the keyboard against the back of the screen
2. Gently pull out the keyboard
Convert the LT320
5
OPERATION
Powering ON and OFF
To activate the LT320, push and quickly release the Power Button. The display will come
on in a few seconds. To put the LT320 in Standby mode, push and quickly release the
Power Button. To turn the LT320 off for extended storage, power off safely using any
software function that “shuts down computer” provided in the software operating
system.
NOTE:
The battery pack shipped with your laptop may be low in power—please use the
AC-DC adapter with the LT320 when setting up for the first time to fully charge
the battery pack, or use the optional battery charger kit.
NOTE:
When the battery pack is charging, the blue Battery LED should blink slowly.
If plugging in the AC-DC adapter does not trigger this blinking activity and the
LED stays dark, the battery pack(s) may have been drained substantially. Try
unplugging/ replugging the AC-DC adapter to the LT320 a few times to activate
the charging process.
NOTE:
To conserve power, use (push and quick release) the Power Button to put the
laptop in “Standby” mode while not in use. Pushing briefly on the same button
will wake up the system within seconds.
NOTE:
Avoid using the Power Button (“hold 4+ seconds” feature) to turn off the
laptop—this form of hardware shutdown is intended to be a means of recovery
from lockups, and not as normal operation.
4
NVIS Mode and Screen Brightness Control (optional)
•
When power button is pressed to power on the unit, power LED will flash orange
once to indicate the unit is booting. Unit will boot into NVIS mode with zero nit
brightness by default and display will be dark. You can press the “Brightness Up”
and “Brightness Down” buttons to set NVIS mode display to desired brightness
(up to 20 nits)
.
• T
o toggle between NVIS and
h
igh-brightness
display
mode, press the “NVIS/
Normal Mode Toggle” button. When changed from NVIS mode to
h
igh-brightness
mode, display brightness percentage will be same as the brightness level set in
NVIS mode before toggling.
Start Up
If the power up (from Standby mode or otherwise) is successful, the appropriate
interface will be displayed after a launch sequence of several seconds. The wireless
LAN connection may take 10-15 seconds to be established.


