background image

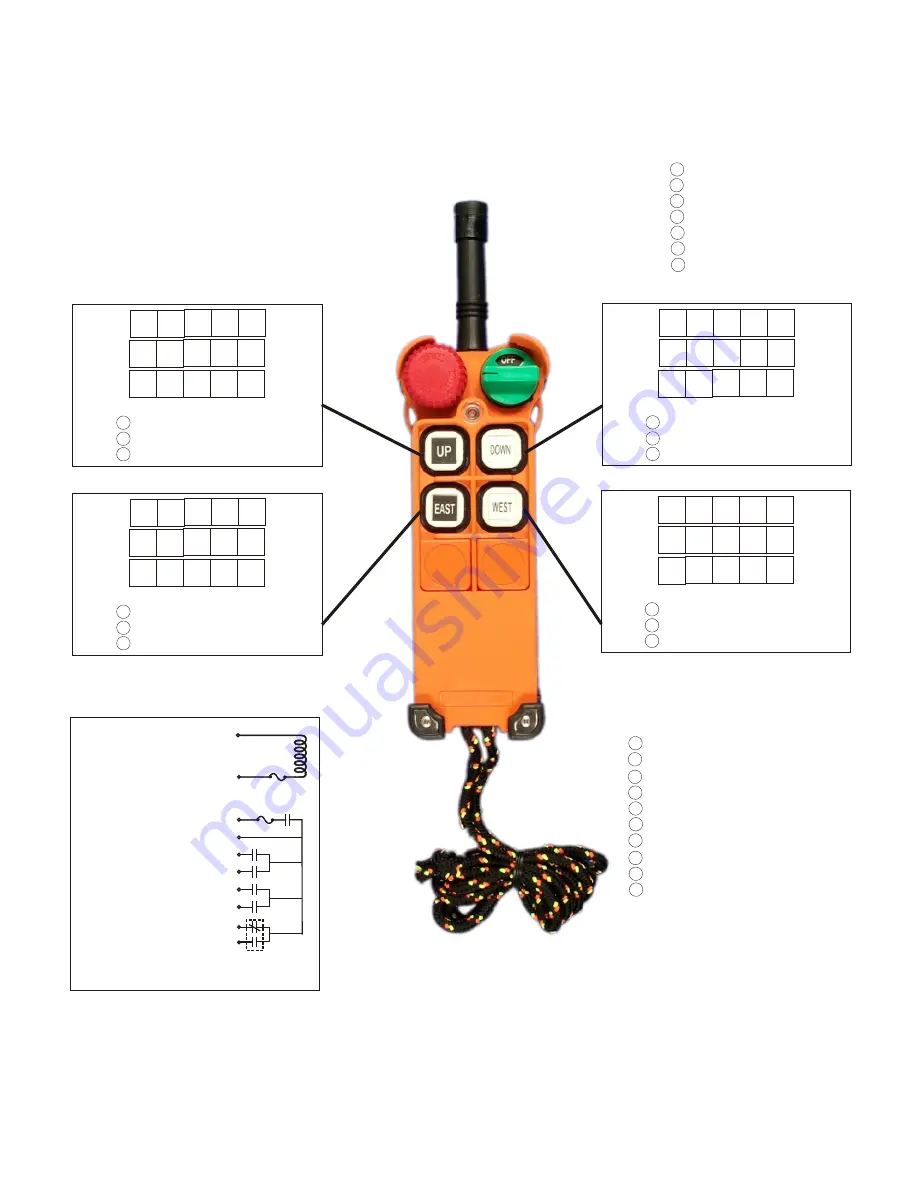
normal, not interlocked
toggle (on/off)
off (on is button “UP”)

normal, interlocked with button “UP”

normal, not interlocked
toggle (on/off)
off (on is button “EAST”)

normal, interlocked with button “EAST”

normal, not interlocked
toggle (on/off)
on (off is button “DOWN”)

normal, interlocked with button “DOWN”

normal, not interlocked
toggle (on/off)
on (off is button “WEST”)

normal, interlocked with button “WEST”

toggle (on/off) of Relay R0

Start key second function setting

Default setting normal momentary control of R0

inching .1 seconds
inching .2 seconds
inching .3 seconds
inching .4 seconds

inching .6 seconds
inching .7 seconds
inching .8 seconds
inching .9 seconds

inching .5 seconds

PWRM214S

( ORANGE) COM

( RED        ) MAIN

( YELLOW ) UP

( GREEN   ) DOWN

( BLUE      ) EAST

( PURPLE ) WEST

PWRM214S   Wire Diagram

0.5A

10A

( PINK       ) R0

( BLACK    ) POWER 1

( BROWN    ) POWER 2

110VAC Standard

10 minutes
20 minutes
30 minutes
1 hour
2 hours
3 hours
4 hours

Auto Shut Down time

Default setting : Never

NOTES: For each button there is a default function setting labeled in 

bold, 

if you wish to change any button function check the appropriate circle for that button. 

If you want to re-label any button, fill in the squares in the appropriate section. Use only the squares available.

Содержание PWR MICRO PWRM212D

Страница 1: ...Drivecon Inc 820 Lakeside Dr Gurnee Illinois 60031 Ph 847 855 9150 Fax 847 855 9650 DRIVECON COM PWR MICRO SERIES Owner s Manual Rev 2a January 29 2010 Radio Remote Control ...

Страница 2: ......

Страница 3: ...3 1 0 Installation Instructions 5 2 0 Operation Instructions 6 3 0 Safety 8 4 0 Troubleshooting on Installation 10 5 0 Programming 11 6 0 Internal Horn Option 13 7 0 Product Selection Guide 14 8 0 Product Options 16 9 0 Receiver Wiring Diagrams 17 Program and Button Labeling 19 ...

Страница 4: ...2 This Page Intentionally Left Blank ...

Страница 5: ...et for PWRM21 4 PWRM21 6 button models and 500 feet for all PWRM24 models Transmitter batteries 2 AA alkaline batteries Channel Frequency Channel Frequency Channel Frequency Channel Frequency 1 310 0325 11 312 7075 21 315 3825 31 318 0575 2 310 3000 12 312 9750 22 315 6500 32 318 3250 3 310 5675 13 313 2425 23 315 9175 33 318 5925 4 310 8350 14 313 5100 24 316 1850 34 318 8600 5 311 1025 15 313 77...

Страница 6: ... conforme aux normes CNR 210 d Industrie Canada L utilisation de ce dispositif est autorisée seulement aux conditions suivantes 1 il ne doit pas produire de brouillage et 2 l utilisateur du dispositif doit être prêt à accepter tout brouillage radioelectrique reçu même si ce brouillage est susceptible de compromettre le fonctionnement du dispositif For Models PWRM21 2S and PWRM21 2D IC 2384A F212D ...

Страница 7: ...red The wires are identified on the label on the top of the receiver and on the wiring diagrams on page 17 of this manual 3 All the contacts in the receiver are dry relay contacts This means that is there is no internal source of power to the contacts You will need to connect the common lead for each output or set of outputs that you plan to use to the same power supply that it would be connected ...

Страница 8: ... in the AC power line that operates the receiver 0 5A 250V and one is in the internal 12 volt DC supply 1 5A 250V In the PWRM21 receivers there is one fuse in the COM wire On the PWRM24 series radios there are four fuses in the COM wires 10A 250V These fuses are for relay contact protection in the event of a short circuit in the equipment being controlled by the radio To replace a fuse push down t...

Страница 9: ... is not in use to prevent unintentional operation 7 The PWRM214 and PWRM216 models have an extra relay in the receiver labeled R0 Turning the green key to START after the equipment has already been started will close this relay This relay will not engage the first time the key is turned to START when starting up the equipment See section 5 3 for detailed information on this option 2 5 Start Proced...

Страница 10: ...of safety rules that must be followed when working with DRIVECON products as well as cranes and industrial equipment in general This list is not intended to be all inclusive General industrial safety rules must always be followed If there is any doubt about how to proceed always take the safest course of action Only qualified personnel who are familiar with the product and who have read these safe...

Страница 11: ...us situations or in a manner such that damage might result Although the transmitter is very durable and weather resistant precautions should always be taken to limit its exposure to weather physical impact and corrosives After use or if the unit will not be used for a long interval turn off power to the crane or equipment and remove the safety key from the transmitter Remove the batteries from the...

Страница 12: ...or Not all equipment has a mainline contactor The best way to determine if your equipment has a mainline contactor is to check whether there is a START and STOP on the corded pendant If the equipment does not have a mainline contactor then these wires do not have to be connected On the PWRM21 models this wire is the MAIN wire and on the PWRM24 models this is MAIN IN 3 and MAIN OUT 4 The MAIN wire ...

Страница 13: ...PWRM246D PWRM248D and PWRM2410D Acceleration delay Delay between actuation of relays for the first and the second detents of the two step button can be programmed on the two speed models This delay time can be set between 0 and 4 seconds default is 0 seconds Typical selections are available on the programming data sheet 5 3 Models PWRM214S PWRM214D PWRM216S PWRM246S PWRM246D PWRM248S PWRM248D PWRM...

Страница 14: ... be completely released and repressed in order to activate the first step relay again Combination When 2 buttons are depressed simultaneously it will result in a third relay output that is set to toggle The relays of the two buttons depressed will not engage instead a third relay will engage This feature is designed to suit some special applications such as lighting systems Combination setting is ...

Страница 15: ...ART at any time after startup regardless of whether a motion button is being pressed The horn will sound as long as the START button is pressed This may be eliminated see Adjustments below Adjustments There are two 2 small DIP style rocker switches near the lower edge of the Horn printed circuit board This board is mounted inside the front cover of the receiver These switches constitute the only a...

Страница 16: ...tton 1 step 110 220VAC 2 PWRM21 2S DC 2TX Truck Equipment winches hoists etc 2 button 1 step 12 24 V AC DC 2 PWRM214S 2TX Monorails dual hoists etc 4 button 1 step 110 220VAC 2 PWRM21 4S DC 2TX Truck Equipment monorails dual hoists etc 4 button 1 step 12 24 V AC DC 2 PWRM212D 2TX Hoist lifts etc 2 button 2 step 110 220VAC 2 PWRM21 2D DC 2TX Truck Equipment hoists lifts etc 2 button 2 step 12 24 V ...

Страница 17: ... B A B 8 button 1 step 110 220VAC 2 PWRM24 8S HN Overhead cranes with A B A B 8 button 1 step 110 220VAC 2 PWRM248D Overhead cranes with A B A B 8 button 2 step 110 220VAC 2 PWRM24 8D HN Overhead cranes with A B A B 8 button 2 step 110 220VAC 2 PWRM2410S Multiple overhead cranes and hoists 10 button 1 step 110 220VAC 2 PWRM24 10S HN Multiple overhead cranes and hoists 10 button 1 step 110 220VAC 2...

Страница 18: ...unting the stock antenna outside an enclosure Call Factory for details 1 800 374 8266 PWRM21 and PWRM24 Spare Transmitters Spare Transmitter Model Numbers Works with Models PWRM212S TX PWRM212S 2TX PWRM212S DC 2TX PWRM214S TX PWRM214S 2TX PWRM214S DC 2TX PWRM212D TX PWRM212D 2TX PWRM212D DC 2TX PWRM214D TX PWRM214D 2TX PWRM214D DC 2TX PWRM216S TX PWRM216S 2TX PWRM216S DC 2TX PWRM246S TX PWRM246S P...

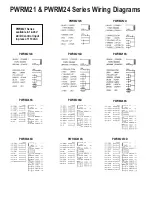
Страница 19: ...1 PWRM24 Series Wiring Diagrams PWRM21 Series available in 12 24 V AC DC control input in place of 110 VAC PWRM212S PWRM212D PWRM214S PWRM214D PWRM216S PWRM246S PWRM246D PWRM248S PWRM248D PWRM2410S PWRM2410D ...

Страница 20: ...This page intentionally left blank ...

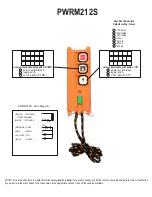
Страница 21: ...PWRM212S Wire Diagram BLACK POWER 1 WHITE POWER 2 110VAC Standard 10 minutes 20 minutes 30 minutes 1 hour 2 hours 3 hours 4 hours Auto Shut Down time Default setting Never NOTES For each button there is a default function setting labeled in bold if you wish to change any button function check the appropriate circle for that button If you want to re label any button fill in the squares in the appro...

Страница 22: ...This page intentionally left blank ...

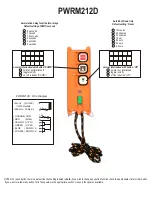
Страница 23: ...D ORANGE COM RED MAIN YELLOW UP 1S GREEN UP 2S BLUE DOWN 1S PURPLE DOWN 2S 0 5A 10A PWRM212D Wire Diagram BLACK POWER 1 BROWN POWER 2 110VAC Standard 10 minutes 20 minutes 30 minutes 1 hour 2 hours 3 hours 4 hours Auto Shut Down time Default setting Never NOTES For each button there is a default function setting labeled in bold if you wish to change any button function check the appropriate circle...

Страница 24: ...This page intentionally left blank ...

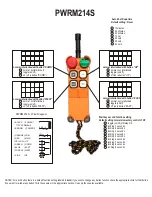
Страница 25: ...g 1 seconds inching 2 seconds inching 3 seconds inching 4 seconds inching 6 seconds inching 7 seconds inching 8 seconds inching 9 seconds inching 5 seconds PWRM214S ORANGE COM RED MAIN YELLOW UP GREEN DOWN BLUE EAST PURPLE WEST PWRM214S Wire Diagram 0 5A 10A PINK R0 BLACK POWER 1 BROWN POWER 2 110VAC Standard 10 minutes 20 minutes 30 minutes 1 hour 2 hours 3 hours 4 hours Auto Shut Down time Defau...

Страница 26: ...This page intentionally left blank ...

Страница 27: ...conds 1 second 1 5 seconds 2 seconds 3 seconds 4 seconds Acceleration delay for all button relays Default setting of ZERO seconds PWRM214D PWRM214D Wire Diagram 0 5A 10A BLACK POWER 1 ORANGE COM RED MAIN YELLOW UP GREEN DOWN GREY U D 2S BLUE EAST PURPLE WEST WHITE E W 2S PINK R0 BROWN POWER 2 110VAC Standard Start key second function setting Default setting normal momentary control of R0 10 minute...

Страница 28: ...This page intentionally left blank ...

Страница 29: ...tart key second function setting Default setting normal momentary control of R0 inching 1 seconds inching 2 seconds inching 3 seconds inching 4 seconds inching 6 seconds inching 7 seconds inching 8 seconds inching 9 seconds inching 5 seconds 10 minutes 20 minutes 30 minutes 1 hour 2 hours 3 hours 4 hours Auto Shut Down time Default setting Never PWRM216S RED MAIN YELLOW UP GREEN DOWN BLUE EAST PUR...

Страница 30: ...This page intentionally left blank ...

Страница 31: ...interlocked toggle on off on off is button NORTH normal interlocked with button NORTH normal toggle on off UP DOWN EAST WEST SOUTH START NORTH inching 4 seconds inching 5 seconds inching 6 seconds inching 1 seconds inching 7 seconds inching 2 seconds inching 8 seconds inching 3 seconds 10 minutes 20 minutes 30 minutes 1 hour 2 hours 3 hours 4 hours Auto Shut Down time Default setting of 1 hour nev...

Страница 32: ...This page intentionally left blank ...

Страница 33: ... inching 5 seconds inching 6 seconds inching 1 seconds inching 7 seconds inching 2 seconds inching 8 seconds inching 3 seconds acceleration 4 seconds acceleration 5 seconds acceleration 6 seconds acceleration 1 seconds acceleration 7 seconds acceleration 2 seconds acceleration 8 seconds acceleration 3 seconds Acceleration delay for all button relays Default setting of ZERO 10 minutes 20 minutes 30...

Страница 34: ...This page intentionally left blank ...

Страница 35: ...terlocked toggle on off on off is button NORTH normal interlocked with button NORTH normal not interlocked toggle on off on off is button 2 normal interlocked with button 2 normal toggle on off UP DOWN EAST WEST SOUTH START NORTH 1 2 inching 4 seconds inching 5 seconds inching 6 seconds inching 1 seconds inching 7 seconds inching 2 seconds inching 8 seconds inching 3 seconds 10 minutes 20 minutes ...

Страница 36: ...This page intentionally left blank ...

Страница 37: ...ith button 2 normal toggle on off UP DOWN EAST WEST SOUTH START NORTH 1 2 inching 4 seconds inching 5 seconds inching 6 seconds inching 1 seconds inching 7 seconds inching 2 seconds inching 8 seconds inching 3 seconds acceleration 4 seconds acceleration 5 seconds acceleration 6 seconds acceleration 1 seconds acceleration 7 seconds acceleration 2 seconds acceleration 8 seconds acceleration 3 second...

Страница 38: ...This page intentionally left blank ...

Страница 39: ...not interlocked toggle on off on off is button 2 normal interlocked with button 2 normal not interlocked toggle on off on off is button 4 normal interlocked with button 4 normal not interlocked toggle on off off on is button 3 normal interlocked with button 3 normal toggle on off UP DOWN EAST WEST SOUTH START NORTH 1 2 3 4 inching 4 seconds inching 5 seconds inching 6 seconds inching 1 seconds inc...

Страница 40: ...This page intentionally left blank ...

Страница 41: ...h button 4 normal not interlocked toggle on off off on is button 3 normal interlocked with button 3 normal toggle on off UP DOWN EAST WEST SOUTH START NORTH 1 2 3 4 inching 4 seconds inching 5 seconds inching 6 seconds inching 1 seconds inching 7 seconds inching 2 seconds inching 8 seconds inching 3 seconds acceleration 4 seconds acceleration 5 seconds acceleration 6 seconds acceleration 1 seconds...

Страница 42: ...This page intentionally left blank ...

Страница 43: ......

Страница 44: ...Drivecon Inc 820 Lakeside Dr Gurnee Illinois 60031 Ph 847 855 9150 Fax 847 855 9650 DRIVECON COM ...

Отзывы: