Instructions EF35002 - 08/10
Camflex
®
II 35002 Series Control Valves
3
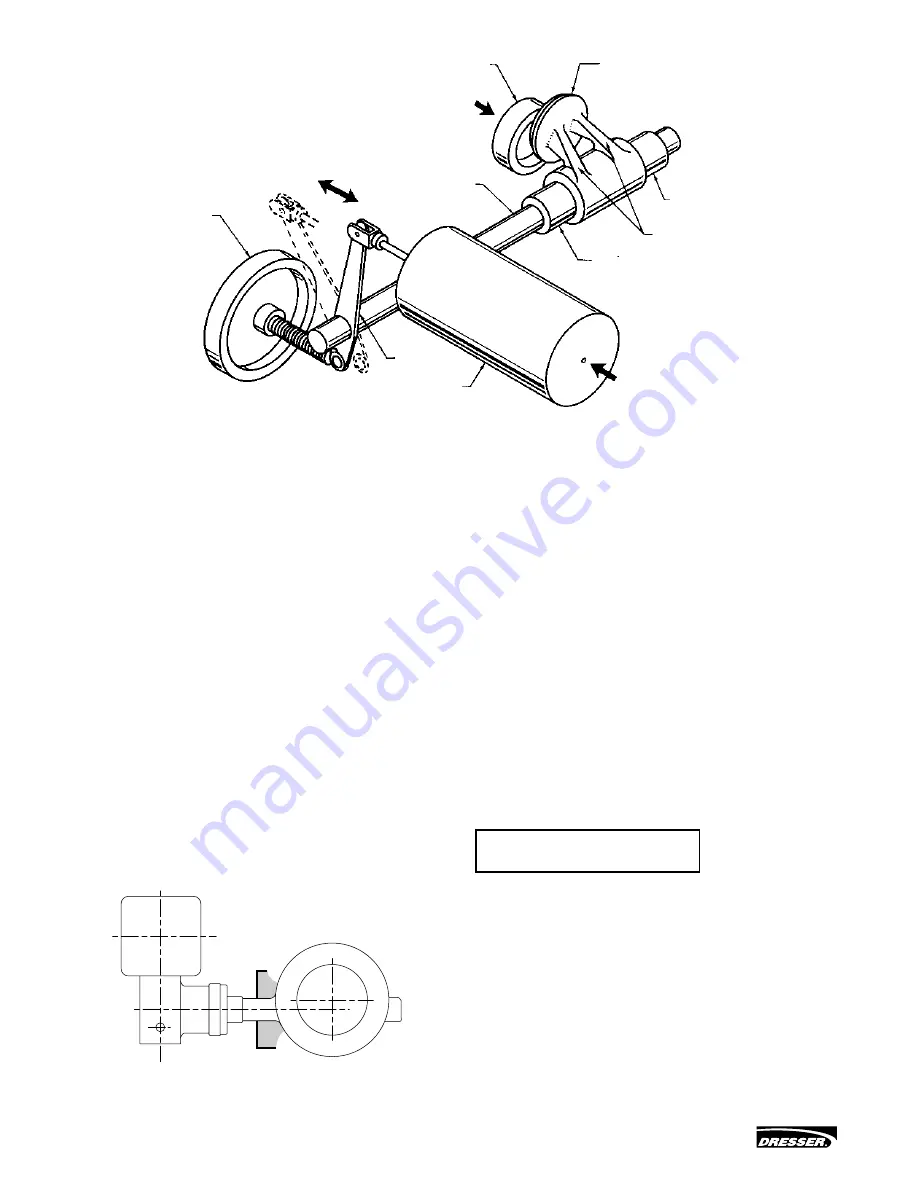
The actuator is generally mounted with air-loading to counter the
dynamic torque on the plug. In Figure 2 the flow direction tends
to open the plug and the actuator is oriented to close it with
increasing air pressure. The actuator spring force assists plug off-
balance forces to open the valve on air failure. If the valve is to
close on air failure, the body would be turned around in the line so
that flow tends to close the plug and the actuator position would
be reversed.
The Camflex
®
II valve has a modified linear flow characteristic,
which is the same in either flow direction. It can be easily
transformed to an equal percentage when equipping the valve
with a positioner [4700 series, 8000 series, SVI (Smart Valve
Interface) or FVP (Fieldbus Valve Positioner)]. Reduced TRIM
factors 0.4 and 0.6 are available on all sizes. The flow capacity
of a 0.4 factor is 40% of the nominal capacity of the valve and it
is 60% for the 0.6 factor. Factors 0.1 and 0.2 are available on the
1" (DN 25) valve.
The ability of the Camflex
®
II valve to handle a wide range of
process fluid temperatures is due to the long integrally cast
bonnet. This affords ample radiation surface to normalize the
packing temperature. Therefore, with self-lubricating TFE Aramid
fiber packing, the valve handles temperatures from -200°C to
+ 400°C (-320°F to +750°F). When insulating the valve, do not
insulate the valve bonnet (see Figure 3).
Figure 3
4. Unpacking
Care must be exercised when unpacking the valve to prevent
damage to the accessories and component parts. Should
any problems arise, contact the Masoneilan Representative or
District Office.
Note: For ease of shipment and to prevent damage, valves
equipped with the spring diaphragm actuator are shipped
with the handwheel unassembled. Refer to Section 10.3 for
handwheel assembly procedures.
5. Installation
The Camflex
®
II valve has been assembled at the factory in
accordance with specific instructions concerning flow direction
and actuator mode. The valve must be installed so that the
controlled substance will flow through the valve in the direction
indicated by the flow arrow (25), which is located on the upper
part of the valve bonnet. The valve actuator should be installed
so the actuator is above the centerline of the shaft. To install the
valve in the line, proceed as follows:
CAUTION
CAUTION
WARNING
DANGER
Any change in flow direction or actuator mode must be
accomplished as outlined in Sections 7 and 10 of this instruction
manual. Failure to follow these could result in personal injury and
equipment malfunction.
A.
Check the model number on the serial plate (56) against the
numbering System described in Figure 1 to determine the
valve mode.
B.
Clean piping and valve of all foreign material such as welding
chips, scale, oil, grease or dirt. Gasket surfaces should be
thoroughly cleaned to ensure leak proof connections.
Figure 2
Plug
Seat Ring
Fluid Flow
Shaft
Guide Bushing
Flexible Arms
Guide Bushing
Air
Actuator
Lever
Handwheel


