background image


  ASSEMBLY 

STEP 1


      Page 3 of 8


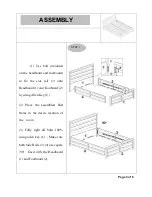
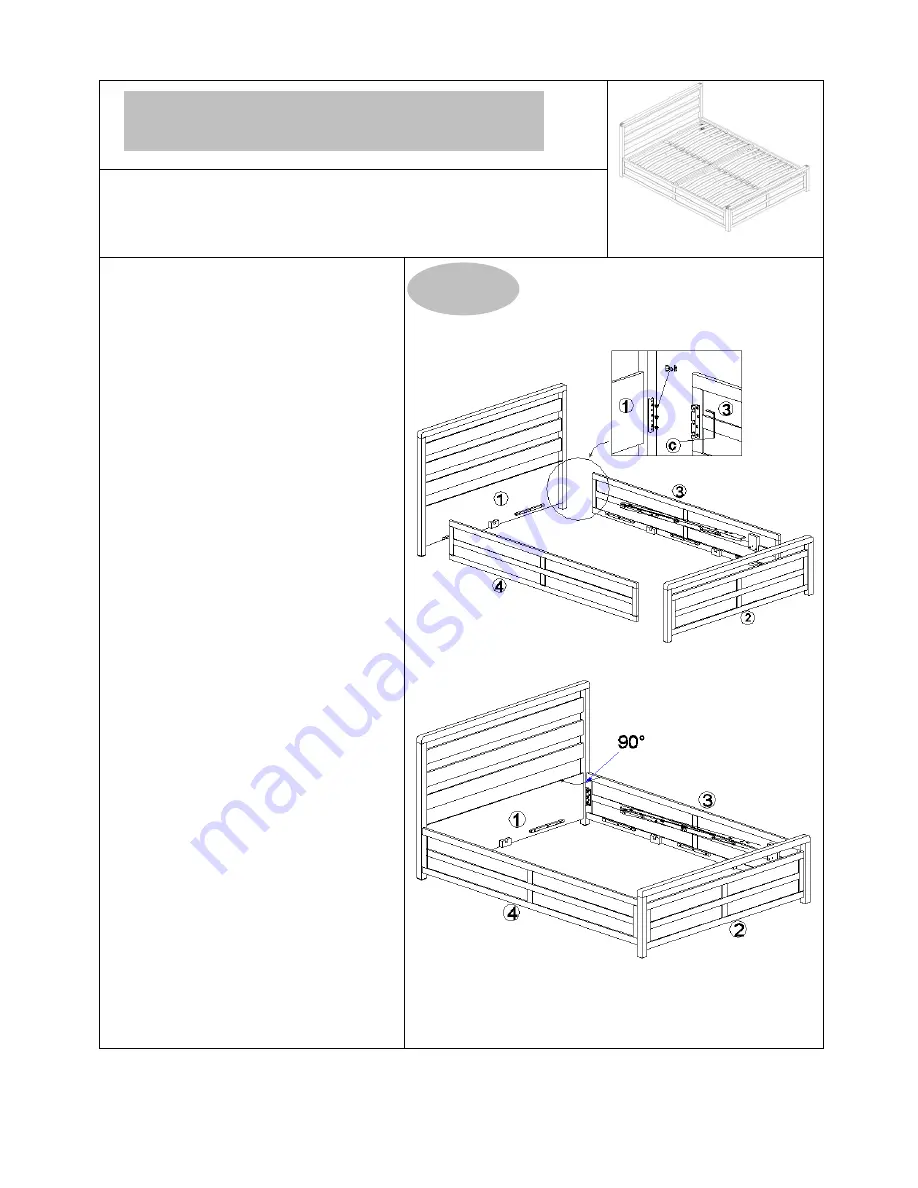
(1)  Use  bolt  (mounted 

on the headboard and footboard) 

to  fix  the  side  rail  (3)  onto 

Headboard (1) and Footboard (2) 

by using Allen Key (C). 

(2)  Place  the  assembled  Bed 

frame  in  the  desire  location  of 

the    room 

(3)  Fully  tight  all  bolts  100% 

using  allen  key  (C)  ,  Make  sure 

both Side Rails (3) (4) are square 

/90°    fixed  with  the  Headboard 

(1) and Footboard (2). 


Содержание WOODSTOCK Ottoman King Bed

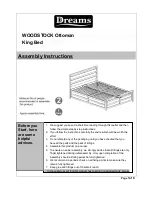
Страница 1: ...pack of fittings 4 Assemble this product on a carpet 5 To ensure an easier assembly we strongly advise that all fittings are only finger tightened during initial assembly Only upon completion of the...

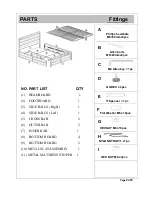
Страница 2: ...SS BAR 2 6 OUTER BAR 2 7 INNER BAR 1 8 BOTTOM BOARD 4 9 BOTTOM BOARD 2 10 METAL SLAT ASSEMBLY 1 11 METAL MATTRESS STOPER 1 A C H I B Allen bolts M8 80mmx2pcs D E M4 Allen key 1pc F GLIDES x 2psc G 11S...

Страница 3: ...to fix the side rail 3 onto Headboard 1 and Footboard 2 by using Allen Key C 2 Place the assembled Bed frame in the desire location of the room 3 Fully tight all bolts 100 using allen key C Make sure...

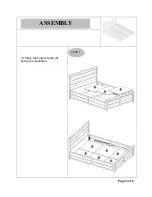
Страница 4: ...EMBLY STEP 2 1 Secure the adjustable glides K to the cross bar 5 by screwing the glides 2 Place the cross bar 5 to the side rails 3 4 3 Place the 2 outer bar 6 and inner bar 7 as illustrated Page 4 of...

Страница 5: ...ASSEMBLY STEP 3 1 Place the bottom board 8 and 9 as illustrated Page 5 of 8...

Страница 6: ...4 1 Secure the gas spring to the metal lift hinges in place at both side rails 2 Tighten nuts with spanner E do not over tighten A small gap is left so stems can move freely this is important see sket...

Страница 7: ...n bots B flat washer F and Hex nut G using allen key C and Spanner E 2 Place and secure the Metal Mattress stoper 11 to the Metal Slats assembly 10 with Hex nut I using Spanner E 3 Secure the Nylon St...

Страница 8: ...with Philip head bolt A Flats washer F and Hex nut G using spanner E NOTE WHEN FULLY ASSEMBLY AND THE MATRESS IS IN POSITION PLEASE RAISE AND LOWER THE OTTOMAN 4 5 TIMES TO ENSURE THE GAS PISTON ARE...

Отзывы: