


VigorFly 200 Series User’s Guide
133
F
F
o
o
r
r
P
P
P
P
T
T
P
P
/
/
L
L
2
2
T
T
P
P
U
U
s
s
e
e
r
r
s
s
1.
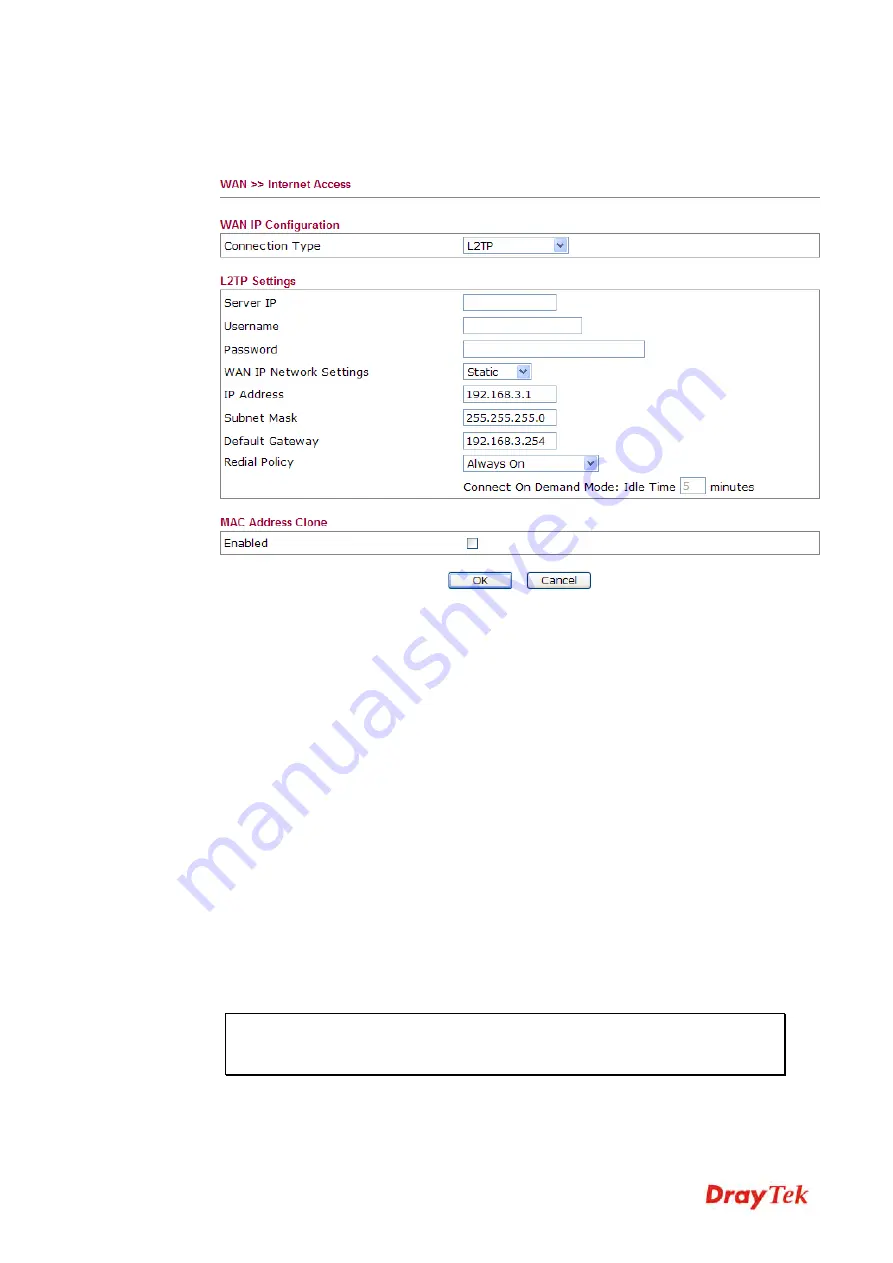
Choose
PPTP/L2TP
as the connection type.
2.
Check if
Username
,
Password, IP address, Subnet Mask
are entered with correct
values that you
get from
your
ISP
.
5
5
.
.
5
5
F
F
o
o
r
r
c
c
i
i
n
n
g
g
V
V
i
i
g
g
o
o
r
r
R
R
o
o
u
u
t
t
e
e
r
r
i
i
n
n
t
t
o
o
T
T
F
F
T
T
P
P
M
M
o
o
d
d
e
e
f
f
o
o
r
r
P
P
e
e
r
r
f
f
o
o
r
r
m
m
i
i
n
n
g
g
t
t
h
h
e
e
F
F
i
i
r
r
m
m
w
w
a
a
r
r
e
e
U
U
p
p
g
g
r
r
a
a
d
d
e
e
1.
Press and hold the
Factory Reset
button. The system will power off and power on the
Vigor Router.
2.
Release the
Factory Reset
button when the ACT LED and its neighbor LED blink
simultaneously.
3.
Change your PC IP address to 192.168.1.10.
4.
Open
Firmware Upgrade Utility
and key in Router IP 192.168.1.1 manually.
5.
Install
Router Tools
on one computer that connects to Vigor Router's LAN port.
6.
Make sure the computer can ping Vigor's LAN IP. ( Default IP is 192.168.1.1 )
7.
Run
Router Tools >> Firmware Upgrade Utility
.
8.
Input Vigor's LAN IP manually or use the
. .
.button to select.
9.
Indicate the firmware location.
Note:
There are two firmware types. The
.rst
firmware format will make the
configurations be back to default settings after upgrading firmware. The
.all
firmware format will remain the former configurations after upgrading firmware.
10.
Input the Password if you have set one, then click
Send
.
Содержание VigorFly 200
Страница 1: ......
Страница 8: ......
Страница 36: ...VigorFly 200 Series User s Guide 28 This page is left blank ...
Страница 134: ...VigorFly 200 Series User s Guide 126 This page is left blank ...


