


20
3.
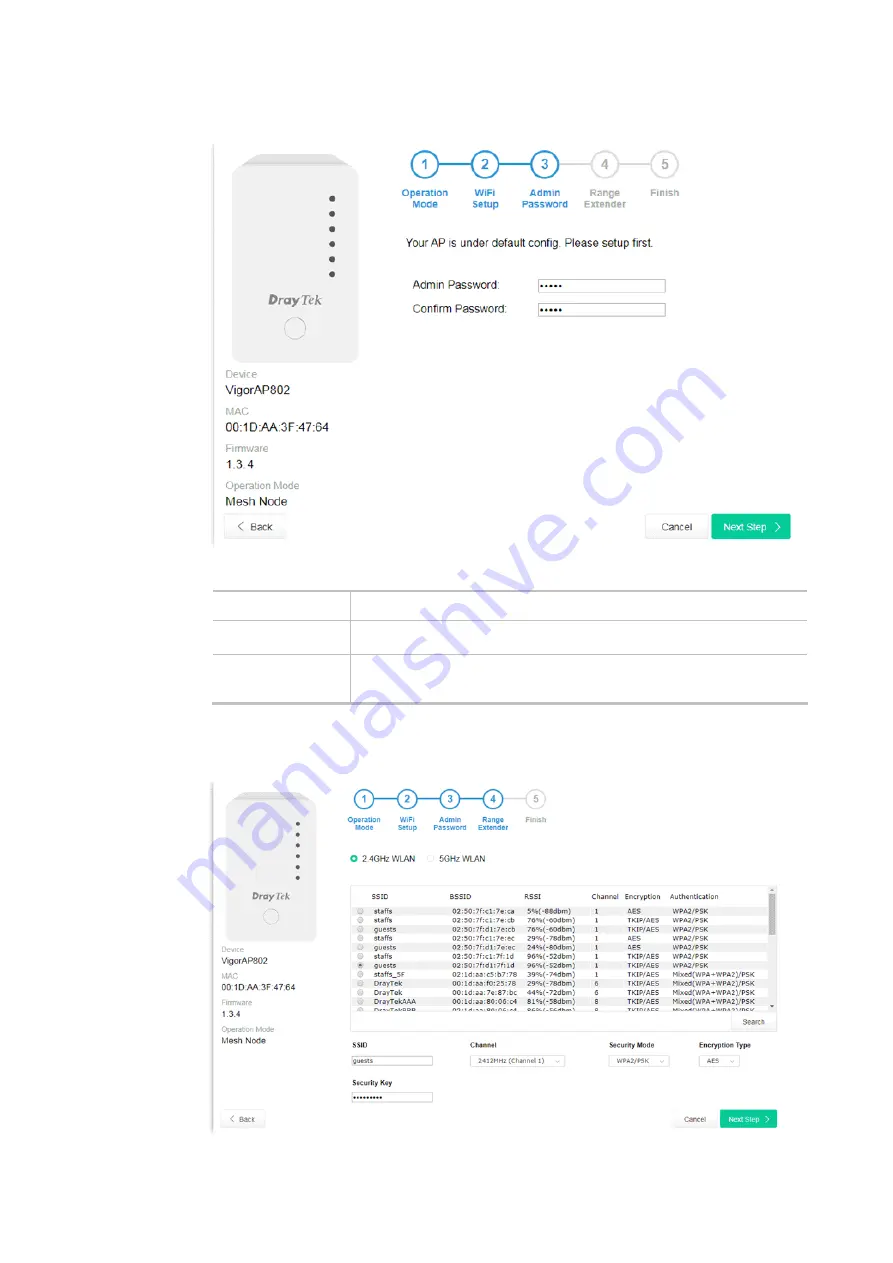
Change the default password for such device with new value. Then click
Next Step
.
Available settings are explained as follows:
Item Description
Admin Password
Enter a new password.
Confirm
Password
Enter the new password again for confirmation.
4.
In the following page, click
Search
to find out neighboring access point. When all the available
access points appear on the page, click the one you want to connect. Corresponding settings
(e.g., SSID, security key) of the selected device will be shown below. Then click
Next Step
.
Содержание VigorAP 802
Страница 1: ...I ...
Страница 6: ...Chapter I Installation ...
Страница 28: ...22 5 A summary of settings configuration will be shown on screen Click Finish ...
Страница 29: ...23 Chapter II Connectivity ...
Страница 34: ...28 ...
Страница 57: ...51 Below shows how Band Steering works ...
Страница 61: ...55 ...
Страница 81: ...75 Chapter III Management ...
Страница 101: ...95 ...
Страница 104: ...98 ...
Страница 113: ...107 Chapter IV Others ...
Страница 121: ...115 Chapter V Troubleshooting ...
Страница 125: ...119 V 1 4 WLAN 2 4GHz Statistics Such page is used for debug by RD only ...
Страница 126: ...VigorAP 802 User s Guide 120 V 1 5 WLAN 5GHz Statistics Such page is used for debug by RD only ...
Страница 134: ...VigorAP 802 User s Guide 128 ...


