background image

Draper Tools Limited, Hursley Road,
Chandler's Ford, Eastleigh, Hampshire. SO53 1YF.  U.K.

Helpline: (023) 8049 4344

Sales Desk: (023) 8049 4333

Internet: drapertools.com

E-mail: [email protected]

General Enquiries: (023) 8026 6355

Service/Warranty Repair Agent:
For aftersales servicing or warranty repairs, please contact the 
Draper Tools Helpline for details of an agent in your local area.

©Published by Draper Tools Limited.
No part of this publication may be reproduced, stored in a retrieval system or transmitted in any form or by any means, 
electronic, mechanical photocopying, recording or otherwise without prior permission in writing from Draper Tools Ltd.

These instructions accompanying the product are the original instructions. This document is part of the product, 
keep it for the life of the product passing it on to any subsequent holder of the product. Read all these 
instructions before assembling, operating or maintaining this product.
This manual has been compiled by Draper Tools describing the purpose for which the product has been 
designed, and contains all the necessary information to ensure its correct and safe use. By following all the 
general safety instructions contained in this manual, it will ensure both product and operator safety, together 
with longer life of the product itself.
AlI photographs and drawings in this manual are supplied by Draper Tools to help illustrate the operation of the 
product.
Whilst every effort has been made to ensure the accuracy of information contained in this manual, the Draper 
Tools policy of continuous improvement determines the right to make modifications without prior warning.

09113

CONTACTS

YOUR DRAPER STOCKIST

PJKC0218

16" WALL MOUNTED

FAN

Содержание 09113

Страница 1: ...the product keep it for the life of the product passing it on to any subsequent holder of the product Read all these instructions before assembling operating or maintaining this product This manual h...

Страница 2: ...SAFETY CONTENT WARNING Information that draws attention to the risk of injury or death CAUTION Information that draws attention to the risk of damage to the product or surroundings 1 4 COPYRIGHT NOTIC...

Страница 3: ...ILLES 10 12 8 2 TO ADJUST THE FAN ANGLE 13 9 FAN INSTRUCTION 9 1 REMOTE CONTROL OPERATION 14 9 2 USE OF REMOTE CONTROL 15 9 3 REPLACING BATTERIES NOT INCLUDED 15 9 4 BATTERY WARNING 15 10 MAINTENANCE...

Страница 4: ...arantee is extended to 24 months for parts only This guarantee does not apply to normal wear and tear nor does it cover any damage caused by misuse careless or unsafe handling alterations accidents or...

Страница 5: ...ed on a firm and stable surface Ensure that water and or cleaning detergent does not enter the motor housing or switch mechanism 16 5 10 MAINTENANCE 1 Always unplug the fan from the power supply befor...

Страница 6: ...ress properly Loose clothing long hair and jewellery are all dangerous because they can become entangled in moving machinery This can also result in parts of body being pulled into the machine Clothin...

Страница 7: ...ned for connection to a Domestic power supply rated at 230V AC It is Class 2 double insulated is designed for connection to a power supply matching that detailed on the rating label and compatible wit...

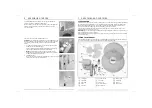
Страница 8: ...Front grille Fan blade Rear grille Clips Fan body 8 13 8 ASSEMBLING THE FAN 8 2 TO ADJUST THE FAN ANGLE Push the guard gently to the desired up or down angle 6 TECHNICAL DESCRIPTION 6 1 IDENTIFICATION...

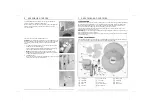
Страница 9: ...ntains several parts and semi assembled elements that require final assembly Lay out the contents and check off the items against those featured below 9 12 8 ASSEMBLING THE FAN Carefully attach the fr...

Страница 10: ...en tighten Place the blade into shaft and make sure the rotor shaft pin is fitted into the groove of the blade Turn the fan securing nut anticlockwise to tighten the blade Note Fan clamp nut has a rev...

Страница 11: ...en tighten Place the blade into shaft and make sure the rotor shaft pin is fitted into the groove of the blade Turn the fan securing nut anticlockwise to tighten the blade Note Fan clamp nut has a rev...

Страница 12: ...ntains several parts and semi assembled elements that require final assembly Lay out the contents and check off the items against those featured below 9 12 8 ASSEMBLING THE FAN Carefully attach the fr...

Страница 13: ...Front grille Fan blade Rear grille Clips Fan body 8 13 8 ASSEMBLING THE FAN 8 2 TO ADJUST THE FAN ANGLE Push the guard gently to the desired up or down angle 6 TECHNICAL DESCRIPTION 6 1 IDENTIFICATION...

Страница 14: ...ned for connection to a Domestic power supply rated at 230V AC It is Class 2 double insulated is designed for connection to a power supply matching that detailed on the rating label and compatible wit...

Страница 15: ...ress properly Loose clothing long hair and jewellery are all dangerous because they can become entangled in moving machinery This can also result in parts of body being pulled into the machine Clothin...

Страница 16: ...ed on a firm and stable surface Ensure that water and or cleaning detergent does not enter the motor housing or switch mechanism 16 5 10 MAINTENANCE 1 Always unplug the fan from the power supply befor...

Страница 17: ...arantee is extended to 24 months for parts only This guarantee does not apply to normal wear and tear nor does it cover any damage caused by misuse careless or unsafe handling alterations accidents or...

Страница 18: ...ILLES 10 12 8 2 TO ADJUST THE FAN ANGLE 13 9 FAN INSTRUCTION 9 1 REMOTE CONTROL OPERATION 14 9 2 USE OF REMOTE CONTROL 15 9 3 REPLACING BATTERIES NOT INCLUDED 15 9 4 BATTERY WARNING 15 10 MAINTENANCE...

Страница 19: ...SAFETY CONTENT WARNING Information that draws attention to the risk of injury or death CAUTION Information that draws attention to the risk of damage to the product or surroundings 1 4 COPYRIGHT NOTIC...

Страница 20: ...the product keep it for the life of the product passing it on to any subsequent holder of the product Read all these instructions before assembling operating or maintaining this product This manual h...

Отзывы: