background image


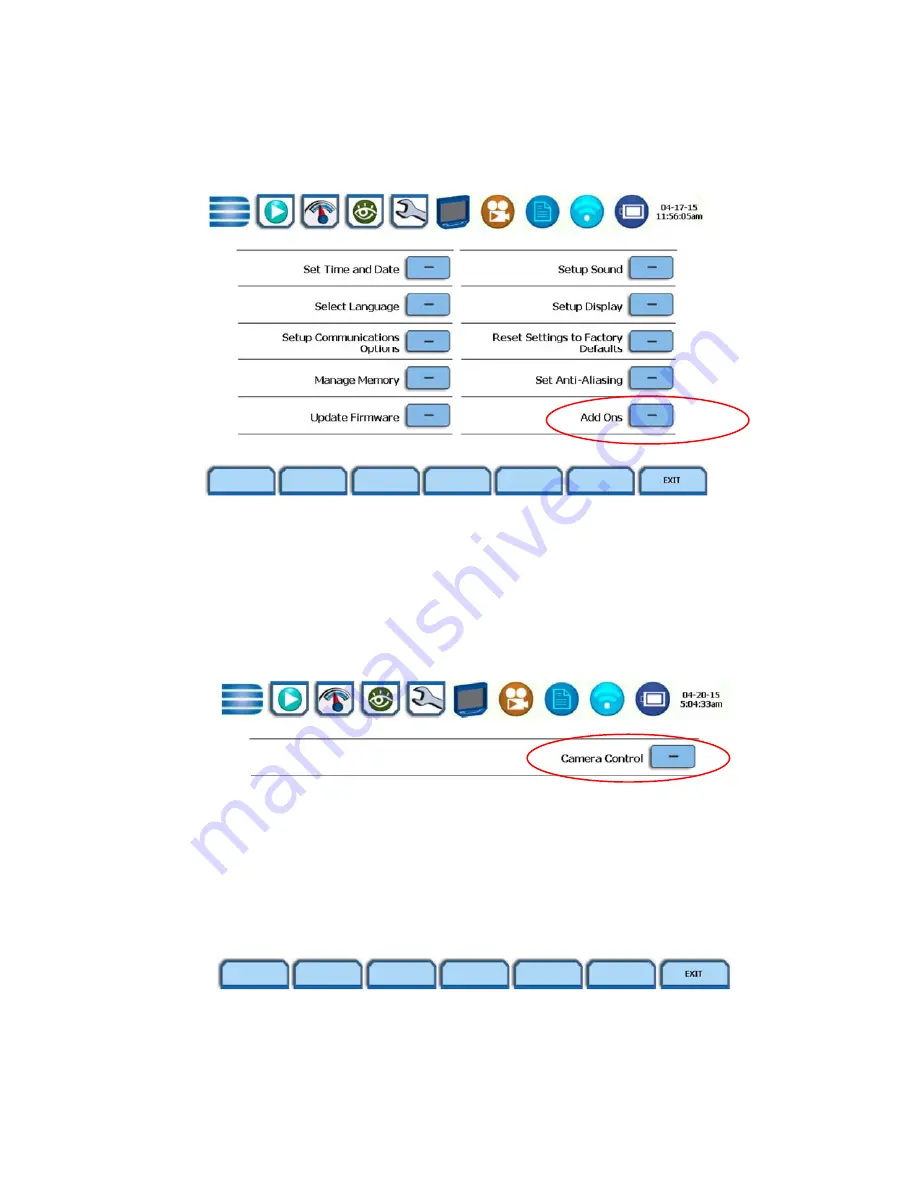
Once the firmware has been updated go back to the “setup 
instrument menu” and the “Add Ons” should appear in the menu. 


Click on the “Add Ons” button and the following screen will 
appear. 
The addition of the “Camera Control” button indicates that the 
GoPro camera control firmware has been successfully 
installed on the instrument. 


Содержание PQ+Sentry

Страница 1: ...with GoPro Hero3 User Instructions Dranetz 1000 New Durham Road Edison New Jersey 08818 Telephone 1 800 372 6832 or 732 287 3680 sales dranetz com www dranetz com...

Страница 2: ...yright 2015 Dranetz All rights reserved No part of this book may be reproduced stored in a retrieval system or transcribed in any form or by any means electronic mechanical photocopying recording or o...

Страница 3: ...era in two modes either loop mode or record time period While the Dranetz HDPQ is monitoring power parameters the GoPro can be synchronized to record the visual audio environmental surroundings of you...

Страница 4: ...hrough the Dranetz Customer Service Department but delivered by Dranetz Technical Support Department 16 Gb microSD memory card USB Data Charge adapter converts a USB port to charge only GOPROHDPQ HDPQ...

Страница 5: ...contact customer support to purchase the option have your instrument serial number available For pricing and availability contact Dranetz Customer Service Department at 732 287 3680 or 1 800 372 6832...

Страница 6: ...generated file Example The filename ngcamera_HDPXAJA001 hpk will only load into instrument HDPQ serial number HDPXAJA001 and no other HDPQ instrument Note Do not have any other HDPQ firmware files su...

Страница 7: ...trument menu and the Add Ons should appear in the menu Click on the Add Ons button and the following screen will appear The addition of the Camera Control button indicates that the GoPro camera contro...

Страница 8: ...ocated on the front side of the camera GoPro Hero3 Setup WiFi Hold the camera so that the lens is facing you and the top of the camera is facing up Upon power ON of the camera the display will provide...

Страница 9: ...s the top select button again and the wireless settings appear on the display Press the front Mode button until the GoPro App selection is highlighted Press the top select button once and the blue LED...

Страница 10: ...ssword of goprohero You will need this information when configuring the HDPQ to communicate with the camera Note Though not required it is recommended that you change the network name and password of...

Страница 11: ...ses this mode to allow for constant video capture saving only the pieces of video that correlate with power quality events Note A video section consists of 5 one minute video files To set the camera i...

Страница 12: ...nt mode button repeatedly until the loop mode icon appears in the camera display The recommended loop time is set to 5 minutes by default Press and hold the front power button until the camera powers...

Страница 13: ...th the HDPQ and will record video until the camera memory card fills or recording is manually stopped by the user To set the camera into Video mode hold the camera so that the lens is facing you and t...

Страница 14: ...HDPQ instrument for use with the GoPro Hero3 HDPQ Communication Settings Power up the HDPQ and wait until the home screen appears Press the Setup Instrument icon to advance to the next screen Press th...

Страница 15: ...is disabled select the Enable WiFi button to search for the Networks Found Note Wifi must be enabled on the GoPro camera in the settings menu and set for GoPro App The blue led on the camera will flas...

Страница 16: ...pad appears and enter the default password goprohero If you have changed the password for the GoPro camera use that password Next press the Exit button and the following screen appears and shows that...

Страница 17: ...16 Press Exit and the GoPro camera communications settings are complete...

Страница 18: ...17 HDPQ Camera Control Settings From the home screen press Setup Instrument Press the Add Ons button Press the Camera Control button...

Страница 19: ...antly into the same 5 minute long section of the memory card until the HDPQ communicates to the camera to start a new session saving the previous session The HDPQ utilizes this mode to allow constant...

Страница 20: ...ord video until the camera memory card fills Never The camera will only record once when the specified time and date is reached Hour The camera will record every hour for the set time and date Day The...

Страница 21: ...button unitl the camera shuts down Record If you are using the standard Record video feature for the GoPro camera you have to power on the camera before turning monitoring ON the HDPQ Camera Power Th...

Страница 22: ...urs for a longer period than the HDPQ battery run time the HDPQ will resume monitoring when power is restored However the GoPro camera may not retain all of its settings and will have to be restarted...

Страница 23: ...for a period of one year from the date of invoice Warranties for products and accessories sold by but not branded as Dranetz are covered by their respective manufacturer s warranties and are not warra...

Страница 24: ...of operating equipment of Dranetz Copyright This publication is protected under the Copyright laws of the United States Title 17 et seq No part of this publication may be reproduced transmitted transc...

Отзывы: