6
EXTERNAL CONTROL FUNCTION
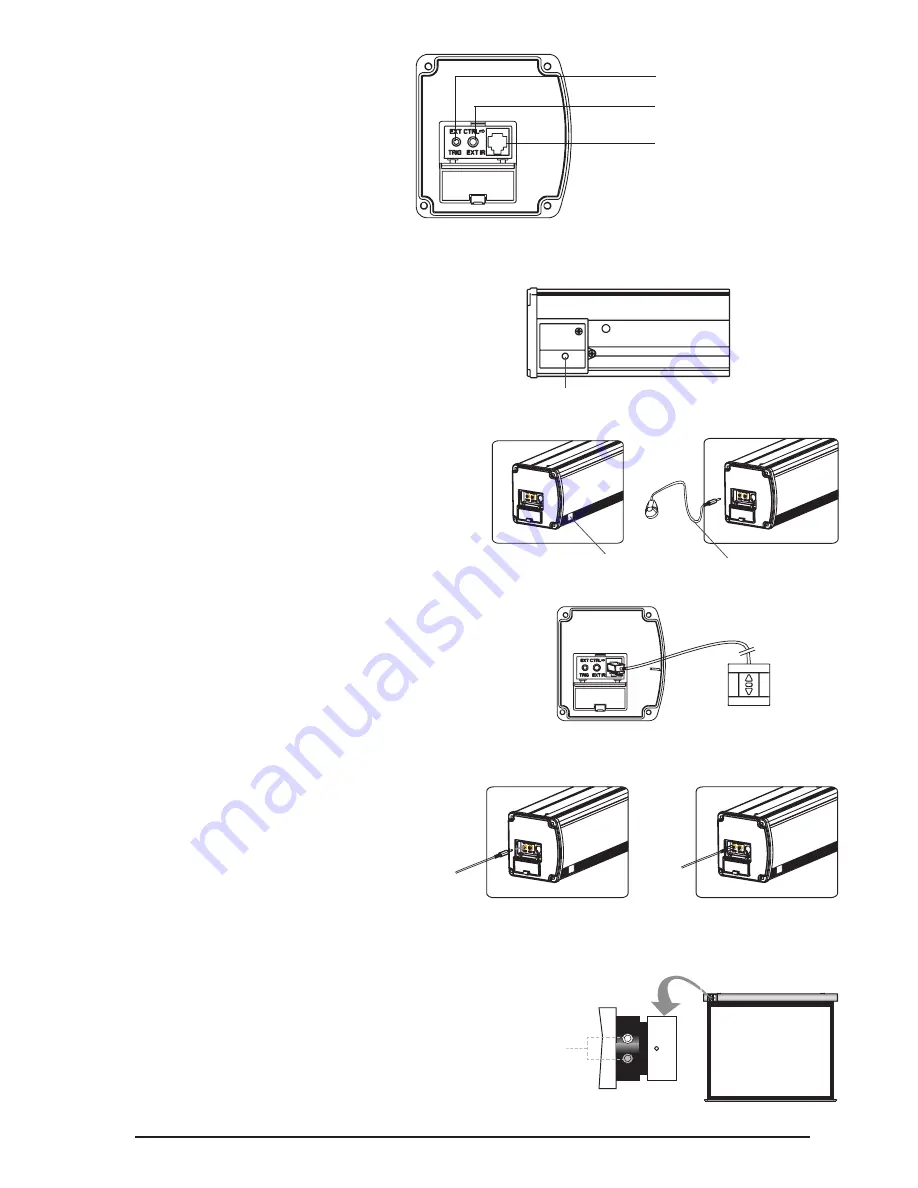
This motorized screen has 4 types on control options:
infrared (IR) remote control, manual control,
triggered control, and a wall switch.
To access the external control interface, press down and
open the the end cap door. Close door when finished.
Manual Control Switch
The Manual control button is located on the bottom of the Screen Casing.
• To lower screen, press button
• To raise screen, press button
• To stop screen while in motion, press button
Infrared (IR) Remote Control
1. When nothing blocks the sight of the IR window, you can use
the remote control to control the screen with built-in IR receiver.
2. For hidden installations or if the IR window is blocked, use the
external IR receiver. Plug it in to the external IR input and then
fix it at a position where the IR signal is available.
External Wall Switch (optional)
1. For external manual control of the screen, plug the RJ11 plug of the wall switch
into the external connection of screen.
Note: If a longer application is needed, the wire can be spliced with Cat5e cable.
12V Trigger Control (optional)
1. Insert 2.5mm male plug into the trigger jack at the left side of the
screen’s end cap TRIG, and insert 3.5mm male plug into 12V output
hole of device (i.e. projector, receiver).
2. When the 12V source is turned “ON,” the screen will lower
automatically. When the 12V source is turned “OFF,” the screen
will raise automatically.
MOTOR ADJUSTMENTS
To avoid overheating the motor, do not continually retract and lower the screen
for over 4 minutes at a time. If the motor overheats, it will need a cool down time
of 2 minutes. The motor does not need any lubricants. The drop and retract limit
of the screen is factory preset to optimal configuration. Please ask your local dealer
or professional to adjust settings to avoid damaging the motor.
12V Trigger Input
Wall Switch In
Manual Control Switch
External IR Input
IR Window
External IR Receiver
Motor
Adjusting
Slot


