Start T/ASC MUX
Select the hard drive and the T/Config directory.
Type T/CONFIG <ENTER>.
Highlight T/ASCMUX <ENTER>.
The first screen will request initials. Enter your initials and
press <ENTER>.
Main Menu
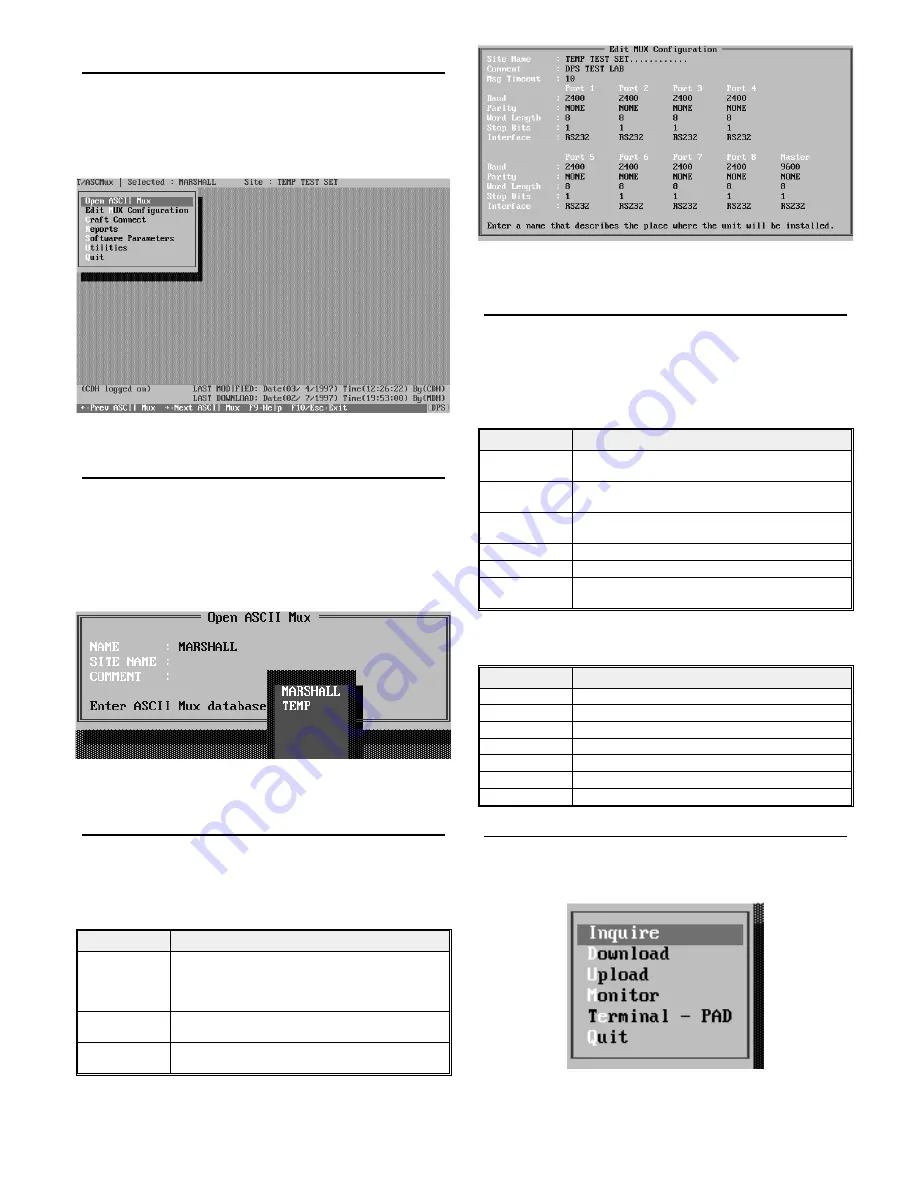
The Main Menu (Fig. 5) lists the functions available in
T/ASCMUX. Each of these Main Menu items is explained in
the following paragraphs. Most fields will have an associated
“default box” that appears. To select from the default box press
Tab and use the Tab key or cursor arrows to highlight the de-
sired value, then press <ENTER>.
Open ASCMUX
This selection is used to open an existing configuration or to
name a new one. When this function is selected a box will ap-
pear with three fields. See Fig. 6 and Table A.
Table A - Field Descriptions in the Open ASCII MUX
Screen
Field
Description
NAME
Enter a new name or select an existing one from the de-
fault box. The name will appear in the Title Bar at the
top of the screen at all times. The name should be exclu-
sive to this configuration.
SITE NAME
Enter a name that describes the location of the unit.
(Mandatory field)
COMMENT
Optional field for additional identifying information,
such as date or initials of preparer.
Edit MUX Configuration
This selection presents the Edit MUX Configuration screen.
See Fig. 7. Set parameters for each of the eight ports and the
MUX (common) Port in this screen. Parameters and their val-
ues are explained in Table B.
Table B - Field Descriptions for the Edit Configuration
Screen
Field
Description
Msg Timeout
Time to delay before aborting incomplete message. En-
ter in tenths of seconds (10-255). Default is 100.
Baud
Off, 300, 1200, 2400 and 9600. Select from default box.
Default 1200 Baud.
Parity
EVEN, NONE, ODD. Select from default box. Default
NONE.
Word Length
7 BITS, 8 BITS. Select from default box. Default is 8.
Stop Bits
1 BIT, 2 BITS. Select from default box. Default is 1.
Interface
TTL, RS232, RS422, RS485, 202. Select from default
box. Default is RS232.
Several “Hot Keys” are available in the Edit MUX Configu-
ration screen. The line at the bottom of the screen lists them.
Table C - Hot Keys in the Edit Configurations Screen
Key
Description
Tab
Select default box.
Up Arrow
Go to previous field.
F1
Go to previous port.
F2
Go to next port.
F8
Save.
F9
Help.
F10/Esc
Go to first field or exit.
Craft Connect
Use this menu item when connecting to the craft port on the
front of the MUX for downloading or other functions.
NOTE: When using this function, the MUX port is not active.
D-PC-180-10A-XV
3
OG109137
March 1997
Fig. 5 - Main Menu Lists the Functions Available in
T/ASCMUX
Fig. 7 - Set ASCII Port Parameters in the Edit
Configurations Screen
Fig. 8 - Select from Several Craft Port Functions in the
Craft Connect Menu
Fig. 6 - Enter a New Name in the Open ASCII window or
Select from Default Box


