LED green:
The green LED flashes during the logger start and according to the measuring interval if the standard
settings hasn’t been changed.
LED red:
The red LED flashes when Hi- or Lo-Alarm has been achieved.
Buzzer:
The Buzzer rings when Hi- or Lo-Alarm has been achieved(if the buzzer is not deactivated). The
Buzzer also rings when the configuration has been transferred successful from the PC to the Logger.
You can activate or deactivate both, LEDs and Buzzer by using the Software DE-LOG-Graph.
2.6 USB-Port
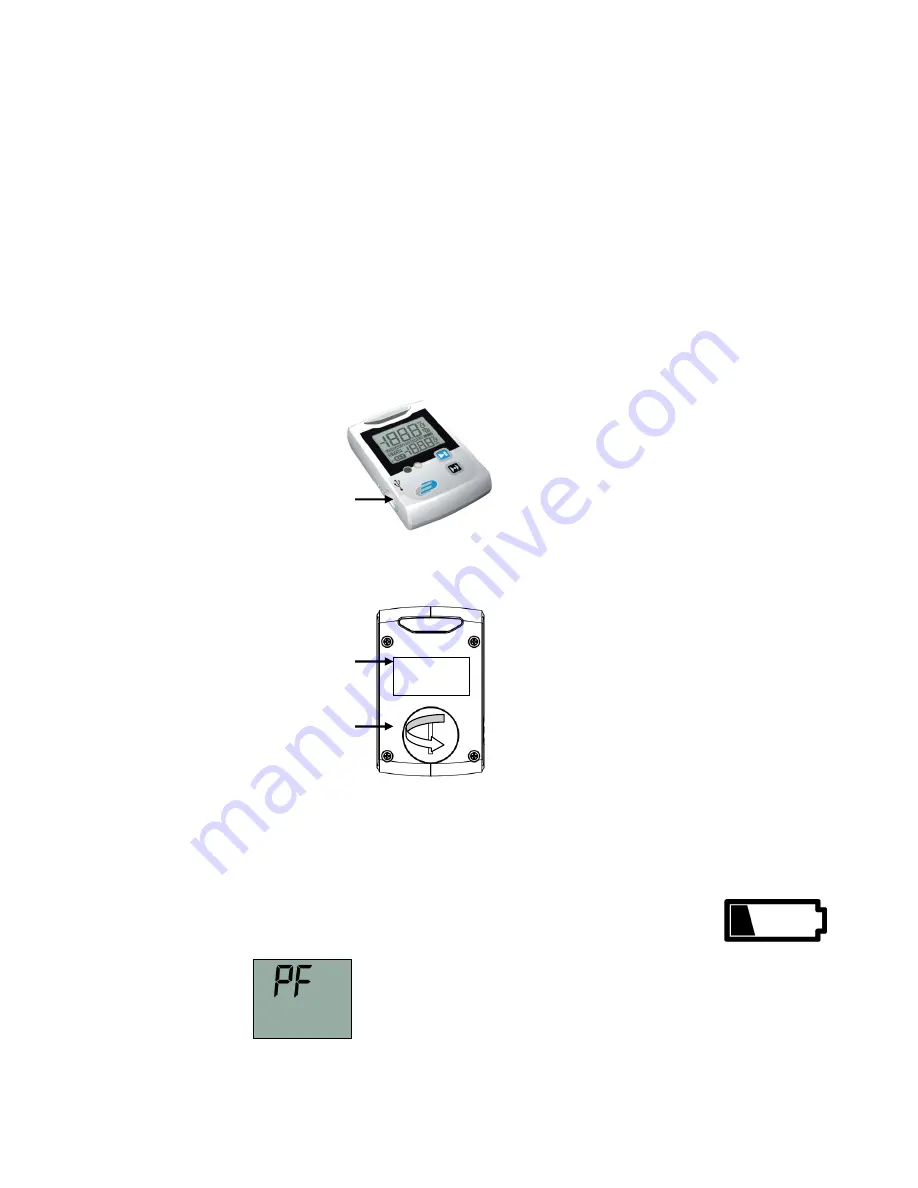
For readout or programming, the data logger must be connected via USB-cable with a PC. View from
the front: On the left side there is the USB-port. The port is protected by a small white rubber cap. To
operate the USB-port please remove the rubber cap. After the completed communication with the PC
do not forget to plug the rubber cap back into the port. It prevents dirt and water from entering the
data logger.
USB-port
(with rubber cap)
2.7 Rear side of the data logger / battery case
On the rear side of the data logger you will find the battery case and a printed sticker.
Marking
Battery cover
2.8 Replacing battery
To replace the battery please open the battery cover on the rear side. Therefore you have to turn the
battery cover 90° to the left. Remove the battery from the instrument and replace with a new battery.
The „BAT “symbol indicates that the battery needs to be exchanged. The instrument allows app. 24
hours of further operation after displaying the „BAT “symbol The battery symbol indicates according
to the battery status between 1 to 3 segments.
If the display indicates only „PF“, the battery is completely exhausted. Please replace the battery
immediately.
Note:
For protection of our environment please don’t put the battery into general household waste,
but use a local authority approved recycling method.


