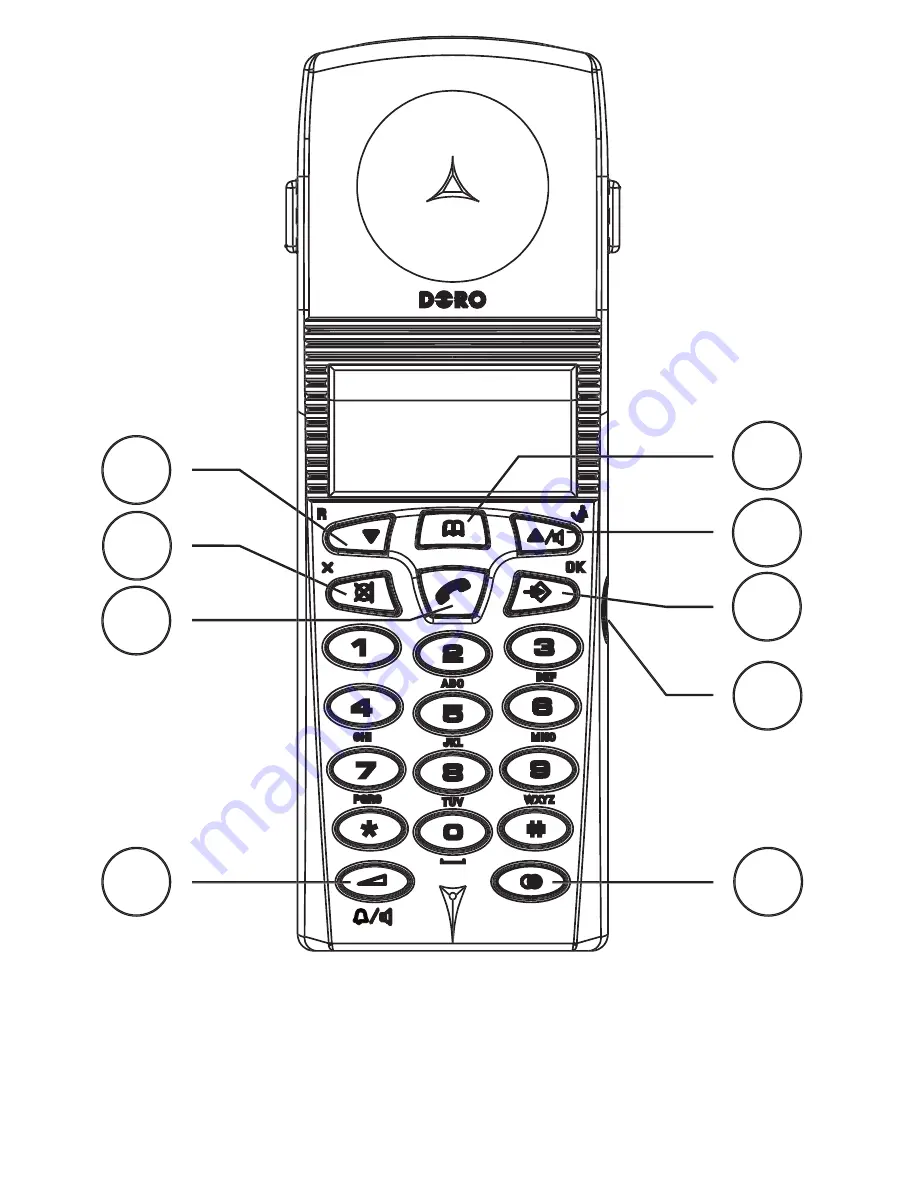
9
7
8
12
3
5
4
6
1 Scroll down/Recall (R)
button
2 Mute/Erase button3 Talk/Call end button4 Volume/Ringer button
5 Redial button6 Headset socket7 Programming button8 Scroll up/Speaker button9 Phone Book button
Страница 1: ...1 2 3 5 4 6 1 Scroll down Recall R button 2 Mute Erase button 3 Talk Call end button 4 Volume Ringer button 5 Redial button 6 Headset socket 7 Programming button 8 Scroll up Speaker button 9 Phone Book button ...
Страница 2: ...arger 1 only Wall mounting The charger can be wall mounted using two horizontally mounted screws 49mm apart The screw heads should then fit into the two keyholes on the back of the charger unit Registration This handset must be registered to the main base unit 1 Hold down the paging button j on the base unit for a few seconds until the indicator Q 7 starts flashing Registration mode will remain ac...
Страница 3: ... pressing q and then receive the external call by pressing q and then receive the external call by pressing q q again q again q Transferring calls between handsets An external call can be transferred from one handset to another they must both be using the same base unit 1 With an external call connected 2 Initiate an intercom call as described above 3 To transfer the external call press q on the c...
Страница 4: ...English Version 1 0 ...